Introduction
By default, Git talks to remotes over HTTPS, so it asks for your username and password on every git pull or git push. SSH fixes that. GitHub, GitLab, and Bitbucket all let Git authenticate over SSH with public-key encryption instead set it up once and you stop typing credentials for every Git command.
Info
An SSH key is a pair of files: a private key that never leaves your machine, and a public key you upload to each service. Authentication happens by proving you hold the private key no password sent over the wire.
Make sure a Git and SSH client is installed
A Git and SSH client must be installed on your system to connect via the SSH protocol. It should be installed by default if you use Arch Linux-based distributions like Manjaro or Garuda Linux.
git --versionssh -VThat command should return the Git version and SSH client’s version number:
git version 2.34.1OpenSSH_8.8p1, OpenSSL 1.1.1l 24 Aug 2021If the system tells you that the ssh or git commands are missing, install them with the command set for your distribution:
sudo pacman -Syusudo pacman -Syyusudo pacman -S gitsudo pacman -S opensshsudo apt updatesudo apt upgradesudo apt install gitsudo apt install opensshsudo yum upgradesudo yum install gitsudo yum install opensshsudo zypper upgradesudo zypper install gitsudo zypper install opensshsudo dnf upgradesudo dnf install gitsudo dnf install opensshDon’t forget to specify global Git settings using the following command after installing Git:
git config --global user.name 'USERNAME'Look for any SSH keys that have already been created
ls -lah ~/.sshThat command lists the contents of the ~/.ssh folder, where the SSH client stores its configuration files. A typical populated directory looks like this:
Directory~/.ssh/
- id_ed25519 Ed25519 private key never share this
- id_ed25519.pub Ed25519 public key safe to upload
- id_rsa RSA private key (legacy) never share this
- id_rsa.pub RSA public key (legacy) safe to upload
- known_hosts
- config
Note
Don’t worry if you get an error saying there is no ~/.ssh directory or no
files in there it just indicates you haven’t established an SSH key pair yet.
Proceed to the next section if this is the case.
Tip
It’s worth regenerating your SSH key pair about once a year. If your current pair is older than that, generate a new one below; if it’s recent and you want to keep it, skip the next section.
Make a fresh set of SSH keys
Generate a new SSH key pair, replacing [email protected] with your email address. Use Ed25519 it’s what GitHub, GitLab, and Bitbucket recommend today. Reach for RSA only on an older system or server that doesn’t support Ed25519.
This creates ~/.ssh/id_ed25519 (private) and ~/.ssh/id_ed25519.pub (public). Ed25519 keys are small and fast, with security on par with a 4096-bit RSA key.
This creates ~/.ssh/id_rsa (private) and ~/.ssh/id_rsa.pub (public). Use the older RSA type only if you need to talk to a legacy system or server that doesn’t support Ed25519.
After running the command, complete the prompts:
- Choose where to save the private key. Press Enter to accept the default location (
~/.ssh/id_ed25519, or~/.ssh/id_rsafor an RSA key):
Generating public/private ed25519 key pair. Enter file in which to save the key (/home/your_user_name/.ssh/id_ed25519):- If a private key already exists, you’ll be asked whether to overwrite it. Type
yand press Enter:
/home/your_user_name/.ssh/id_ed25519 already exists.Overwrite (y/n)?- Enter and re-enter a passphrase (think of it as a password for the key):
Enter passphrase (empty for no passphrase):Enter same passphrase again:Tip
A passphrase encrypts your private key on disk, so a stolen key file is
useless without it. Combined with the ssh-agent (next section), you only
type it once per session.
The SSH key pair is created in ~/.ssh, and the whole interaction should look like this:
Generating public/private ed25519 key pair.Enter file in which to save the key (/home/YOUR_USER_NAME/.ssh/id_ed25519):/home/YOUR_USER_NAME/.ssh/id_ed25519 already exists.Overwrite (y/n)? yEnter passphrase (empty for no passphrase):Enter same passphrase again:Your identification has been saved in /home/YOUR_USER_NAME/.ssh/id_ed25519.Your public key has been saved in /home/YOUR_USER_NAME/.ssh/id_ed25519.pub.The key fingerprint is:The key's randomart image is:+--[ED25519 256]--+| .o+. || .oo=o || . o*+.o || . ..oB.+ || o.S=.* . || . +o.E o || o.o+.= . || =o.++o || ..o**+. |+----[SHA256]-----+YOUR_USER_NAME@YOUR_HOST_NAME:~>Generating public/private rsa key pair.Enter file in which to save the key (/home/YOUR_USER_NAME/.ssh/id_rsa):/home/YOUR_USER_NAME/.ssh/id_rsa already exists.Overwrite (y/n)? yEnter passphrase (empty for no passphrase):Enter same passphrase again:Your identification has been saved in /home/YOUR_USER_NAME/.ssh/id_rsa.Your public key has been saved in /home/YOUR_USER_NAME/.ssh/id_rsa.pub.The key fingerprint is:The key's randomart image is:+---[RSA 4096]----+|o.=@X++. ||o*@O++ ||=Bo+=+ ||Oo+ oo.. ||=+ . .. S ||... o || . o . || . . o || E . o. |+----[SHA256]-----+YOUR_USER_NAME@YOUR_HOST_NAME:~>To the ssh-agent, add your private SSH key
If you’d rather not retype your passphrase every time you use the key, add it to the ssh-agent a background process that keeps your keys in memory while you’re logged in.
- Start the
ssh-agentin the background:
eval "$(ssh-agent -s)"The command returns the ssh-agent process identification:
Agent pid 2887- Add your SSH private key to the
ssh-agentpick the tab for your key type:
ssh-add ~/.ssh/id_ed25519ssh-add ~/.ssh/id_rsa- Type your passphrase and press Enter:
Enter passphrase for /home/YOUR_USER_NAME/.ssh/id_ed25519:The ssh-agent confirms the private SSH key has been added:
To your account, add the public SSH key
You can connect through SSH once you have an SSH key and have added it to the ssh-agent. The procedure is the same for all three services: copy your public key to the clipboard, then paste it into the service’s SSH-keys settings.
xclip is a command-line tool that gives you access to the clipboard from the terminal. If it isn’t already installed, install it for your distribution:
sudo pacman -Syusudo pacman -Syyusudo pacman -S xclipsudo apt updatesudo apt upgradesudo apt install xclipsudo yum upgradesudo yum install xclipsudo zypper upgradesudo zypper install xclipsudo dnf upgradesudo dnf install xclipUsing the xclip command, copy the contents of your public SSH key to the clipboard pick the tab that matches the key type you created:
xclip -sel clip < ~/.ssh/id_ed25519.pubxclip -sel clip < ~/.ssh/id_rsa.pubWarning
Only ever copy and paste the public key (the .pub file). The private key
(id_ed25519 or id_rsa, with no extension) must never be uploaded or shared
with anyone.
Now add that public key to your account. Pick your service below:
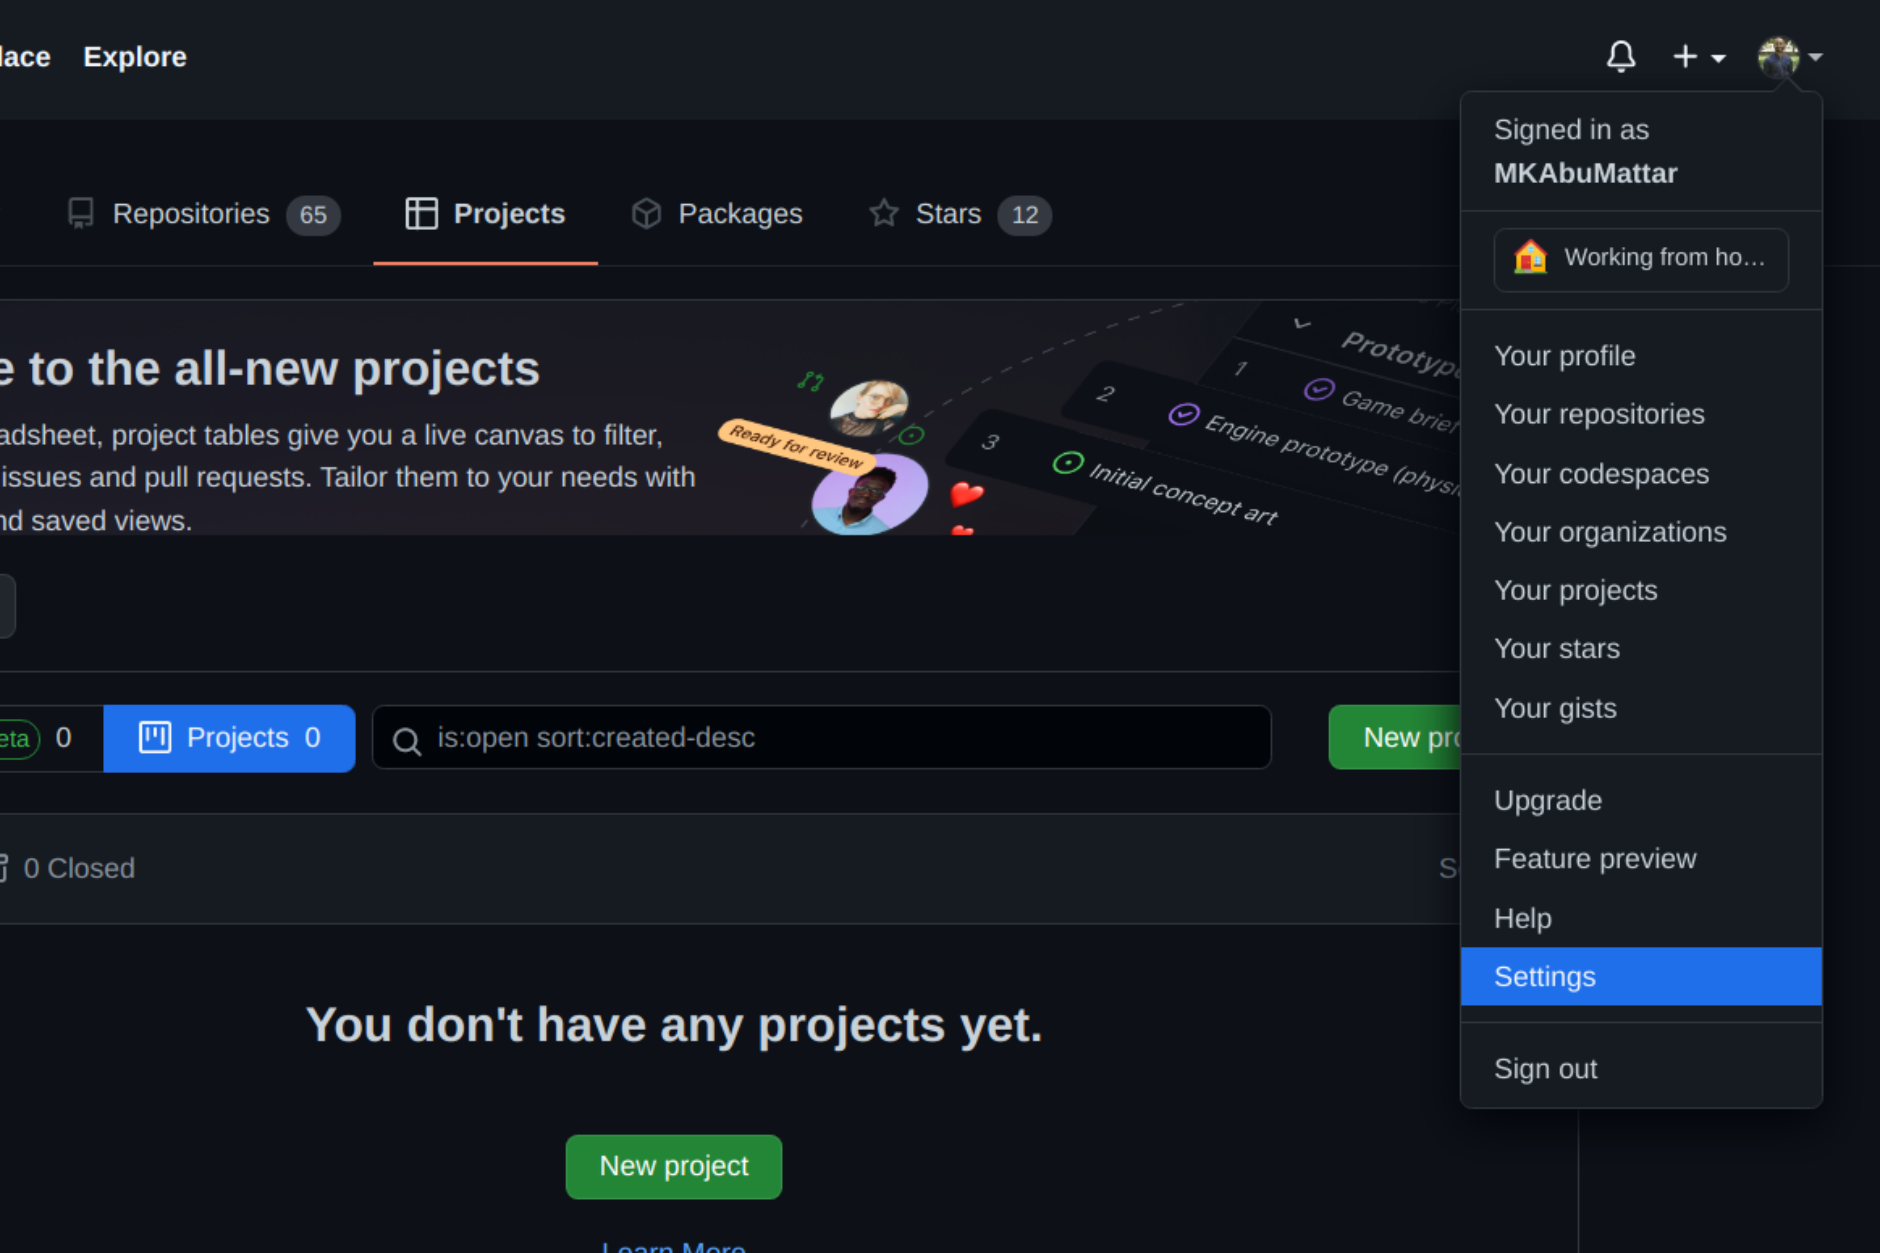
Sign in to your GitHub account by going to github.com and entering your username and password. Click your profile photo in the upper-right corner of the page, then Settings:
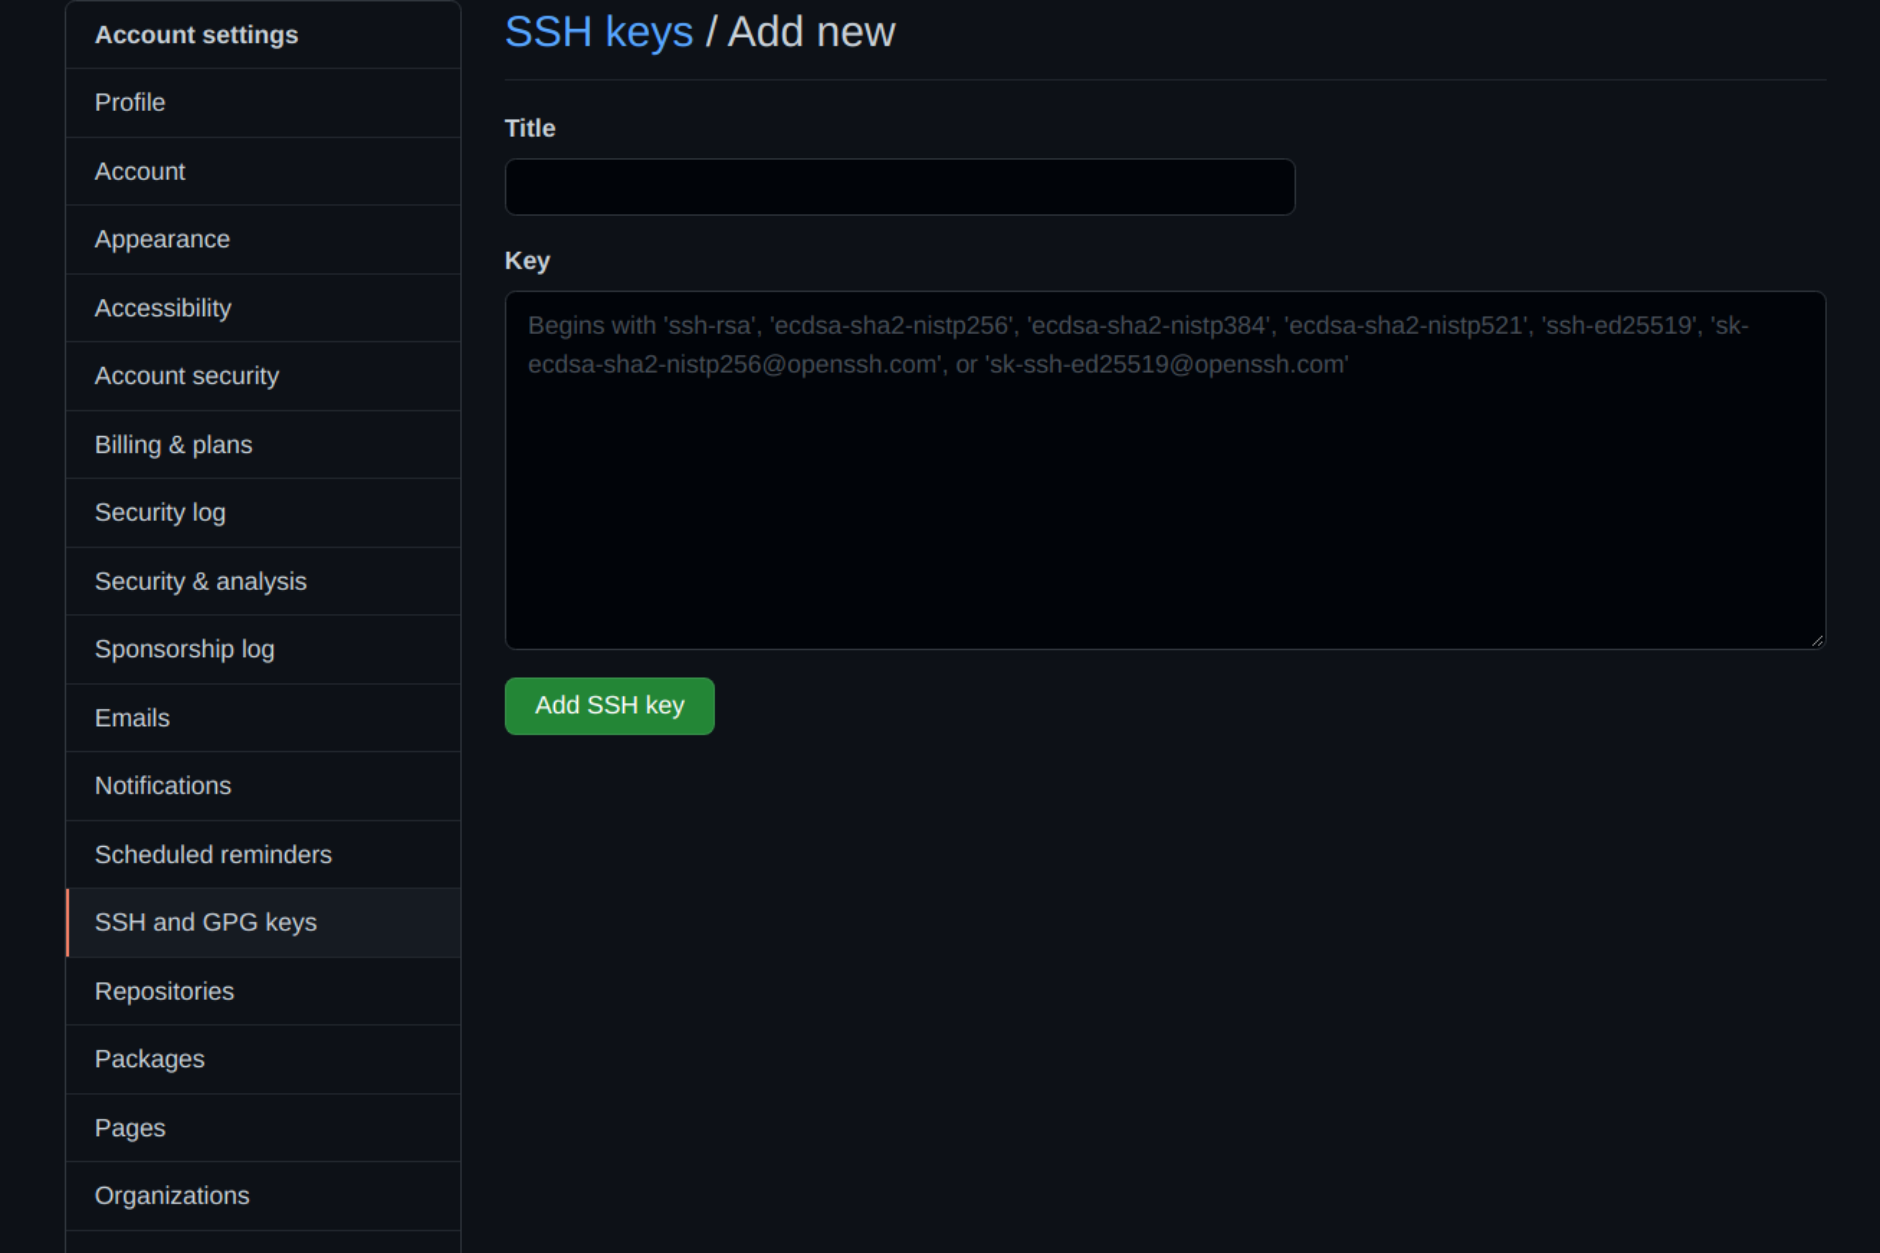
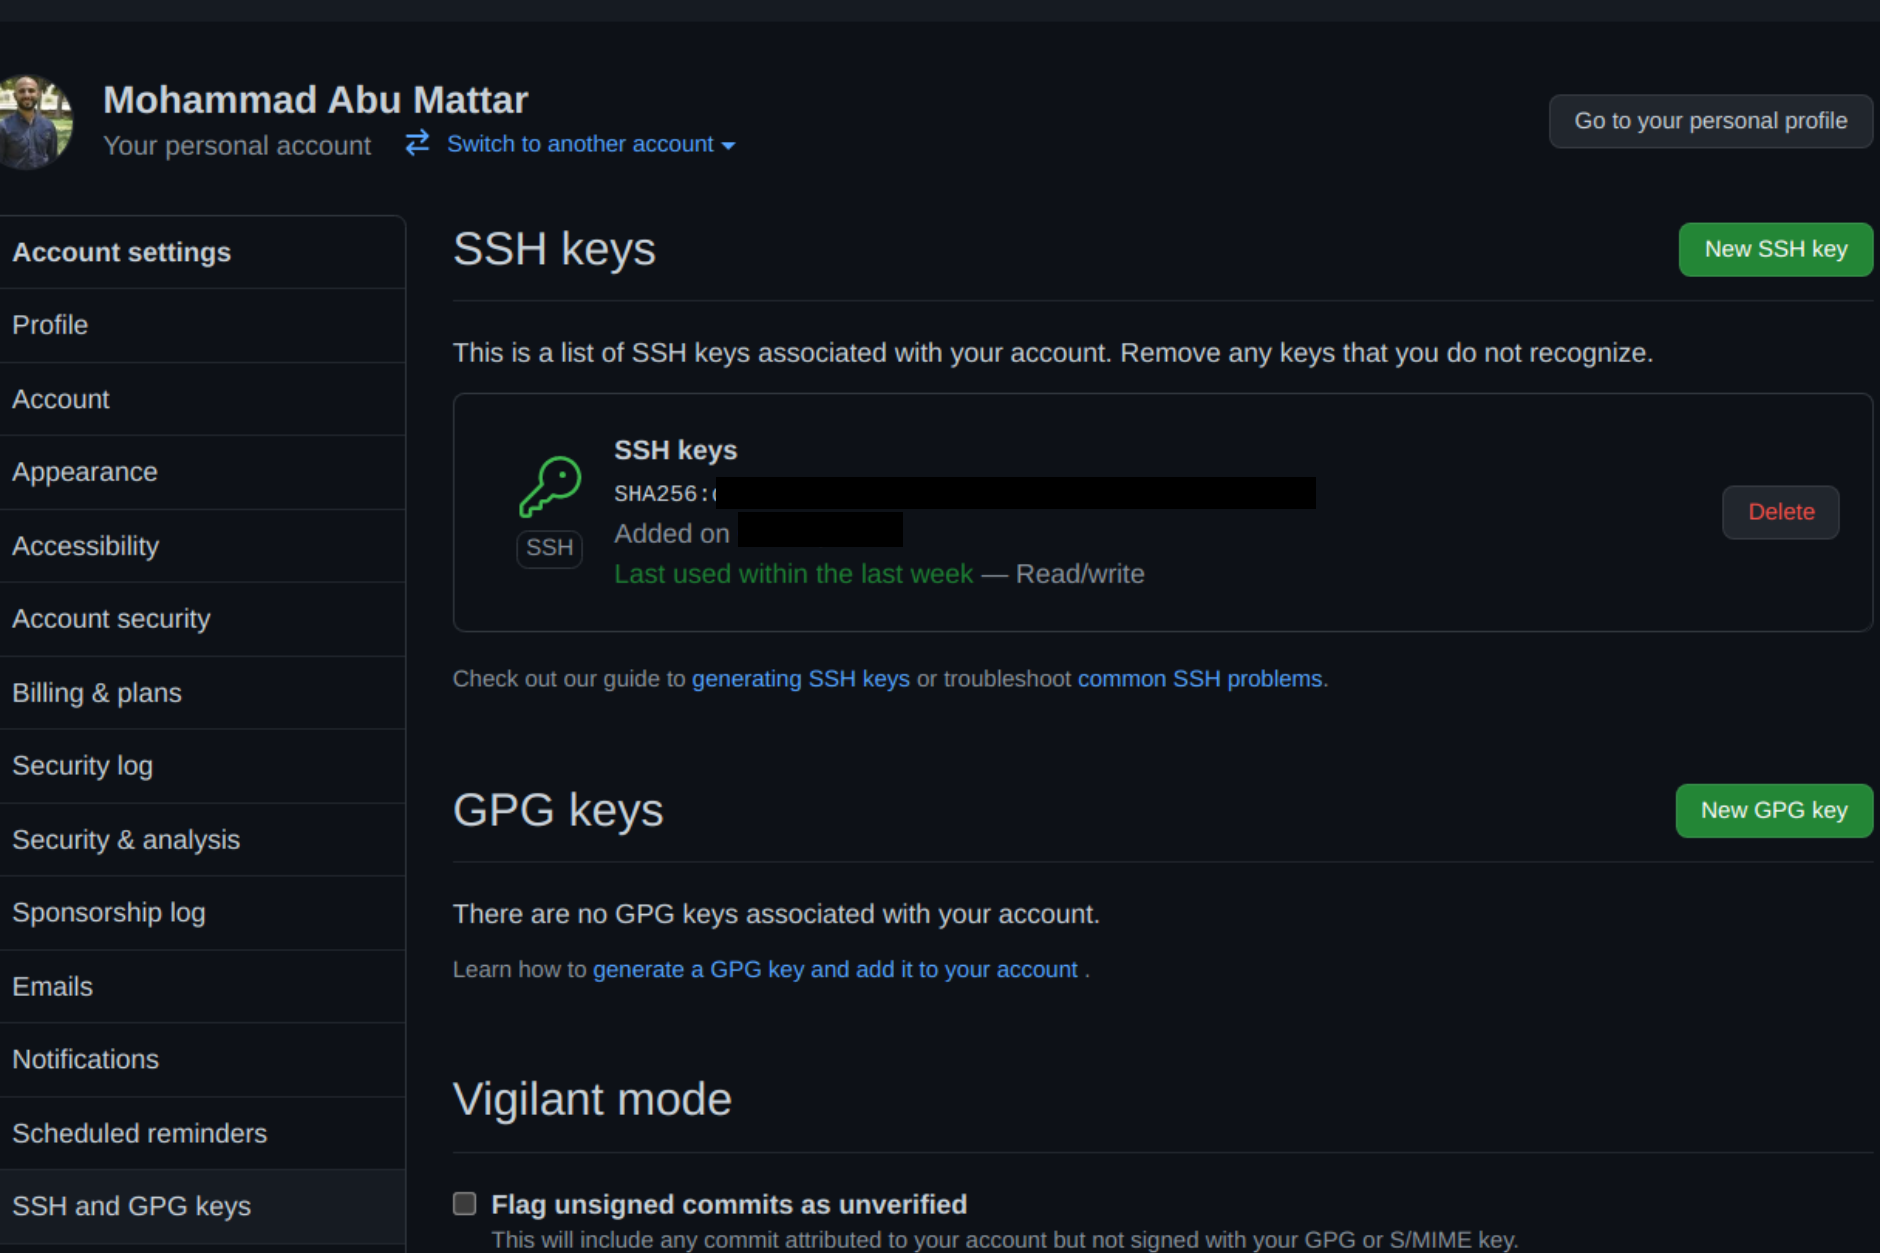
Select SSH and GPG keys from the user settings sidebar, then select New SSH key. Put a descriptive label for the new key in the Title area (for example, your computer’s name) and paste your public key into the Key field. Finally, click Add SSH key:
The key is now visible in the list of SSH keys linked to your account:
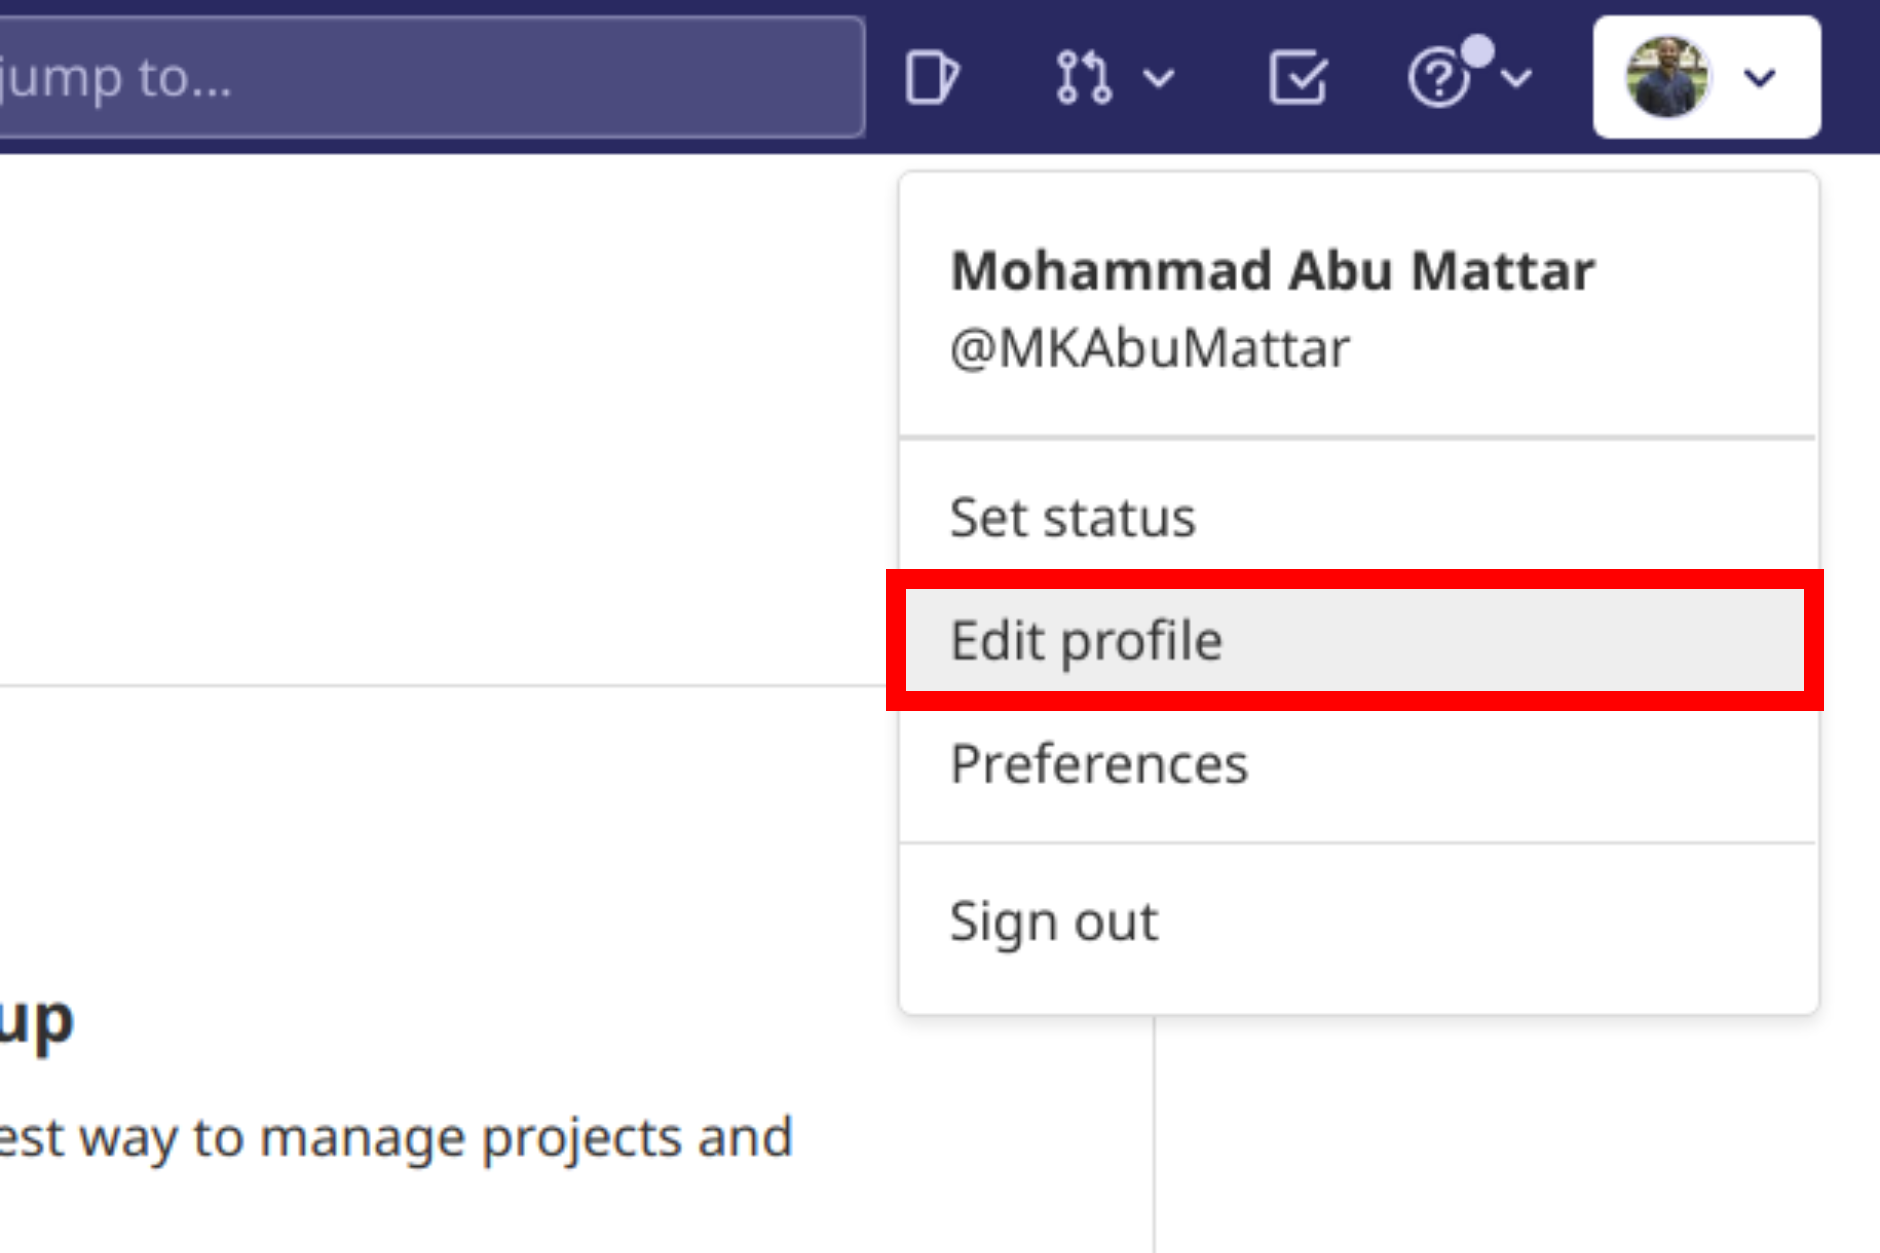
Sign in to your GitLab account by going to gitlab.com and entering your username and password. Click your profile photo in the upper-right corner of the page, then Settings:
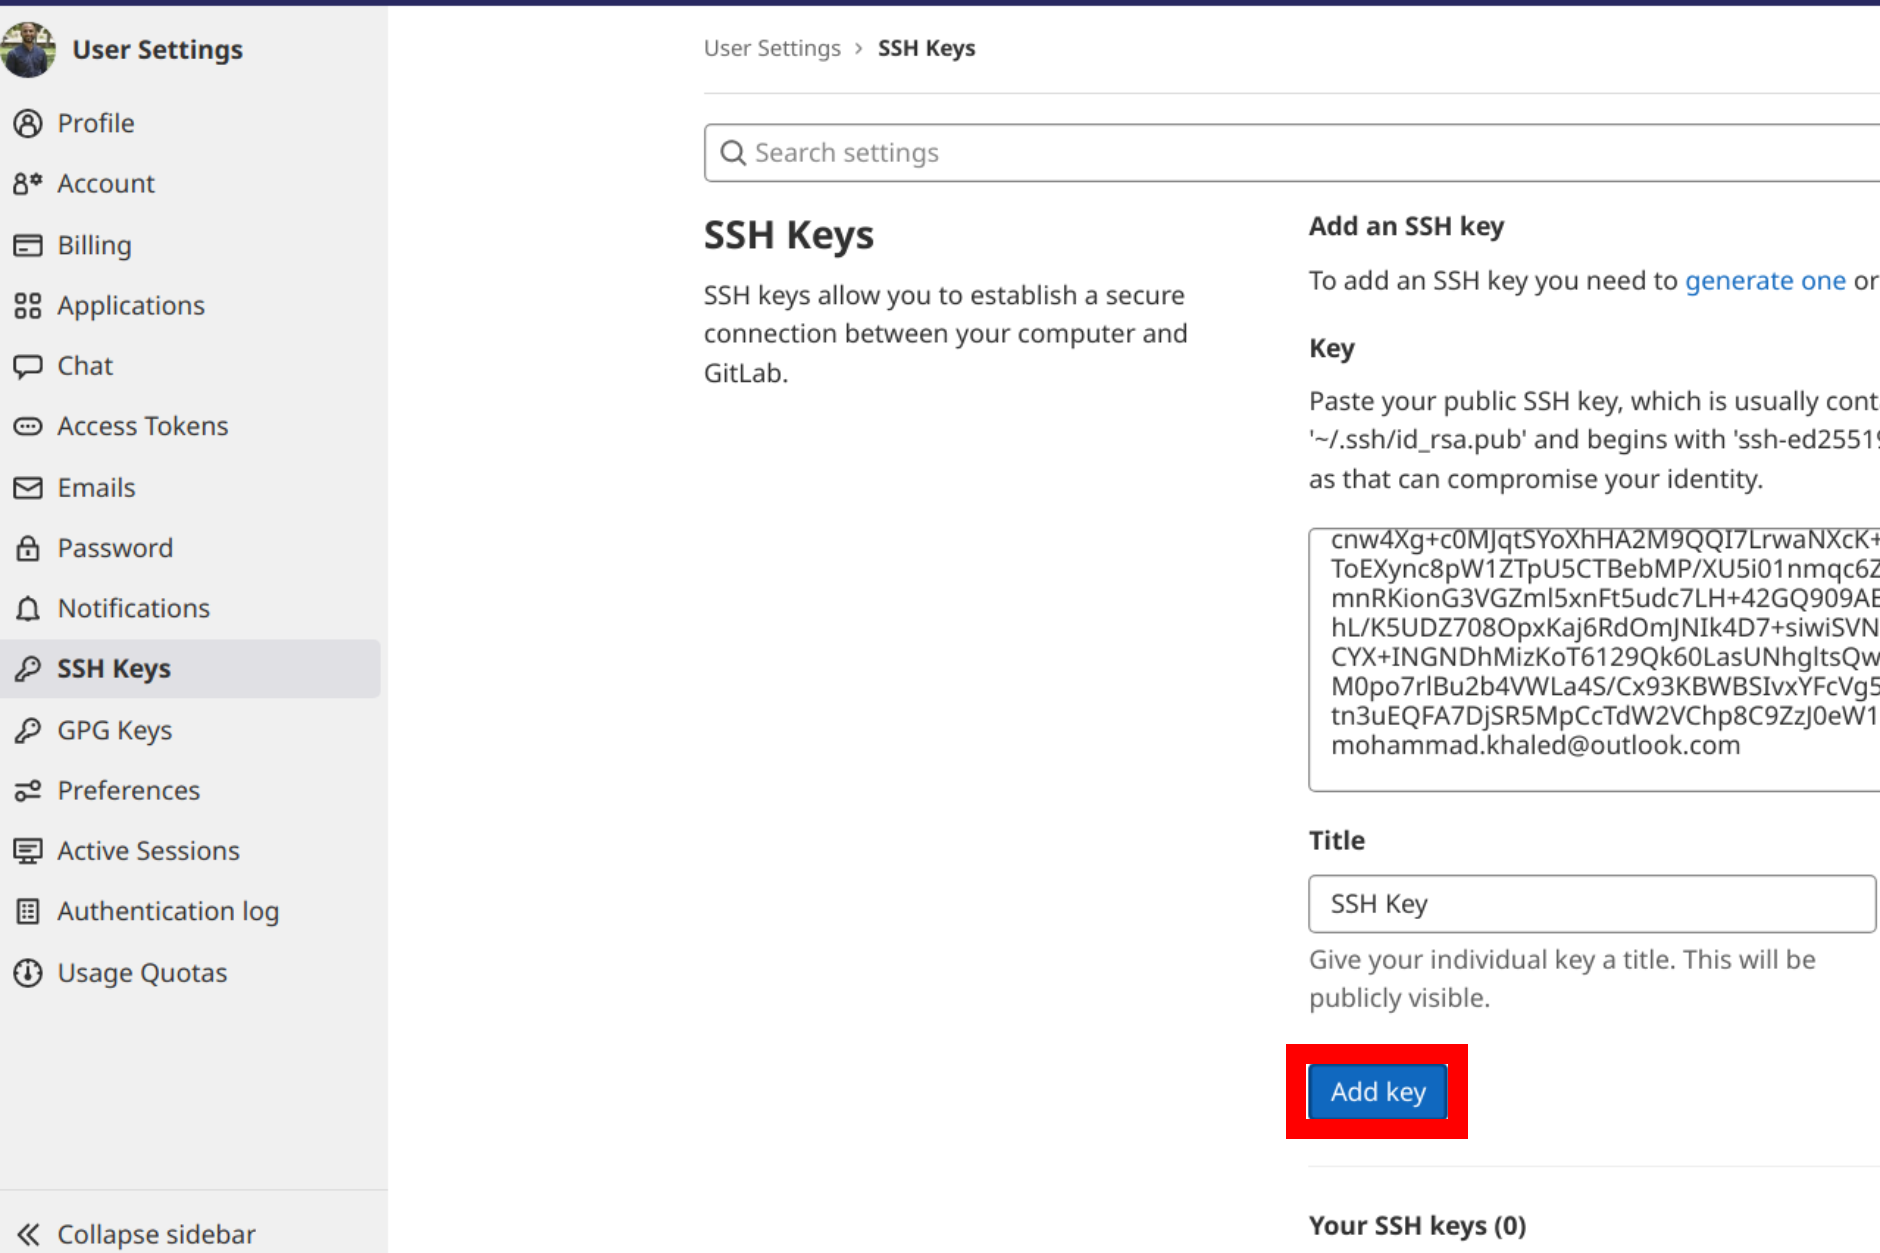
Click SSH Keys in the User Settings sidebar. In the Key area, paste your public key. Fill in the Title field with a descriptive term (for example, the name of your computer). Finally, click Add key:
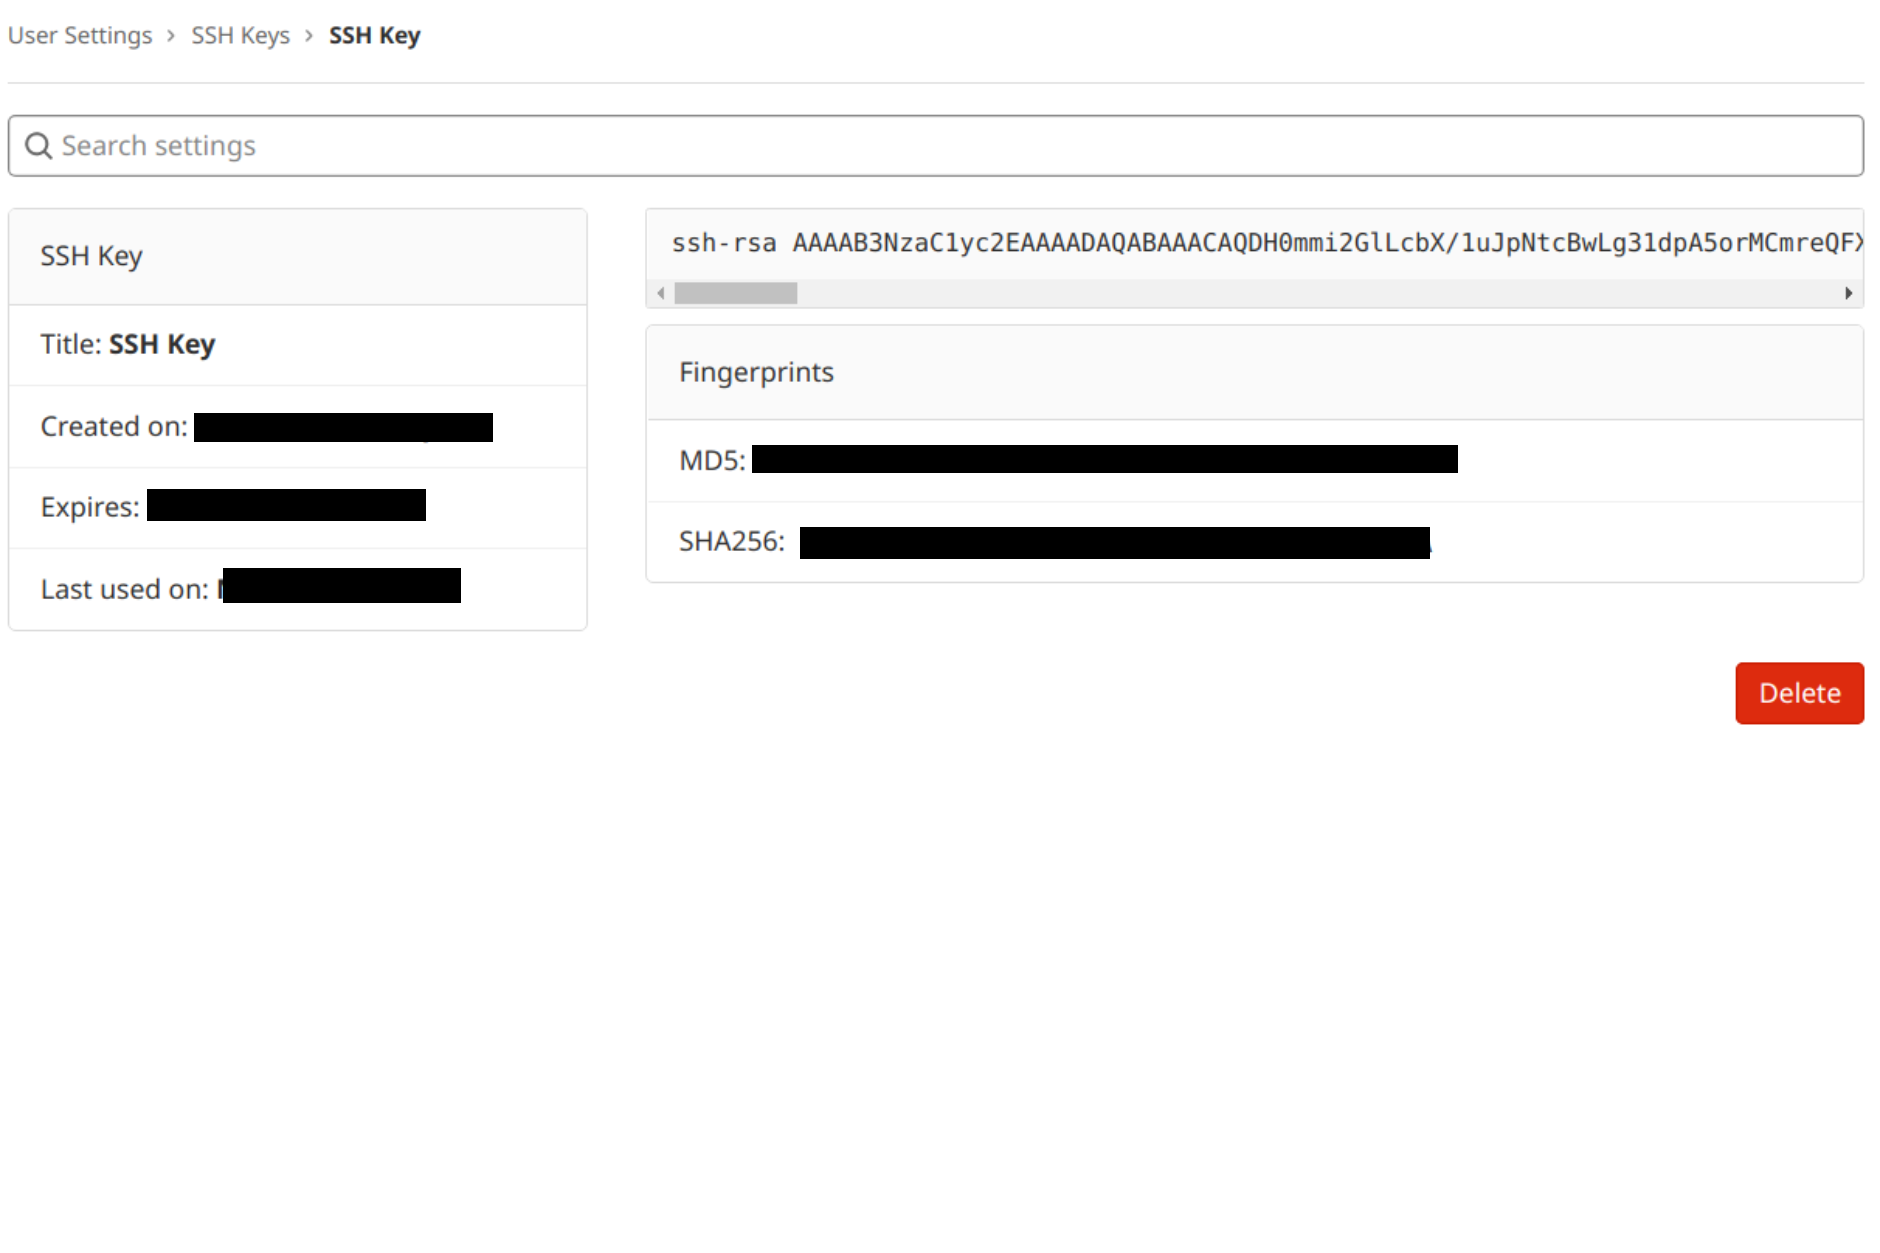
The key is now visible in the list of SSH keys linked to your account:
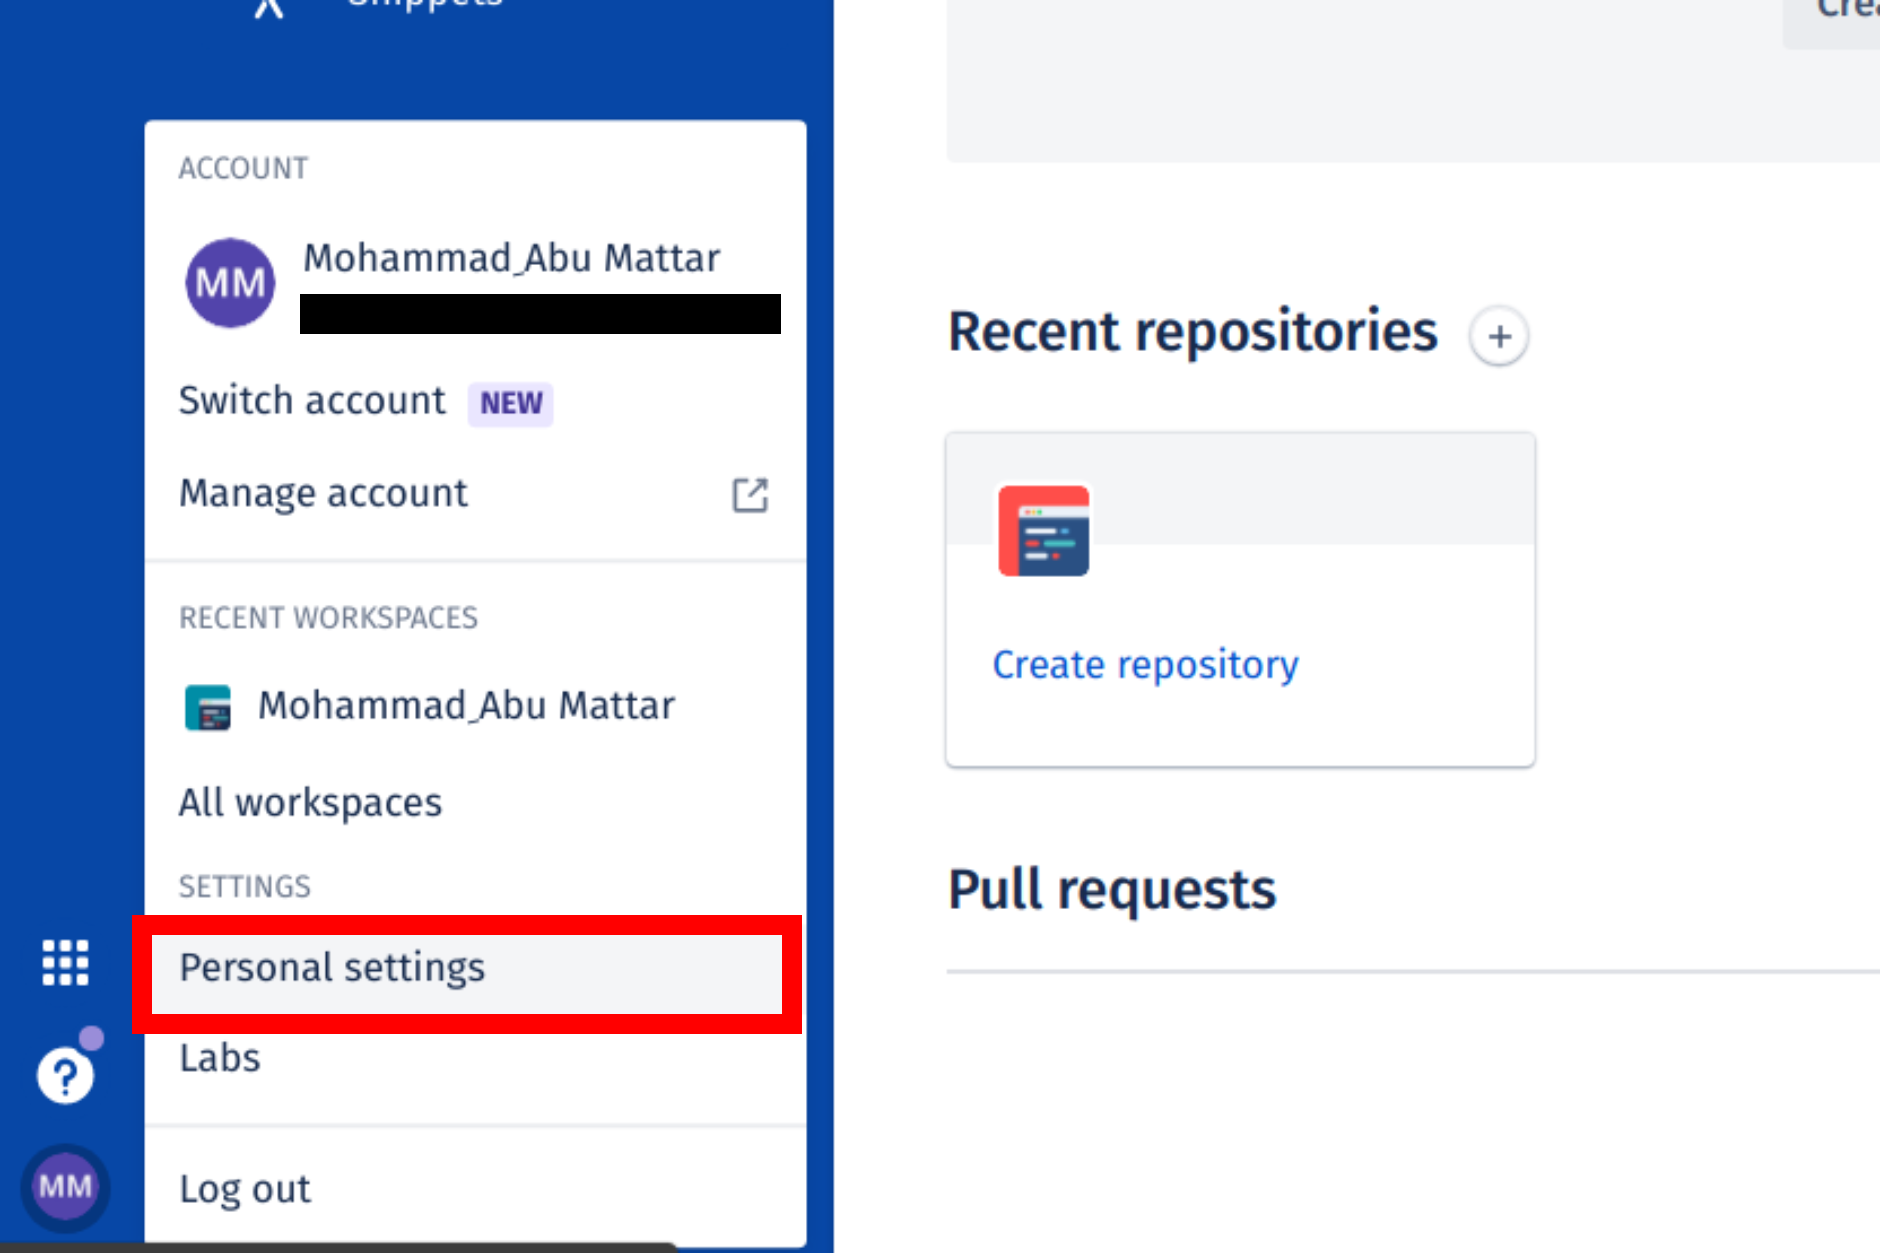
Log in to your Bitbucket account by going to bitbucket.org and entering your username and password. Click your profile photo in the lower-left corner of the website, then Bitbucket settings:
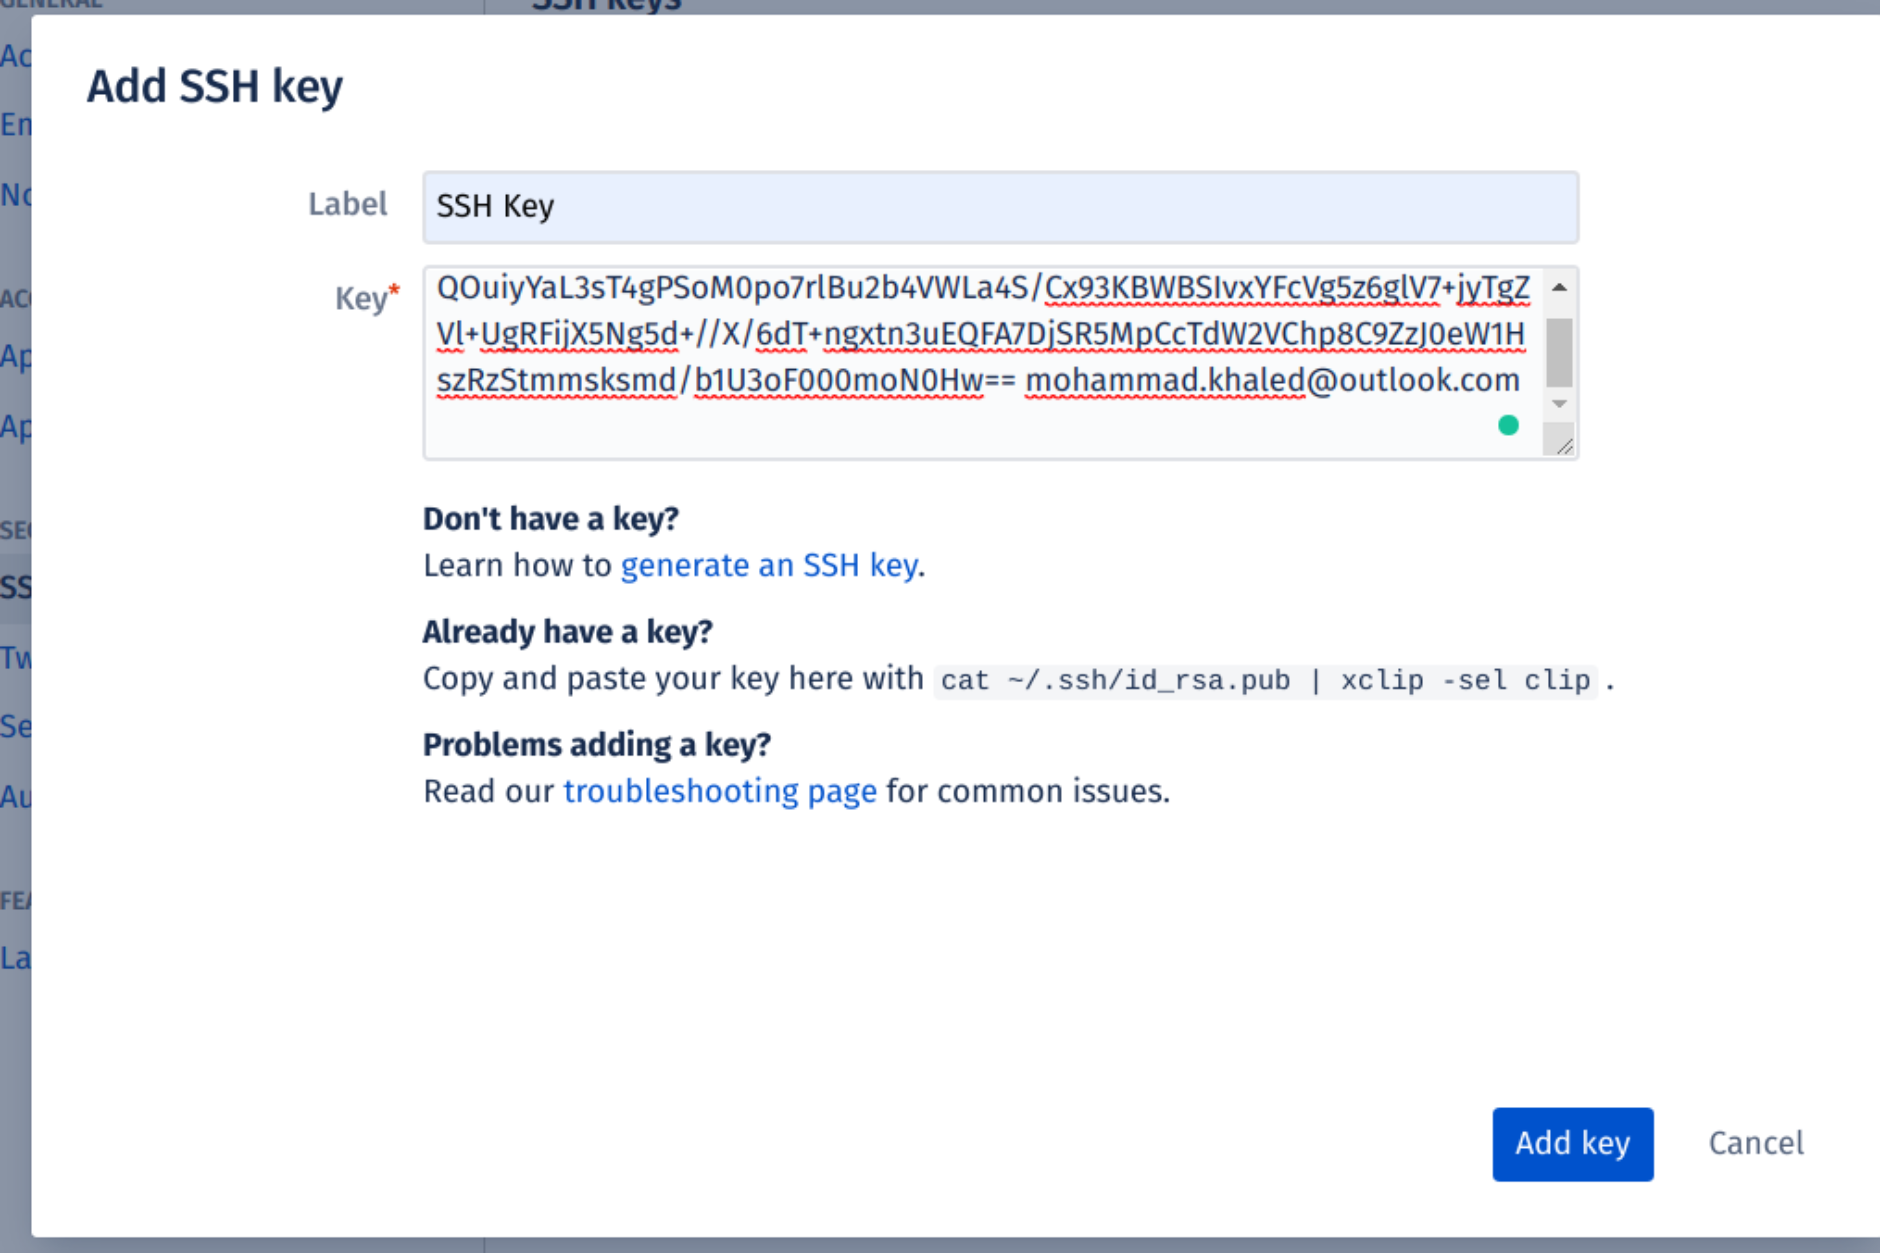
SSH keys may be found in the Settings sidebar’s Security section. After that, select Add key. Fill the Description box with a descriptive label for the new key (such as your computer’s name), then paste your public key into the Key field. Finally, choose Add key:
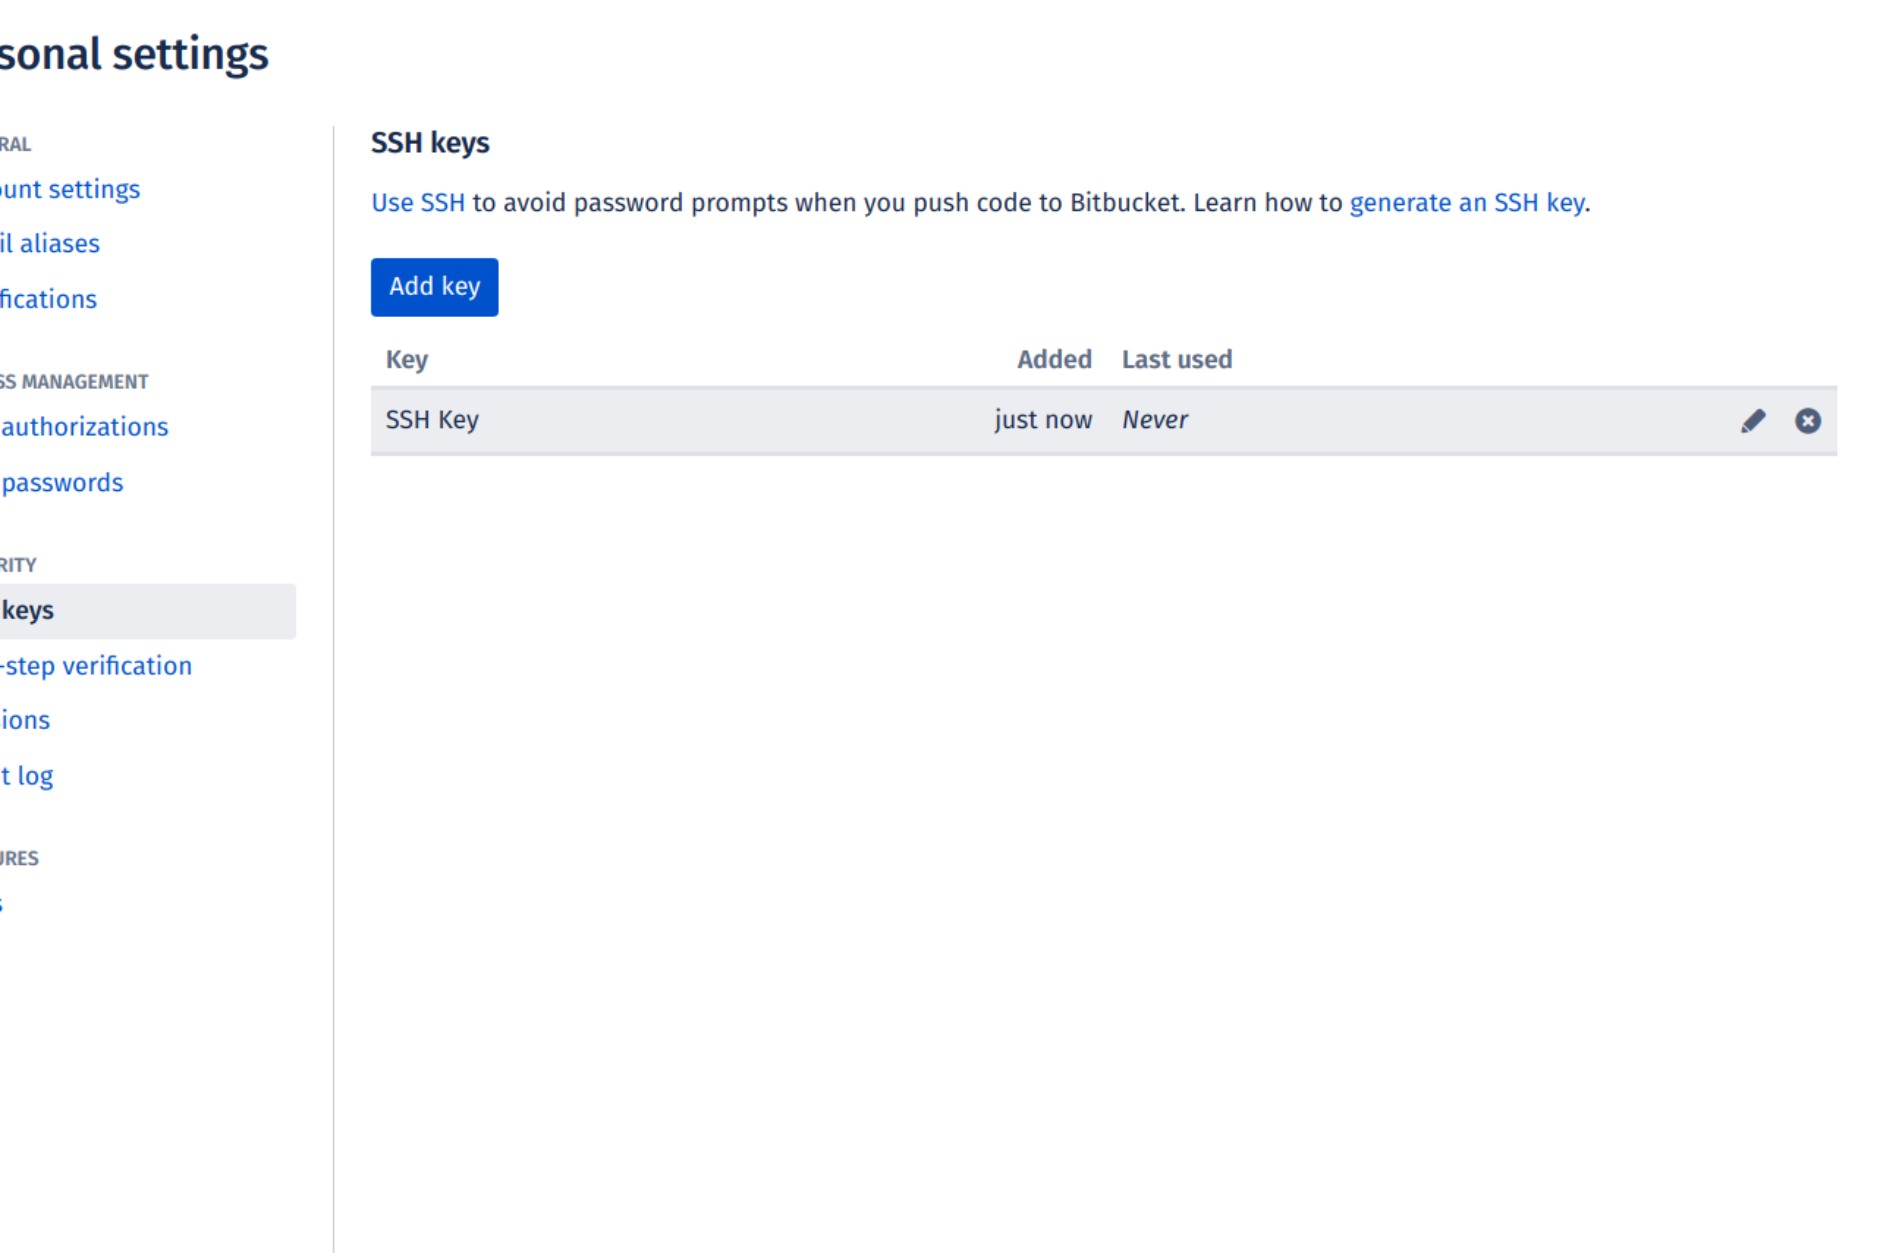
The key has now been added to your account’s list of SSH keys:
Test connecting via SSH
Before you start using SSH with Git, all three services let you check that the connection works.
Once you’ve added your SSH key to your GitHub account, open the terminal and type:
If you’re connecting to GitHub over SSH for the first time, the SSH client will ask if you trust the GitHub server’s public key:
The authenticity of host 'github.com (140.82.113.4)' can't be established.RSA key fingerprint is SHA256:a5d6c20b1790b4c144b9d26c9b201bbee3797aa010f2701c09c1b3a6262d2c02.Are you sure you want to continue connecting (yes/no)?Type yes and press Enter. GitHub is added to the list of trustworthy hosts in the SSH client, and you won’t be asked about its public key again:
Warning: Permanently added 'github.com,140.82.113.4' (RSA) to the list of known hosts.GitHub only allows this SSH connection for testing, not shell access, so it confirms you’re authenticated and then closes the connection:
Hi YOUR_USER_NAME! You've successfully authenticated, but GitHub does not provide shell access.The entire interaction should look something like this:
The authenticity of host 'github.com (140.82.113.4)' can't be established.RSA key fingerprint is SHA256:a5d6c20b1790b4c144b9d26c9b201bbee3797aa010f2701c09c1b3a6262d2c02.Are you sure you want to continue connecting (yes/no)? yesWarning: Permanently added 'github.com,140.82.113.4' (RSA) to the list of known hosts.Hi your_user_name! You've successfully authenticated, but GitHub does not provide shell access.YOUR_USER_NAME@YOUR_HOST_NAME:~>Test passed you’re ready to use SSH with GitHub.
Once you’ve added your SSH key to your GitLab account, the test is pretty similar:
The authenticity of host 'gitlab.com (35.231.145.151)' can't be established.ECDSA key fingerprint is SHA256:4ac7a7fd4296d5e6267c9188346375ff78f6097a802e83c0feaf25277c9e70cc.Are you sure you want to continue connecting (yes/no)? yesWarning: Permanently added 'gitlab.com,35.231.145.151' (ECDSA) to the list of known hosts.Welcome to GitLab, @YOUR_USER_NAME!Test passed you’re ready to use SSH with GitLab.
Once you’ve added your SSH key to your Bitbucket account, the test is pretty similar:
The authenticity of host 'bitbucket.org (104.192.143.1)' can't be established.RSA key fingerprint is SHA256:fb7d37d5497c43f73325e0a98638cac8dda3b01a8c31f4ee11e2e953c19e0252.Are you sure you want to continue connecting (yes/no)? yesWarning: Permanently added 'bitbucket.org,104.192.143.1' (RSA) to the list of known hosts.logged in as YOUR_USER_NAME.
You can use git or hg to connect to Bitbucket. Shell access is disabled.Test passed you’re ready to use SSH with Bitbucket.
Frequently Asked Questions
Yes. A passphrase encrypts the private key on disk, so if the file is ever stolen it’s useless without the passphrase. Pair it with the ssh-agent so you only type it once per login session rather than on every Git command.
Use ed25519. The keys are smaller and faster than RSA with comparable security, and it’s what GitHub, GitLab, and Bitbucket recommend. Generate one with ssh-keygen -t ed25519 -C '[email protected]'. Reach for rsa -b 4096 only when you need to connect to an older server that doesn’t speak Ed25519.
Yes. The same public key can be added to as many accounts and services as you like there’s no need for a separate key per provider. Just paste ~/.ssh/id_ed25519.pub (or id_rsa.pub) into each service’s SSH-keys settings.
Usually one of: the key wasn’t added to the ssh-agent (ssh-add ~/.ssh/id_ed25519), the public key wasn’t added to the service, or the wrong key path is being used. Run ssh -vT [email protected] to see which key the client offers, and confirm ~/.ssh permissions are 700 and the private key is 600.
The ssh-agent isn’t running or isn’t persisting between sessions. Start it with eval "$(ssh-agent -s)" and add the key with ssh-add. To make it stick automatically, add AddKeysToAgent yes (and optionally UseKeychain yes on macOS) under your host in ~/.ssh/config.
References
- GitHub Docs: Generating a new SSH key and adding it to the ssh-agent
- GitHub Docs: Adding a new SSH key to your GitHub account
- GitHub Docs: Working with SSH key passphrases
- GitLab Docs: Use SSH keys to communicate with GitLab
- Bitbucket Docs: Set up an SSH key
- OpenSSH Official Website
ssh-keygenman pagessh-agentman pagessh-addman page- ArchWiki: SSH keys
- DigitalOcean: How To Set Up SSH Keys
- Git SCM Book: Git on the Server - Generating Your SSH Public Key
- xclip man page (or alternative like xsel)
- SSH (Secure Shell) Protocol Overview