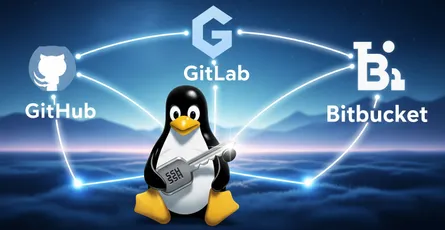
Introduction
By default, Git talks to remotes over HTTPS, so it asks for your username and password on every git pull or git push. SSH fixes that. GitHub, GitLab, and Bitbucket all let Git authenticate over SSH with public-key encryption instead. Set it up once and you stop typing credentials for every Git command.
Info
An SSH key is a pair of files: a private key that never leaves your machine, and a public key you upload to each service. Authentication works by proving you hold the private key. No password travels over the network.
Make sure Git is installed
Before you start, check whether Git is already on your machine. Run this in Windows Terminal (or PowerShell):
git --versionIf you get a version number back, you’re set skip to Generate SSH keys. If the command isn’t found, install Git using whichever method you prefer.
- Download the latest Git for Windows from the official site.
- Run the installer. The defaults are sensible clicking Next through each screen is fine for most setups, including the editor, line-ending, and terminal choices.
- Click Install, then Finish.
- Open a new terminal and confirm it worked:
git --versionchoco install git -yThen confirm the install:
git --versionwinget install --id Git.Git -eThen confirm the install:
git --versionNote
After installing Git, set your global name and email every commit you make is stamped with them:
git config --global user.name 'USERNAME'Generate SSH keys
Open Windows Terminal and generate a new key pair, replacing [email protected] with your email address. Use Ed25519 it’s what GitHub, GitLab, and Bitbucket recommend today. Reach for RSA only on an older system or server that doesn’t support Ed25519.
This creates .ssh\id_ed25519 (private) and .ssh\id_ed25519.pub (public) in your user folder. Ed25519 keys are small and fast, with security on par with a 4096-bit RSA key.
This creates .ssh\id_rsa (private) and .ssh\id_rsa.pub (public). Use the older RSA type only if you need to talk to a legacy system or server that doesn’t support Ed25519.
After running the command, complete the prompts:
- Choose where to save the private key. Press Enter to accept the default location (
C:\Users\you\.ssh\id_ed25519, orid_rsafor an RSA key):
Enter file in which to save the key (/c/Users/you/.ssh/id_ed25519): [Press Enter]- If a key already exists, you’ll be asked whether to overwrite it. Type
yand press Enter:
Overwrite (y/n)?- Enter and re-enter a passphrase (think of it as a password for the key):
Enter passphrase (empty for no passphrase): [Type a passphrase]Enter same passphrase again: [Type passphrase again]Tip
A passphrase encrypts your private key on disk, so a stolen key file is useless without it. On Windows you can have the OpenSSH Authentication Agent remember it for you (see the FAQ below) so you only type it once.
The whole interaction should look like this:
Generating public/private ed25519 key pair.Enter file in which to save the key (/c/Users/you/.ssh/id_ed25519):Created directory '/c/Users/you/.ssh'.Enter passphrase (empty for no passphrase):Enter same passphrase again:Your identification has been saved in /c/Users/you/.ssh/id_ed25519.Your public key has been saved in /c/Users/you/.ssh/id_ed25519.pub.The key fingerprint is:SHA256:xxxxxxxxxxxxxxxxxxxxxxxxxxxxxxxxxxxxxxxxxxx YOUR_EMAIL@EXAMPLE.COMGenerating public/private rsa key pair.Enter file in which to save the key (/c/Users/you/.ssh/id_rsa):Created directory '/c/Users/you/.ssh'.Enter passphrase (empty for no passphrase):Enter same passphrase again:Your identification has been saved in /c/Users/you/.ssh/id_rsa.Your public key has been saved in /c/Users/you/.ssh/id_rsa.pub.The key fingerprint is:SHA256:xxxxxxxxxxxxxxxxxxxxxxxxxxxxxxxxxxxxxxxxxxx YOUR_EMAIL@EXAMPLE.COMConfirm the key landed in your .ssh folder:
Get-ChildItem .\.ssh\A typical .ssh folder looks like this:
Directory.ssh/
- id_ed25519 Ed25519 private key never share this
- id_ed25519.pub Ed25519 public key safe to upload
- id_rsa RSA private key (legacy) never share this
- id_rsa.pub RSA public key (legacy) safe to upload
- known_hosts
- config
Add the public SSH key to your account
Copy your public key to the clipboard with PowerShell pick the tab that matches the key type you created:
Get-Content .\.ssh\id_ed25519.pub | Set-ClipboardGet-Content .\.ssh\id_rsa.pub | Set-ClipboardWarning
Only ever copy and paste the public key (the .pub file). The private key
(id_ed25519 or id_rsa, with no extension) must never be uploaded or shared
with anyone.
Now add that public key to your account. Pick your service below:
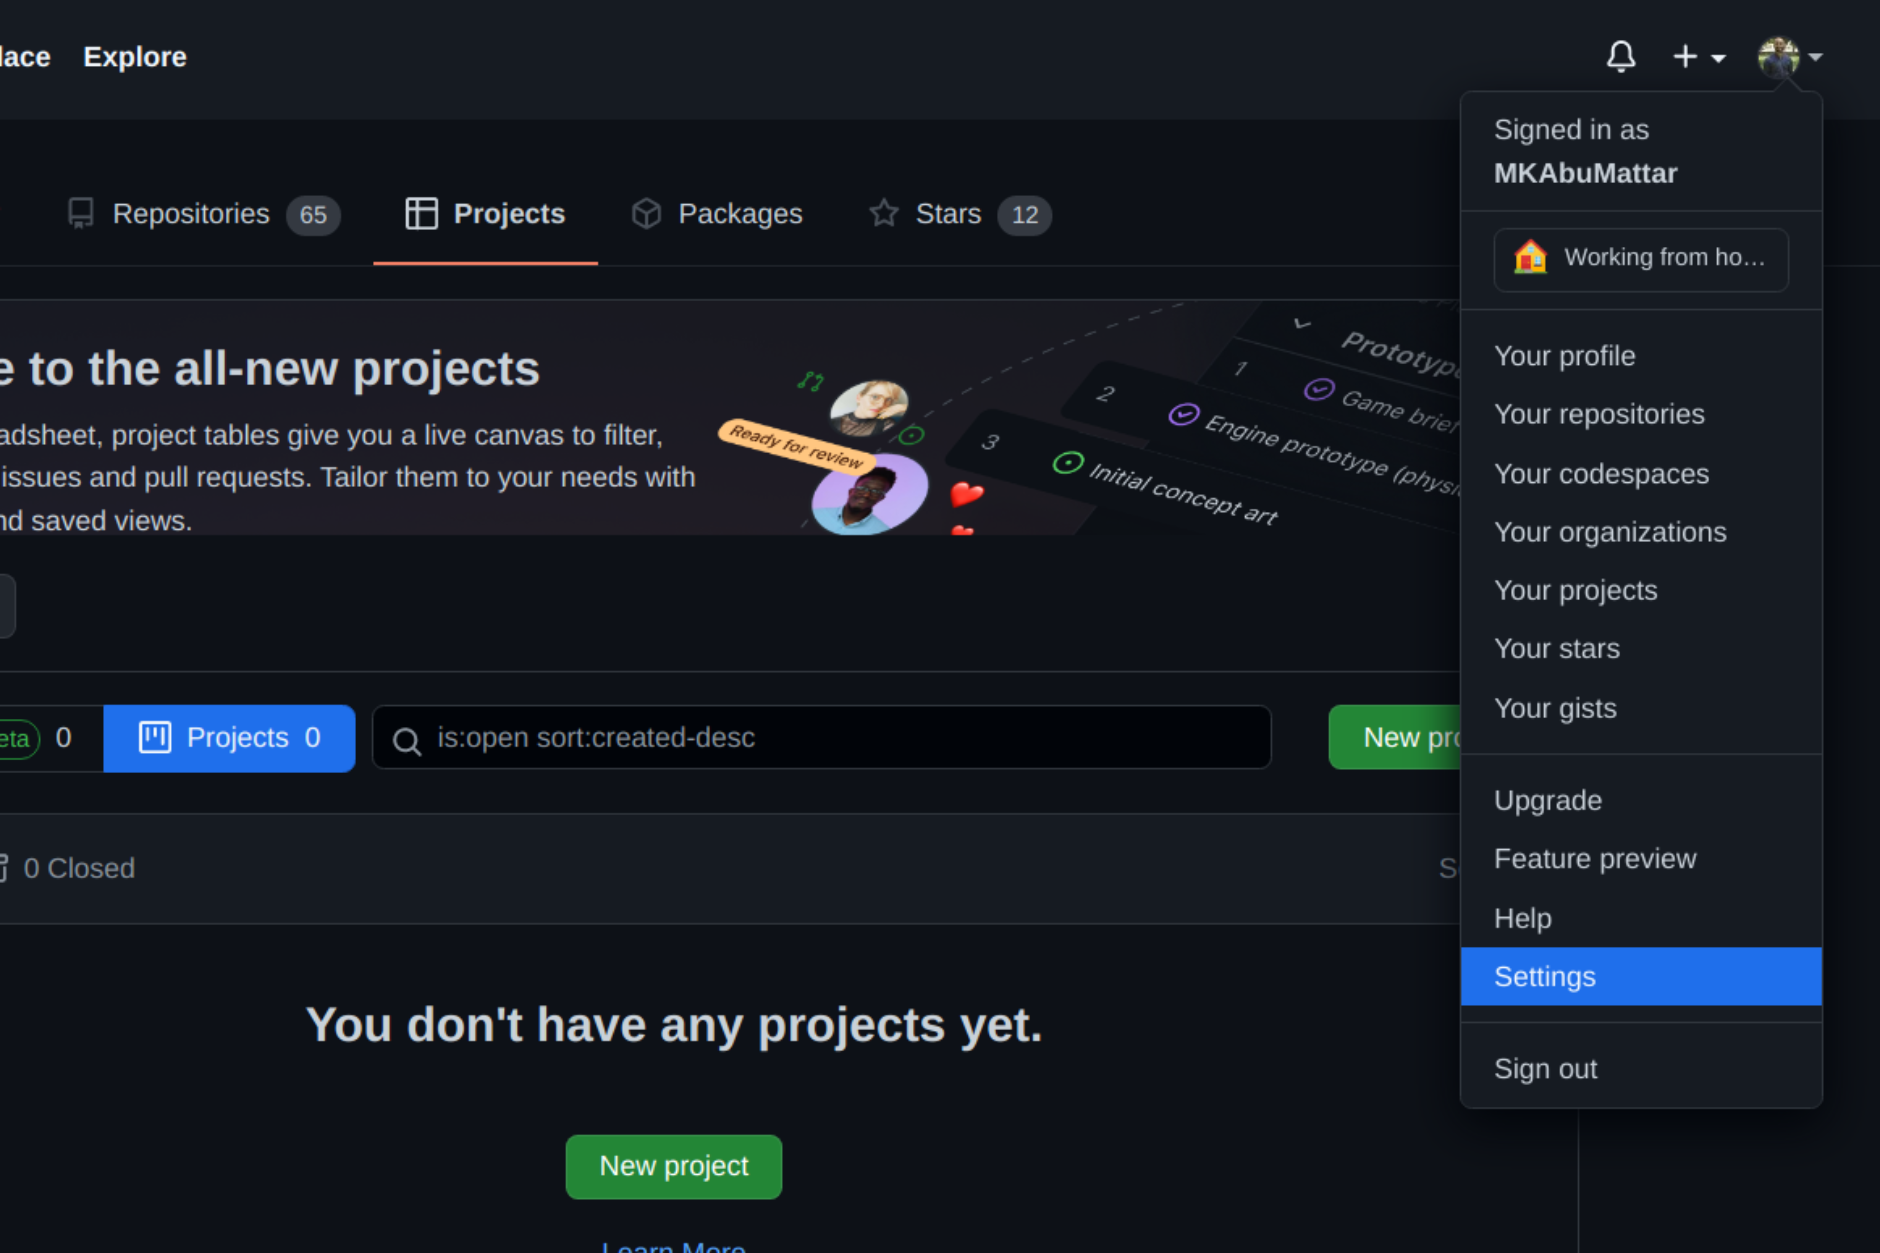
Sign in to your GitHub account at github.com. Click your profile photo in the upper-right corner, then Settings:
Select SSH and GPG keys from the sidebar, then New SSH key. Give it a descriptive title (for example, your computer’s name) and paste your public key into the Key field. Click Add SSH key:
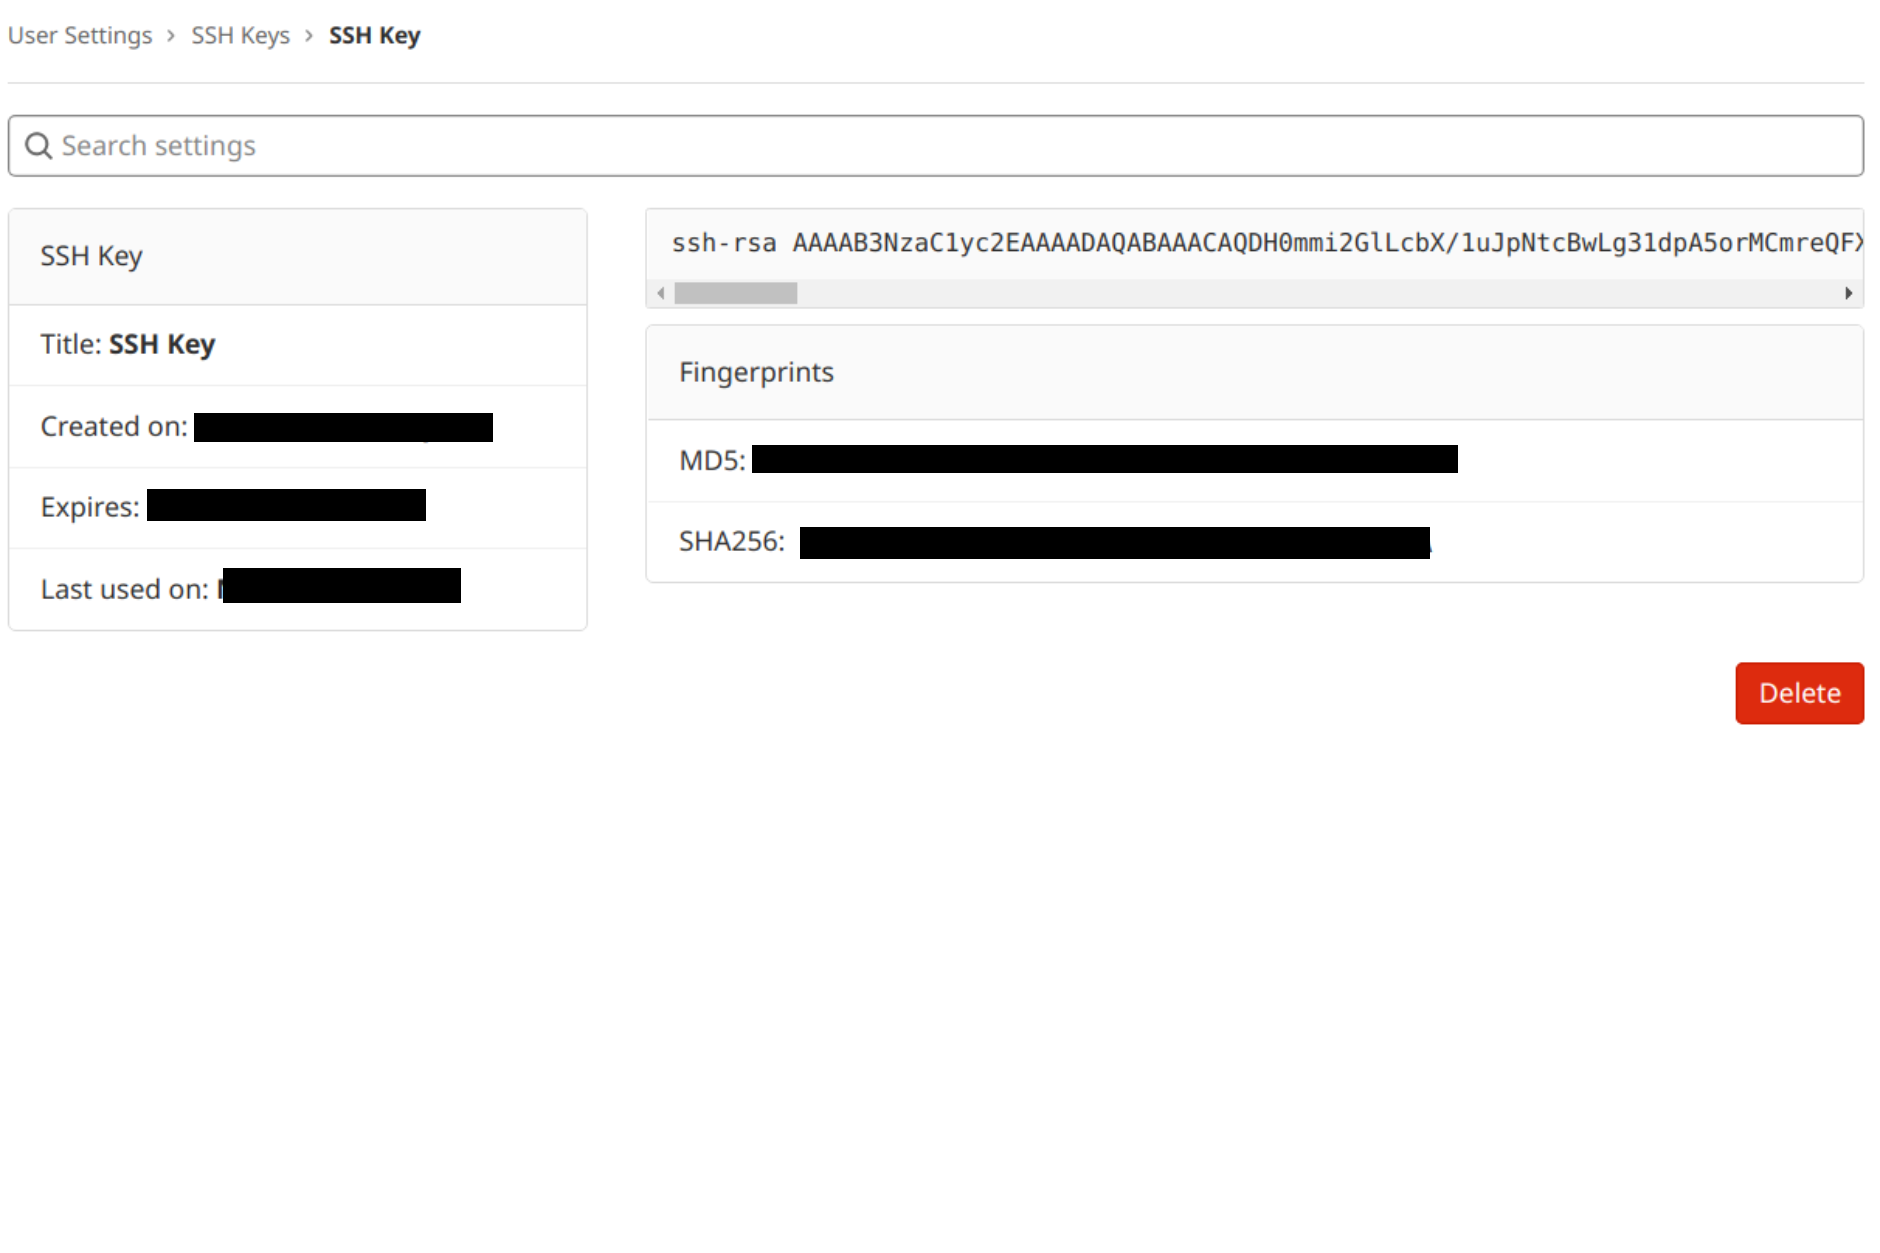
The key now appears in the list of SSH keys on your account:

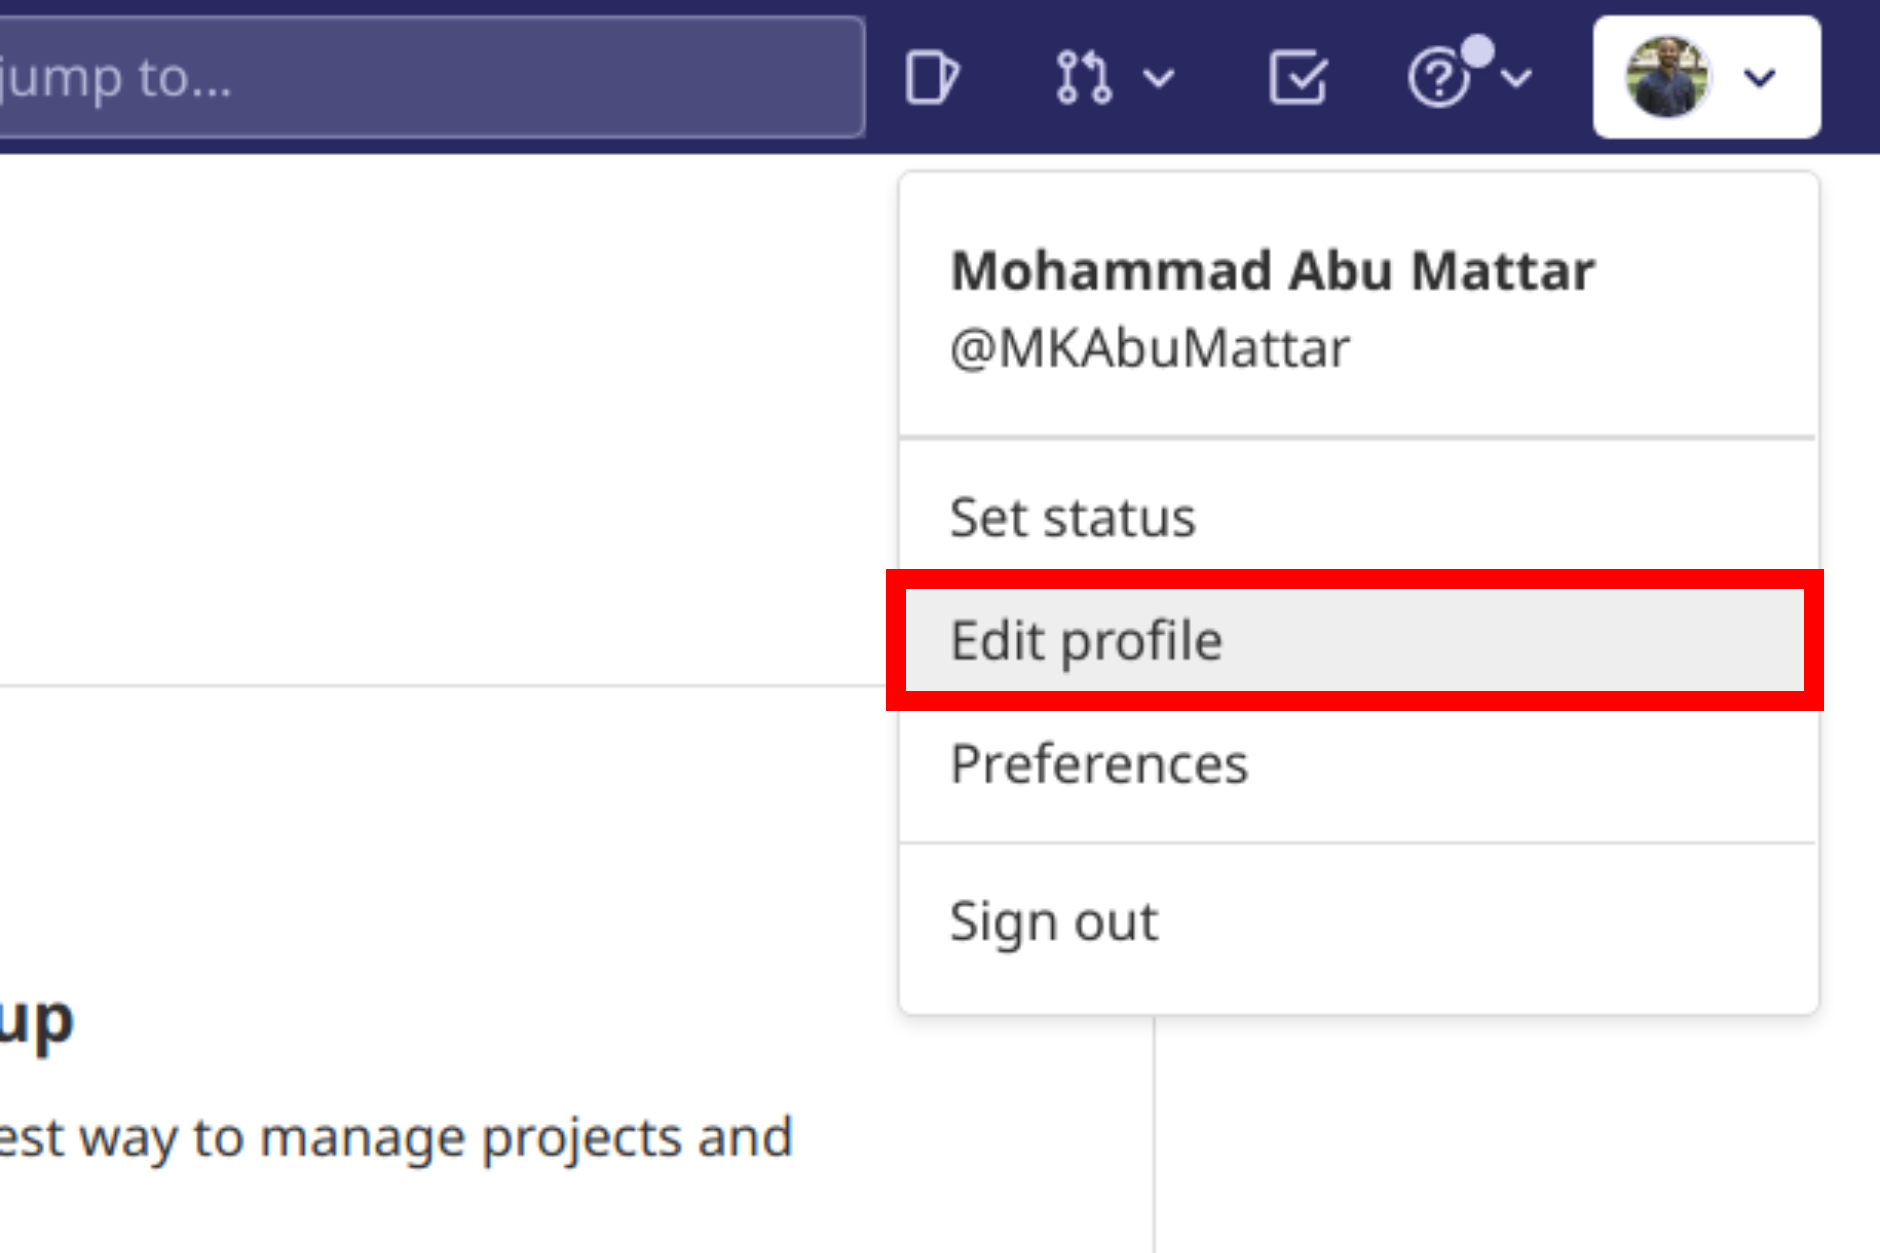
Sign in to your GitLab account at gitlab.com. Click your profile photo in the upper-right corner, then Settings:
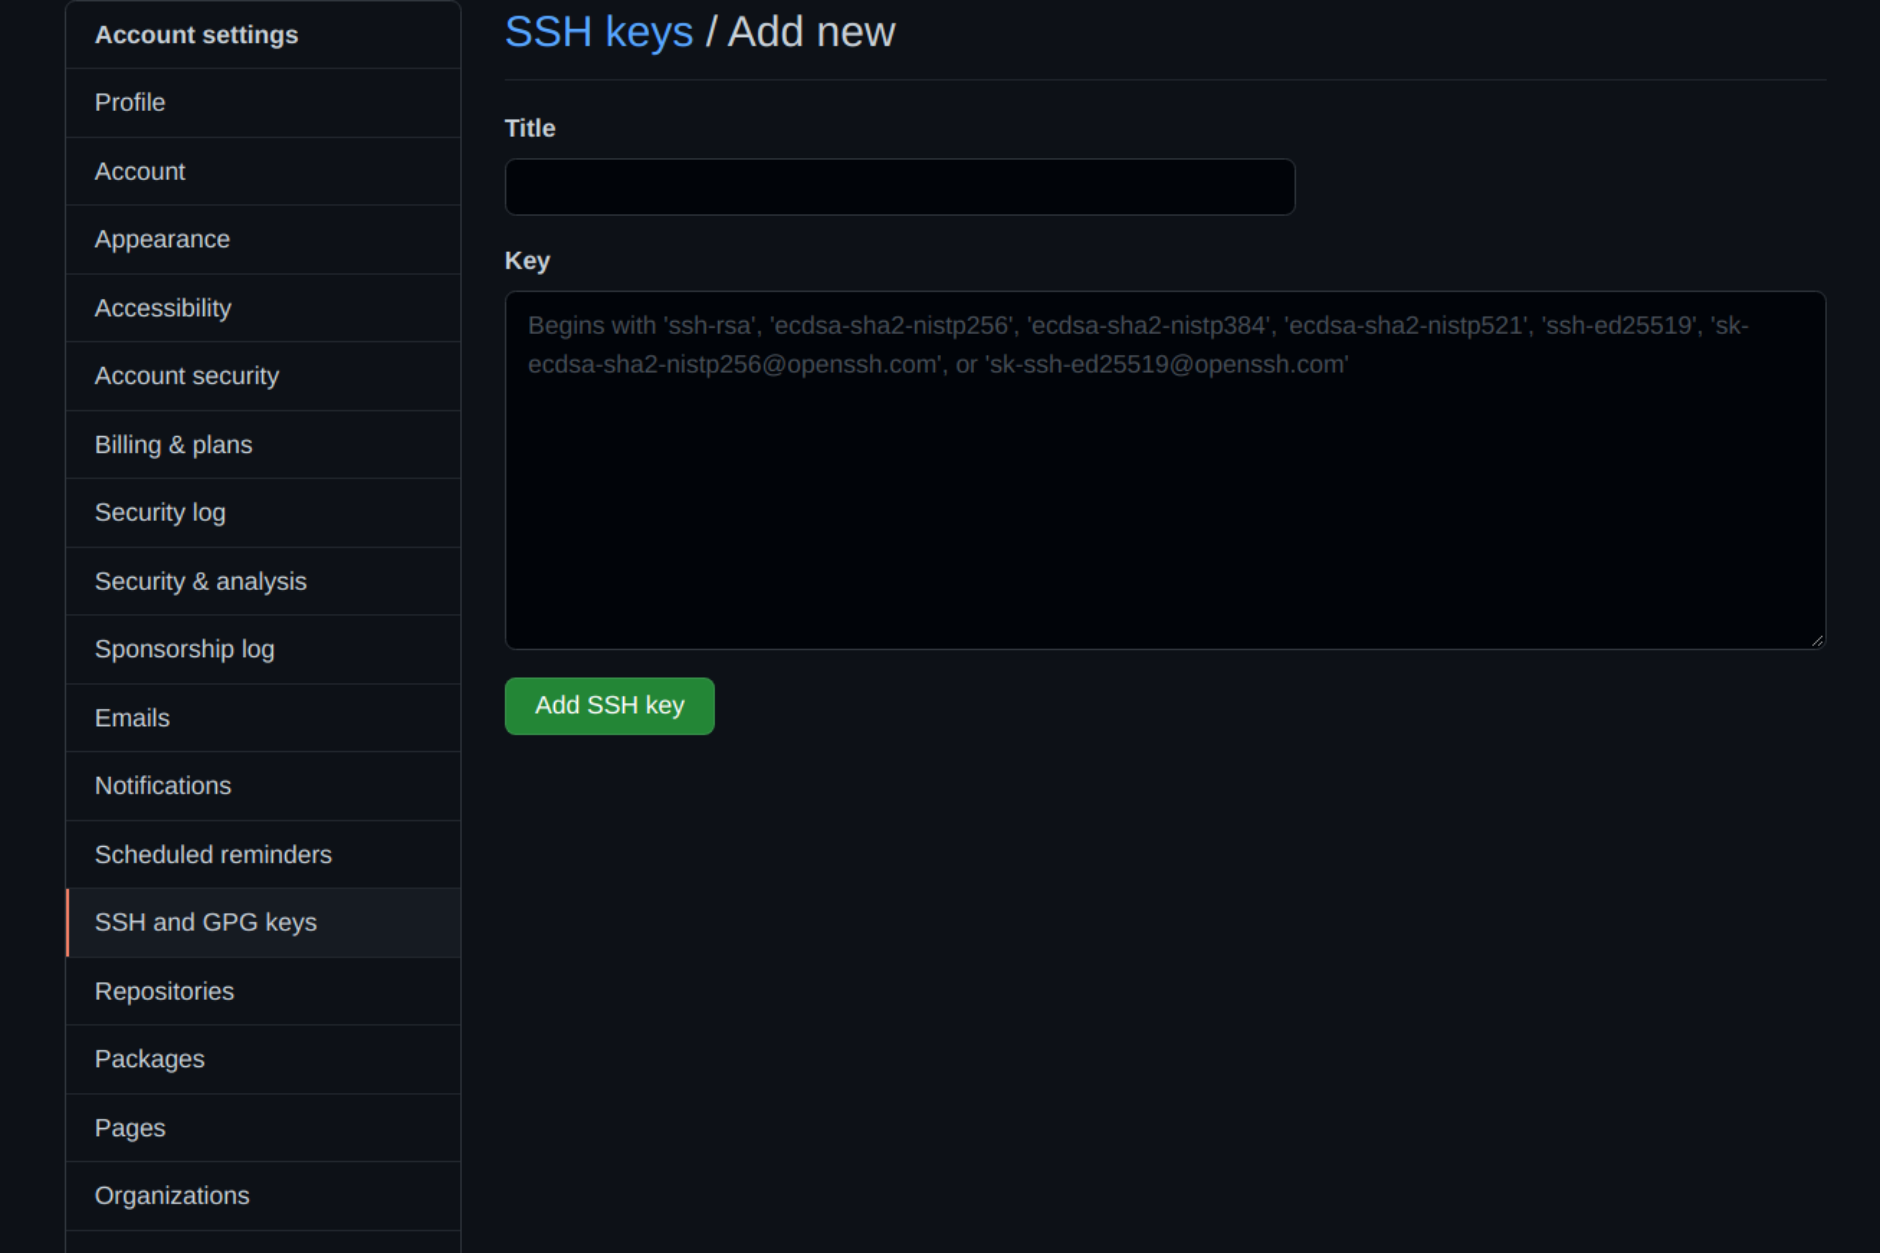
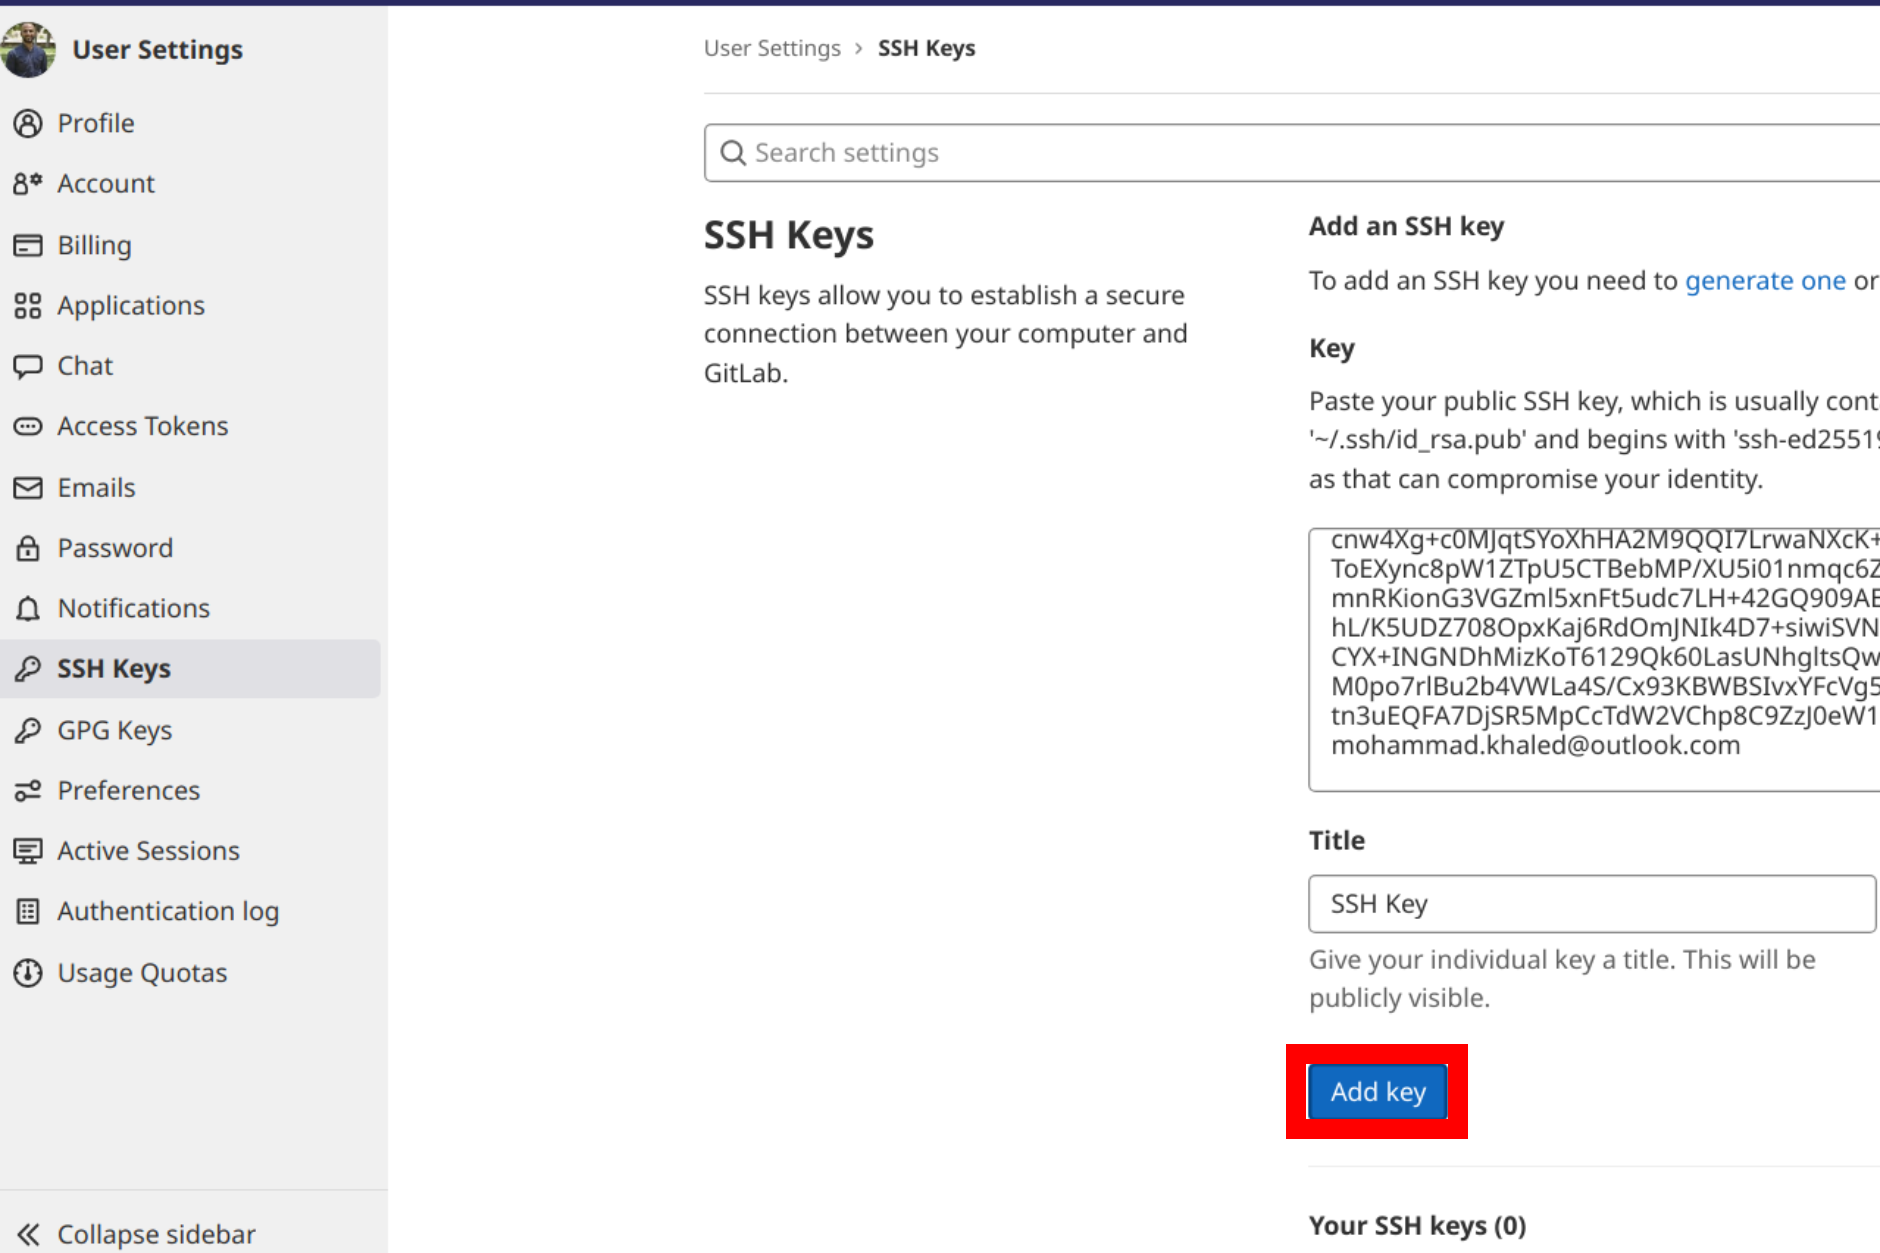
Click SSH Keys in the sidebar and paste your public key into the Key field. Add a descriptive title (for example, the name of your computer), then click Add key:
The key now appears in the list of SSH keys on your account:
Log in to your Bitbucket account at bitbucket.org. Click your profile photo in the lower-left corner, then Bitbucket settings:
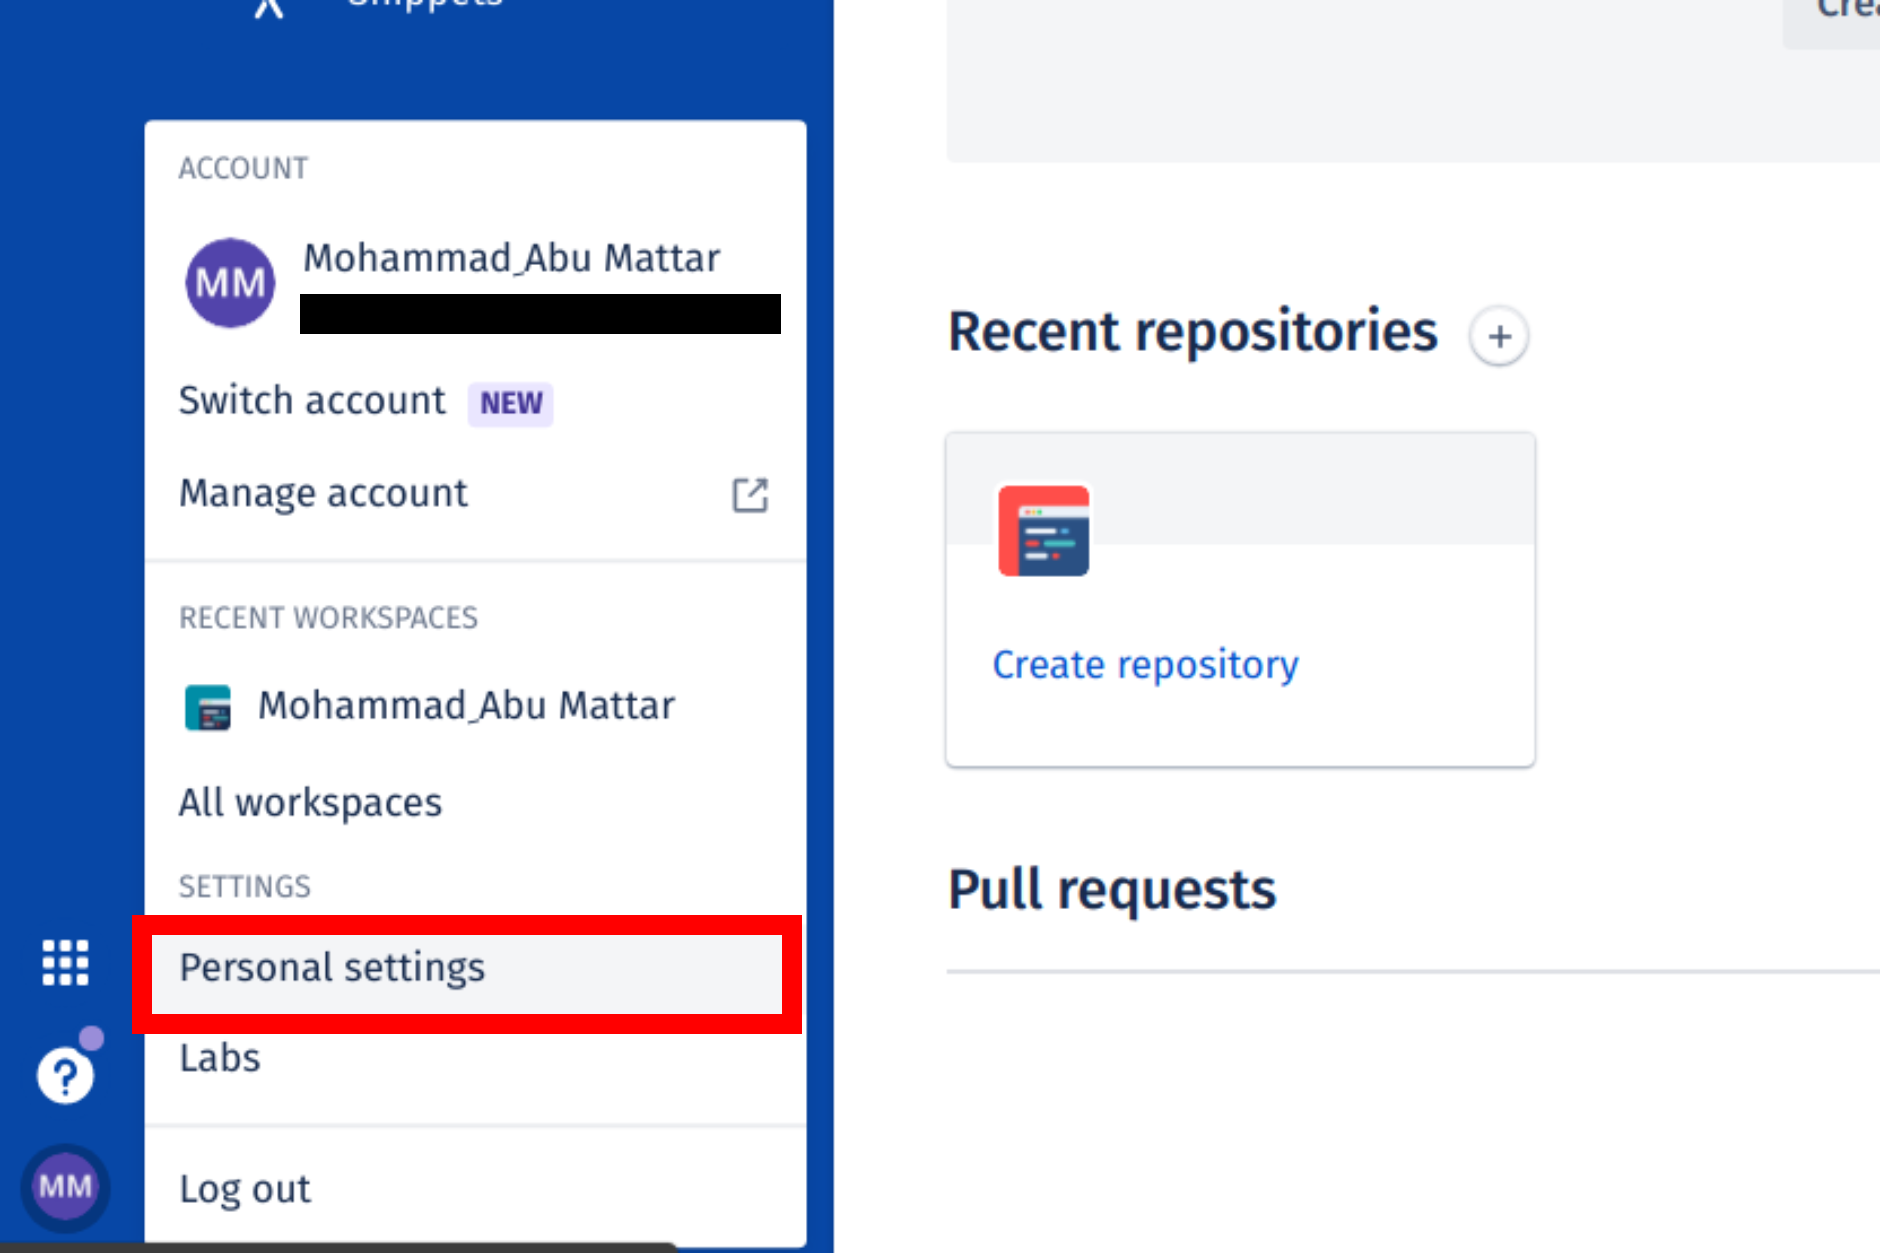
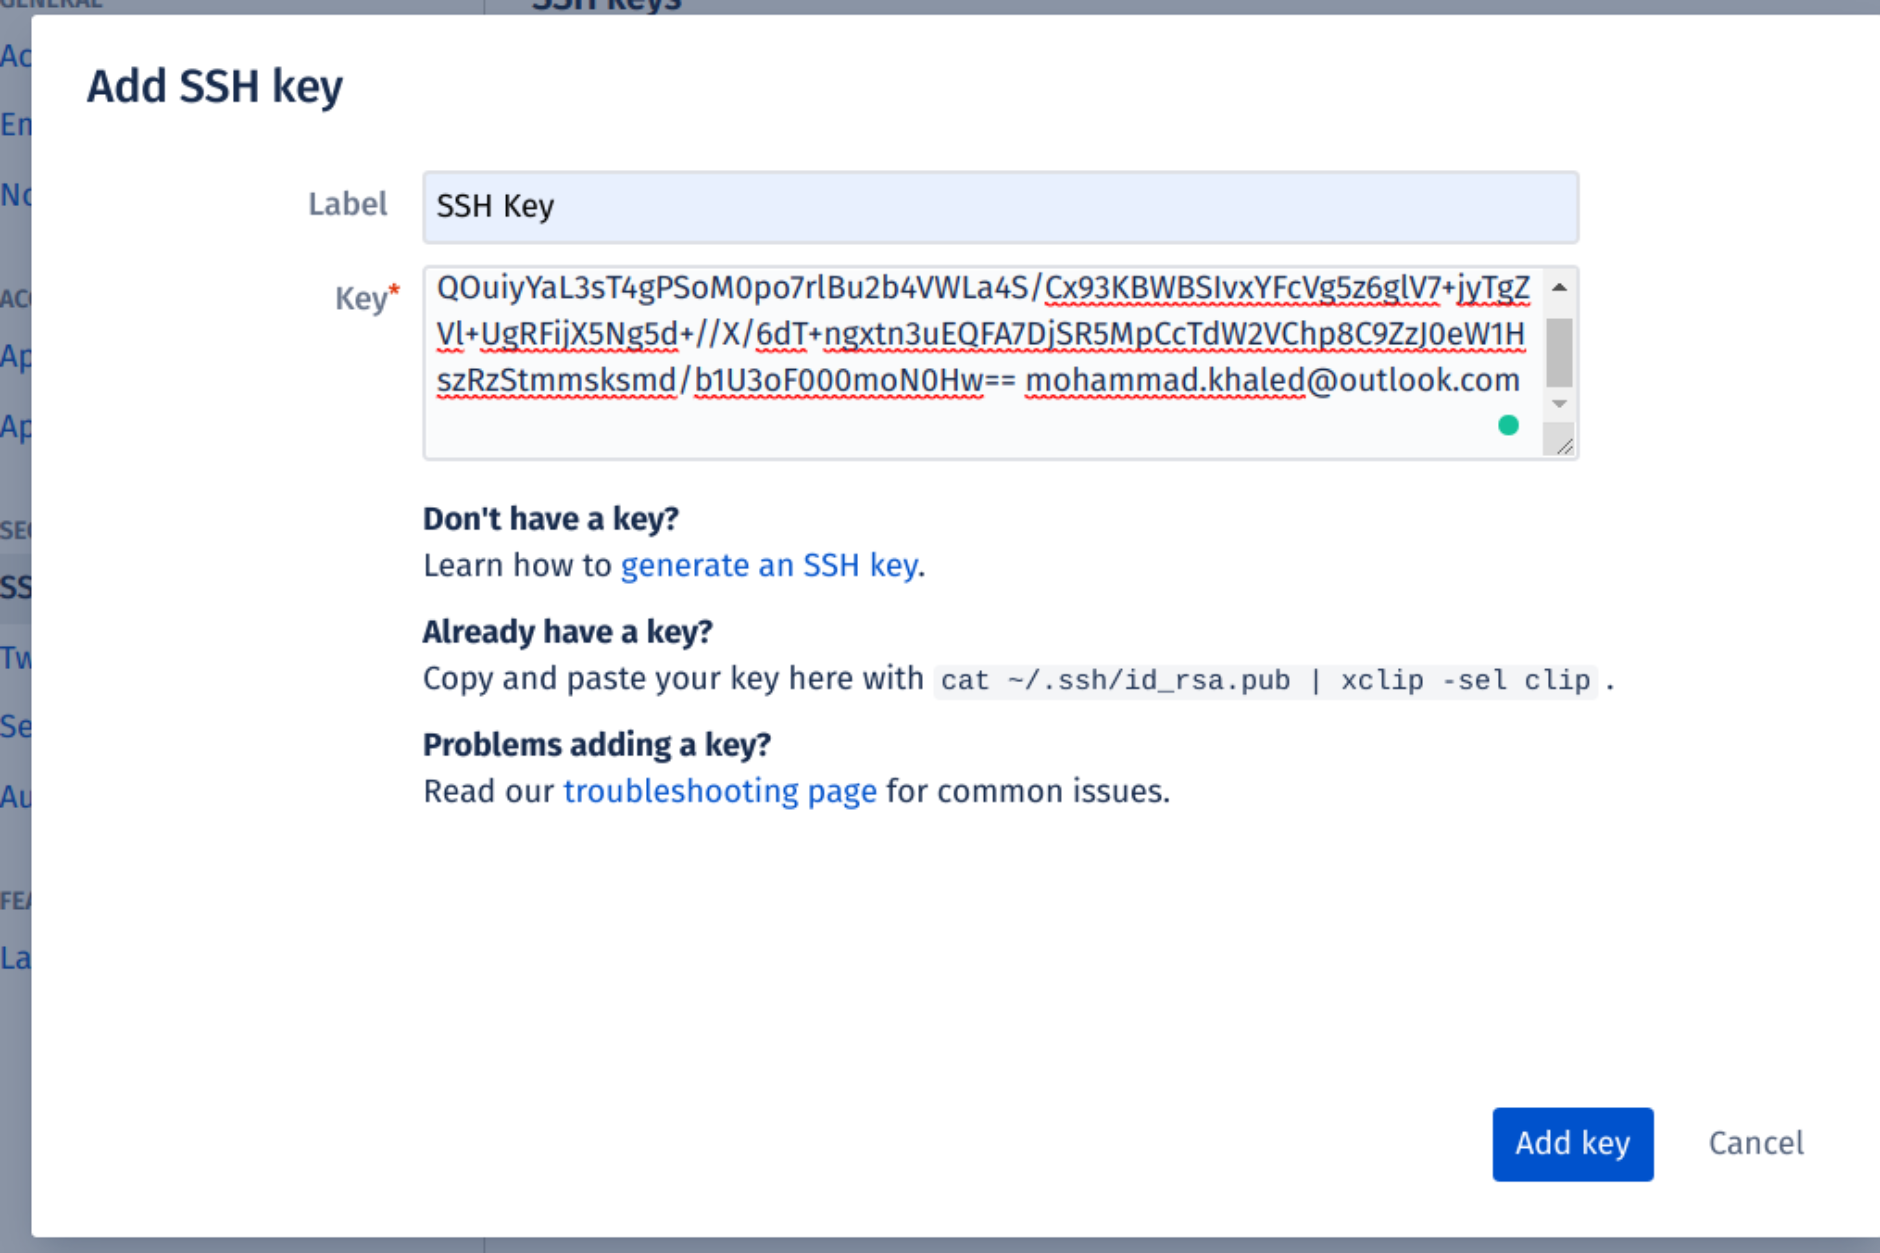
Find SSH keys under the Security section, then select Add key. Add a descriptive label (such as your computer’s name) and paste your public key into the Key field. Click Add key:
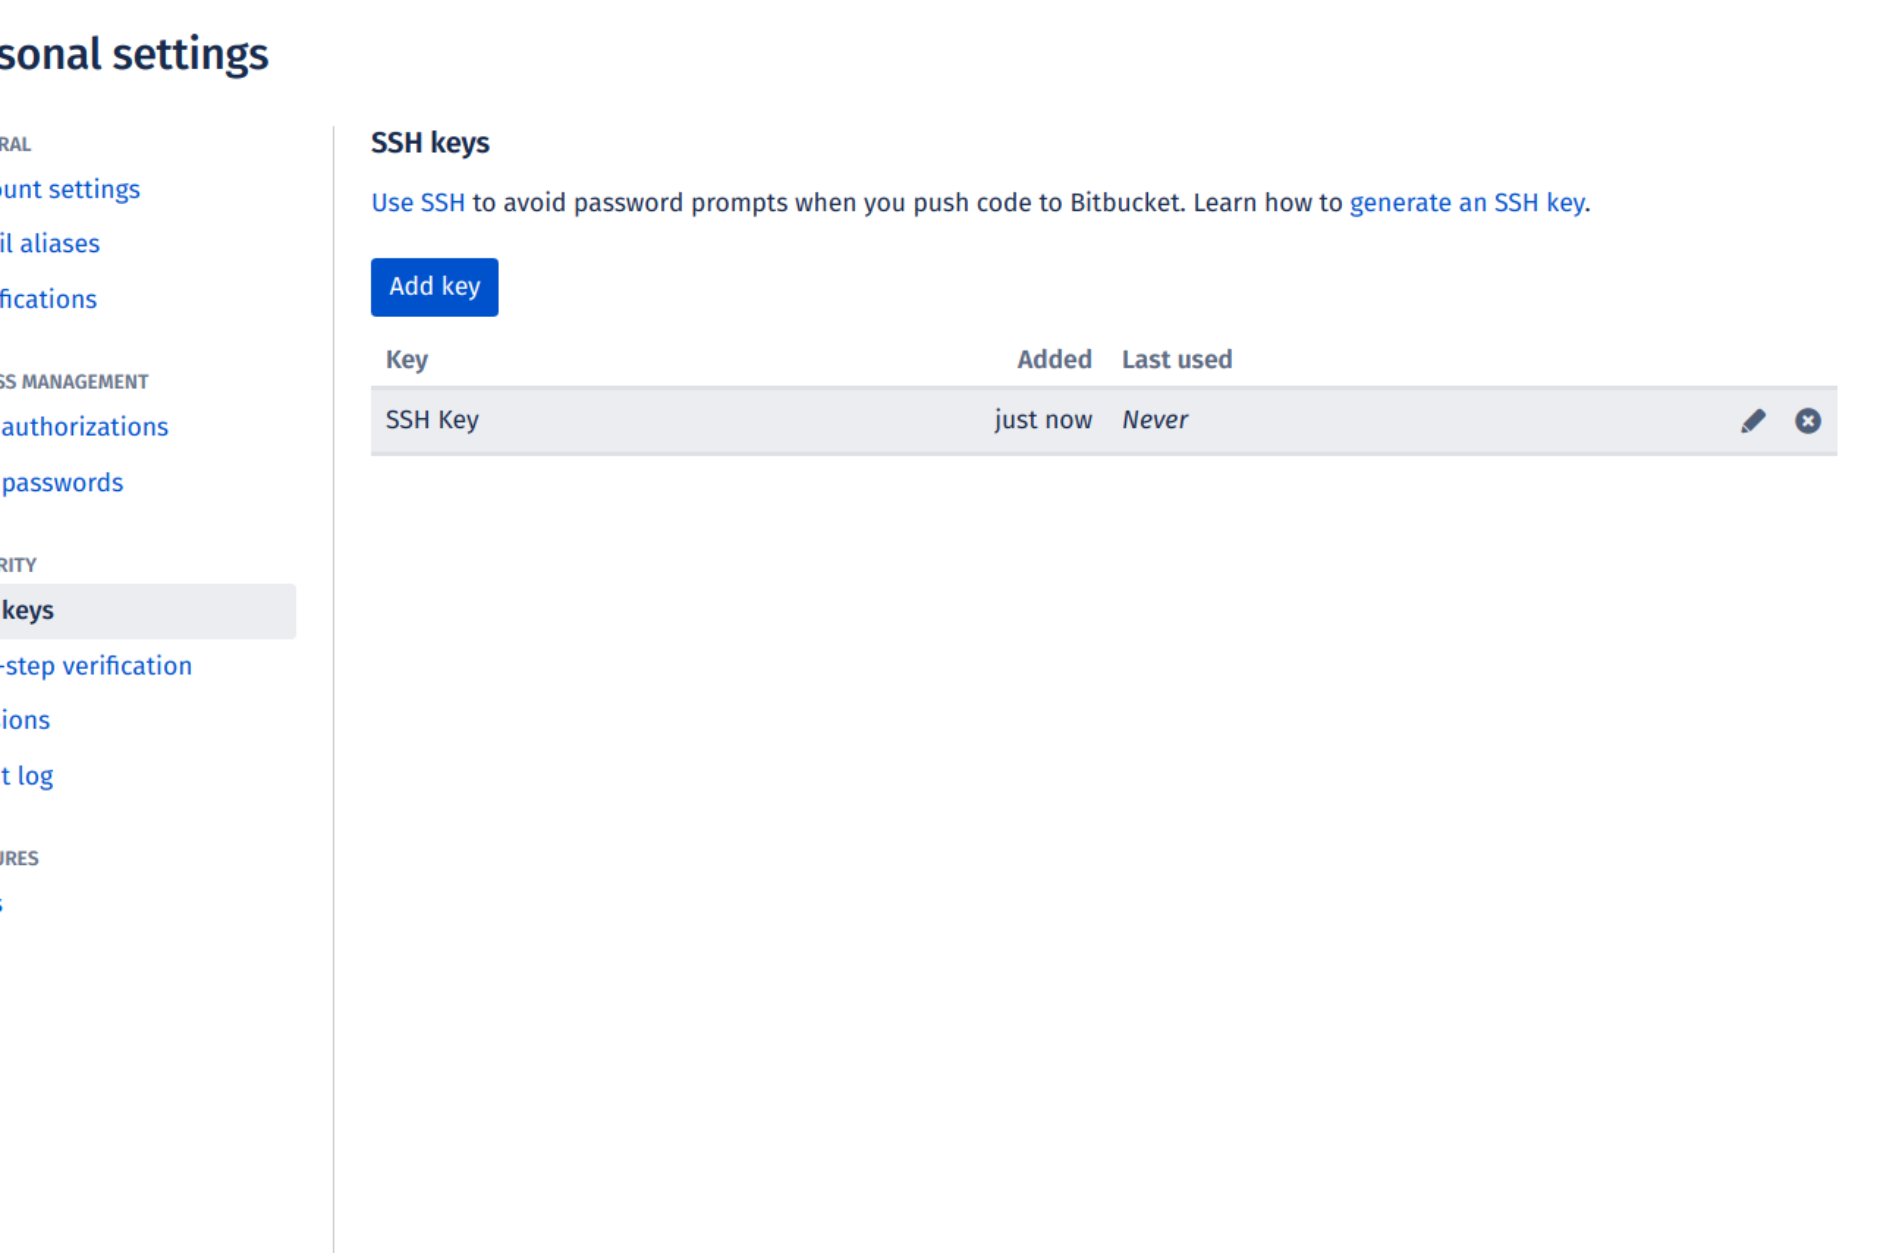
The key has now been added to your account’s list of SSH keys:
Test connecting via SSH
Before you start using SSH with Git, all three services let you check that the connection works.
Once you’ve added your SSH key to your GitHub account, open the terminal and type:
If you’re connecting to GitHub over SSH for the first time, the SSH client will ask if you trust the GitHub server’s public key:
The authenticity of host 'github.com (140.82.113.4)' can't be established.RSA key fingerprint is SHA256:a5d6c20b1790b4c144b9d26c9b201bbee3797aa010f2701c09c1b3a6262d2c02.Are you sure you want to continue connecting (yes/no)?Type yes and press Enter. GitHub is added to your known hosts and won’t prompt again:
Warning: Permanently added 'github.com,140.82.113.4' (RSA) to the list of known hosts.GitHub only allows this SSH connection for testing, not shell access, so it confirms you’re authenticated and then closes the connection:
Hi YOUR_USER_NAME! You've successfully authenticated, but GitHub does not provide shell access.The whole interaction should look something like this:
The authenticity of host 'github.com (140.82.113.4)' can't be established.RSA key fingerprint is SHA256:a5d6c20b1790b4c144b9d26c9b201bbee3797aa010f2701c09c1b3a6262d2c02.Are you sure you want to continue connecting (yes/no)? yesWarning: Permanently added 'github.com,140.82.113.4' (RSA) to the list of known hosts.Hi your_user_name! You've successfully authenticated, but GitHub does not provide shell access.Test passed you’re ready to use SSH with GitHub.
Once you’ve added your SSH key to your GitLab account, the test is pretty similar:
The authenticity of host 'gitlab.com (35.231.145.151)' can't be established.ECDSA key fingerprint is SHA256:4ac7a7fd4296d5e6267c9188346375ff78f6097a802e83c0feaf25277c9e70cc.Are you sure you want to continue connecting (yes/no)? yesWarning: Permanently added 'gitlab.com,35.231.145.151' (ECDSA) to the list of known hosts.Welcome to GitLab, @YOUR_USER_NAME!Test passed you’re ready to use SSH with GitLab.
Once you’ve added your SSH key to your Bitbucket account, the test is pretty similar:
The authenticity of host 'bitbucket.org (104.192.143.1)' can't be established.RSA key fingerprint is SHA256:fb7d37d5497c43f73325e0a98638cac8dda3b01a8c31f4ee11e2e953c19e0252.Are you sure you want to continue connecting (yes/no)? yesWarning: Permanently added 'bitbucket.org,104.192.143.1' (RSA) to the list of known hosts.logged in as YOUR_USER_NAME.
You can use git or hg to connect to Bitbucket. Shell access is disabled.Test passed you’re ready to use SSH with Bitbucket.
Frequently Asked Questions
Use the built-in OpenSSH Authentication Agent. In an admin PowerShell, enable and start the service, then add your key:
Get-Service ssh-agent | Set-Service -StartupType AutomaticStart-Service ssh-agentssh-add $HOME\.ssh\id_ed25519The agent keeps the decrypted key in memory, so you type the passphrase once per login instead of on every Git command.
Use ed25519. The keys are smaller and faster than RSA with comparable security, and it’s what GitHub, GitLab, and Bitbucket recommend. Generate one with ssh-keygen -t ed25519 -C "[email protected]". Reach for rsa -b 4096 only when you need to connect to an older server that doesn’t speak Ed25519.
Yes. The same public key can be added to as many accounts and services as you like there’s no need for a separate key per provider. Just paste id_ed25519.pub (or id_rsa.pub) into each service’s SSH-keys settings.
Usually the key isn’t loaded in the agent, the public key wasn’t added to the service, or the wrong key path is being used. Run ssh -vT [email protected] to see which key the client offers, confirm the OpenSSH agent is running, and make sure you uploaded the matching .pub file.
The OpenSSH client ships with Windows 10/11 but can be disabled. Install it from an admin PowerShell:
Add-WindowsCapability -Online -Name OpenSSH.Client~~~~0.0.1.0Git for Windows also bundles ssh/ssh-keygen, so running the commands inside Git Bash works too.
References
- Git Official Website - Downloads
- Pro Git Book - Generating Your SSH Public Key
- GitHub Docs - Generating a new SSH key and adding it to the ssh-agent
- GitHub Docs - Adding a new SSH key to your GitHub account
- GitHub Docs - Working with SSH key passphrases
- GitHub Docs - Testing your SSH connection
- GitLab Docs - Use SSH keys to communicate with GitLab
- Bitbucket Docs - Set up an SSH key
- Microsoft Docs - OpenSSH key management for Windows
- Microsoft Docs - Get started with OpenSSH for Windows
- Chocolatey - Git Package
- Winget - Git Package
- PowerShell Set-Clipboard Cmdlet