Introduction
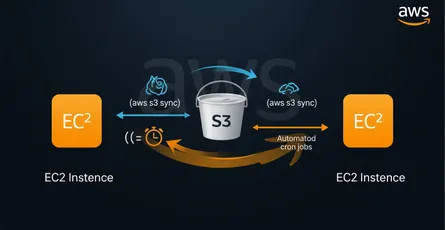
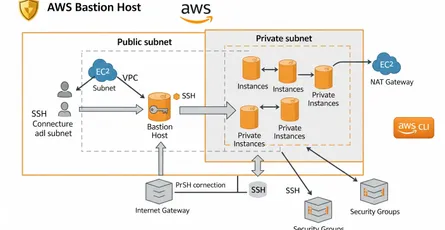
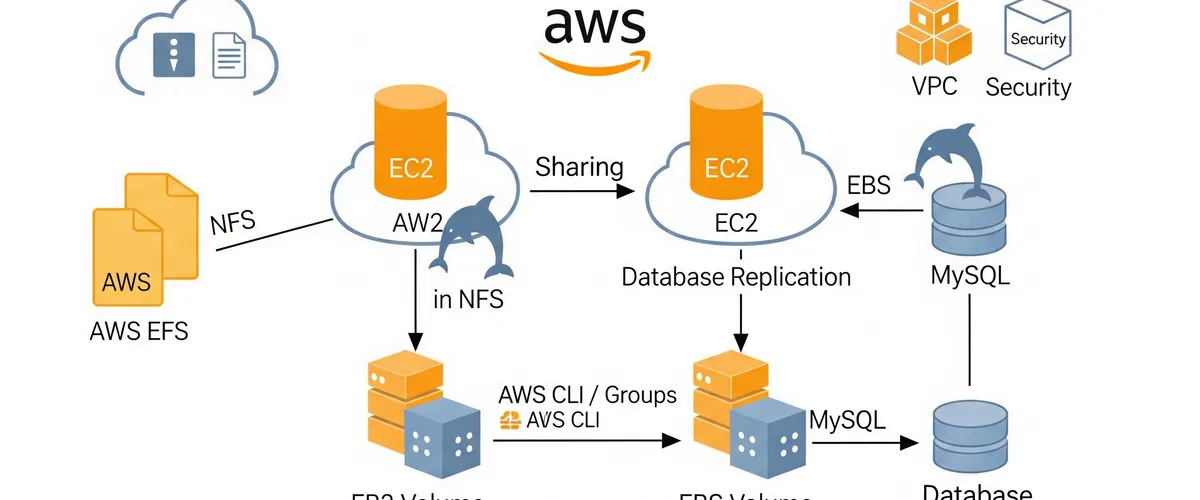
In this post, I will show you how to connect a two EC2 instances database and files transfer using AWS CLI. I will use AWS CLI to create a VPC, EC2 instances, EBS, EFS, and security groups. I will use the EC2 instances to connect to the database and files transfer.
Prerequisites
- AWS CLI installed and configured
- IAM user with the following permissions:
- AmazonVPCFullAccess
- AmazonEC2FullAccess
- AmazonElasticBlockStoreFullAccess
- AmazonElasticFileSystemFullAccess
Create VPC
Step 1: Create VPC
To create a VPC, run the following command:
# Create a VPCAWS_VPC=$(aws ec2 create-vpc \ --cidr-block 10.0.0.0/16 \ --query 'Vpc.VpcId' \ --output text)
# Add a name tag to the VPCaws ec2 create-tags \ --resources $AWS_VPC \ --tags Key=Name,Value=aws-vpcExplanation:
aws ec2 create-vpc- Create a VPC--cidr-block- The IPv4 network range for the VPC, in CIDR notation.--query- The JMESPath query that is applied to the output.--output- The output format of the command.--resources- The IDs of the resources.--tags- The tags to apply to the resource.
Step 2: Modify your custom VPC and enable DNS hostname support, and DNS support
To modify your custom VPC and enable DNS hostname support, and DNS support, run the following command:
# Enable DNS hostnamesaws ec2 modify-vpc-attribute \ --vpc-id $AWS_VPC \ --enable-dns-hostnames "{\"Value\":true}"
# Enable DNS supportaws ec2 modify-vpc-attribute \ --vpc-id $AWS_VPC \ --enable-dns-support "{\"Value\":true}"Explanation:
aws ec2 modify-vpc-attribute- Modifies the specified attribute of the specified VPC.--vpc-id- The ID of the VPC.--enable-dns-hostnames- Indicates whether the instances launched in the VPC get DNS hostnames.--enable-dns-support- Indicates whether DNS resolution is supported for the VPC.
Step 3: Create a Public Subnet
To create a public subnet, run the following command:
# Create a public subnetAWS_PUBLIC_SUBNET=$(aws ec2 create-subnet \ --vpc-id $AWS_VPC \ --cidr-block 10.0.1.0/24 \ --query 'Subnet.SubnetId' \ --output text)
# Add a name tag to the public subnetaws ec2 create-tags \ --resources $AWS_PUBLIC_SUBNET \ --tags Key=Name,Value=aws-public-subnetExplanation:
aws ec2 create-subnet- Creates a subnet in an existing VPC.--vpc-id- The ID of the VPC.--cidr-block- The IPv4 network range for the subnet, in CIDR notation.--query- The JMESPath query that is applied to the output.--output- The output format of the command.--resources- The IDs of the resources.--tags- The tags to apply to the resource.
Step 4: Enable Auto-assign Public IP on the subnet
To enable auto-assign public IP on the subnet, run the following command:
# Enable auto-assign public IP on the subnetaws ec2 modify-subnet-attribute \ --subnet-id $AWS_PUBLIC_SUBNET \ --map-public-ip-on-launchExplanation:
aws ec2 modify-subnet-attribute- Modifies a subnet attribute.--subnet-id- The ID of the subnet.--map-public-ip-on-launch- Specify true to indicate that network interfaces created in the specified subnet should be assigned a public IPv4 address.
Step 5: Create an Internet Gateway
To create an Internet Gateway, run the following command:
# Create an Internet GatewayAWS_INTERNET_GATEWAY=$(aws ec2 create-internet-gateway \ --query 'InternetGateway.InternetGatewayId' \ --output text)
# Add a name tag to the Internet Gatewayaws ec2 create-tags \ --resources $AWS_INTERNET_GATEWAY \ --tags Key=Name,Value=aws-internet-gatewayExplanation:
aws ec2 create-internet-gateway- Creates an Internet gateway for use with a VPC.--query- The JMESPath query that is applied to the output.--output- The output format of the command.--resources- The IDs of the resources.--tags- The tags to apply to the resource.
Step 6: Attach the Internet Gateway to the VPC
To attach the Internet Gateway to the VPC, run the following command:
# Attach the Internet Gateway to the VPCaws ec2 attach-internet-gateway \ --internet-gateway-id $AWS_INTERNET_GATEWAY \ --vpc-id $AWS_VPCExplanation:
aws ec2 attach-internet-gateway- Attaches an Internet gateway to a VPC, enabling connectivity between the Internet and the VPC.--internet-gateway-id- The ID of the Internet gateway.--vpc-id- The ID of the VPC.
Step 7: Create a Route Table
To create a route table, run the following command:
# Create a route tableAWS_ROUTE_TABLE=$(aws ec2 create-route-table \ --vpc-id $AWS_VPC \ --query 'RouteTable.RouteTableId' \ --output text)
# Add a name tag to the route tableaws ec2 create-tags \ --resources $AWS_ROUTE_TABLE \ --tags Key=Name,Value=aws-route-tableExplanation:
aws ec2 create-route-table- Creates a route table for the specified VPC.--vpc-id- The ID of the VPC.--query- The JMESPath query that is applied to the output.--output- The output format of the command.--resources- The IDs of the resources.--tags- The tags to apply to the resource.
Step 8: Create a custom route table association
To create a custom route table association, run the following command:
# Create a custom route table associationaws ec2 associate-route-table \ --subnet-id $AWS_PUBLIC_SUBNET \ --route-table-id $AWS_ROUTE_TABLEExplanation:
aws ec2 associate-route-table- Associates a subnet with a route table.--subnet-id- The ID of the subnet.--route-table-id- The ID of the route table.
Step 9: Associate the subnet with route table, making it a public subnet
To associate the subnet with route table, making it a public subnet, run the following command:
# Associate the subnet with route table, making it a public subnetaws ec2 create-route \ --route-table-id $AWS_ROUTE_TABLE \ --destination-cidr-block 0.0.0.0/0 \ --gateway-id $AWS_INTERNET_GATEWAYExplanation:
aws ec2 create-route- Creates a route in a route table within a VPC.--route-table-id- The ID of the route table for the route.--destination-cidr-block- The IPv4 CIDR address block used for the destination match.--gateway-id- The ID of an Internet gateway or virtual private gateway attached to your VPC.
Step 10: Create a Security Group
To create a security group, run the following command:
# Create a security groupAWS_SECURITY_GROUP=$(aws ec2 create-security-group \ --group-name aws-security-group \ --description "AWS Security Group" \ --vpc-id $AWS_VPC \ --query 'GroupId' \ --output text)
# Add a name tag to the security groupaws ec2 create-tags \ --resources $AWS_SECURITY_GROUP \ --tags Key=Name,Value=aws-security-groupExplanation:
aws ec2 create-security-group- Creates a security group.--group-name- The name of the security group.--description- A description for the security group.--vpc-id- The ID of the VPC.--query- The JMESPath query that is applied to the output.--output- The output format of the command.--resources- The IDs of the resources.--tags- The tags to apply to the resource.
Step 11: Add a rule to the security group
To add a rule to the security group, run the following command:
# Add a rule to the security group
# Add SSH ruleaws ec2 authorize-security-group-ingress \--group-id $AWS_SECURITY_GROUP \--protocol tcp \--port 22 \--cidr 0.0.0.0/0 \--output text
# Add HTTP ruleaws ec2 authorize-security-group-ingress \--group-id $AWS_SECURITY_GROUP \--protocol tcp \--port 80 \--cidr 0.0.0.0/0 \--output text
# Add HTTPS ruleaws ec2 authorize-security-group-ingress \--group-id $AWS_SECURITY_GROUP \--protocol tcp \--port 443 \--cidr 0.0.0.0/0 \--output text
# Add NFS ruleaws ec2 authorize-security-group-ingress \--group-id $AWS_SECURITY_GROUP \--protocol tcp \--port 2049 \--cidr 0.0.0.0/0 \--output text
# Add mysql/arura ruleaws ec2 authorize-security-group-ingress \--group-id $AWS_SECURITY_GROUP \--protocol tcp \--port 3306 \--cidr 0.0.0.0/0 \--output textExplanation:
aws ec2 authorize-security-group-ingress- Adds one or more ingress rules to a security group.--group-id- The ID of the security group.--protocol- The IP protocol name or number.--port- The port number.--cidr- The IPv4 CIDR range.--output- The output format of the command.
Create a Two EC2 Instances
Step 1: Get the latest AMI ID
To get the latest AMI ID, run the following command:
# Get the latest AMI IDAWS_AMI=$(aws ec2 describe-images \ --owners 'amazon' \ --filters 'Name=name,Values=amzn2-ami-hvm-2.0.*' \ 'Name=state,Values=available' \ --query 'sort_by(Images, &CreationDate)[-1].[ImageId]' \ --output 'text')Explanation:
aws ec2 describe-images- Describes one or more of the images (AMIs, AKIs, and ARIs) available to you.--owners- Filters the images by the owner.--filters- The filters to apply to the images.--query- The JMESPath query that is applied to the output.--output- The output format of the command.
Step 2: Create a Key Pair
To create a key pair, run the following command:
# Create a key pairaws ec2 create-key-pair \--key-name aws-key-pair \--query 'KeyMaterial' \--output text > aws-key-pair.pem
# Change the permission of the key pairchmod 400 aws-key-pair.pemExplanation:
aws ec2 create-key-pair- Creates a 2048-bit RSA key pair with the specified name.--key-name- The name for the key pair.--query- The JMESPath query that is applied to the output.--output- The output format of the command.chmod 400 aws-key-pair.pem- Changes the permission of the key pair, making it read-only.
Step 3: Create a User Data Script
To create a user data script, run the following command:
# Create a user data scriptcat <<EOF > user-data.sh#!/bin/bash
# VariablesROOT_DB_PASSWORD="121612"DB_NAME="DB"DB_USER="user"DB_PASSWORD="121612"
# update the systemsudo yum update -y
# install efs-utilssudo yum install git rpm-build make -y
# clone the efs-utils repositorygit clone https://github.com/aws/efs-utils
# change directory to efs-utilscd efs-utils
# build the efs-utilsmake rpm
# install the efs-utilssudo yum install build/amazon-efs-utils*rpm -y
# install httpdsudo yum install httpd -y
# start httpdsudo systemctl start httpd
# enable httpdsudo systemctl enable httpd
# At first, we will enable amazon-linux-extras so that we can specify the PHP version that we want to install.sudo amazon-linux-extras enable php7.4 -y
# Install PHPsudo yum install php php-{pear,cgi,common,curl,mbstring,gd,mysqlnd,gettext,bcmath,json,xml,fpm,intl,zip,imap} -y
# Install MariaDBsudo yum install mariadb-server -y
# Start MariaDBsudo systemctl start mariadb
# Enable MariaDBsudo systemctl enable mariadb
# Restart Apachesudo systemctl restart httpd
# We will now secure MariaDB.sudo mysql_secure_installation <<EOF2
y$ROOT_DB_PASSWORD$ROOT_DB_PASSWORDyyyyEOF2
# Create a databasesudo mysql -u root -p$ROOT_DB_PASSWORD -e "CREATE DATABASE $DB_NAME;"
# Create a usersudo mysql -u root -p$ROOT_DB_PASSWORD -e "CREATE USER '$DB_USER'@'localhost' IDENTIFIED BY '$DB_PASSWORD';"
# Grant privilegessudo mysql -u root -p$ROOT_DB_PASSWORD -e "GRANT ALL PRIVILEGES ON $DB_NAME.* TO '$DB_USER'@'localhost';"
# Flush privilegessudo mysql -u root -p$ROOT_DB_PASSWORD -e "FLUSH PRIVILEGES;"
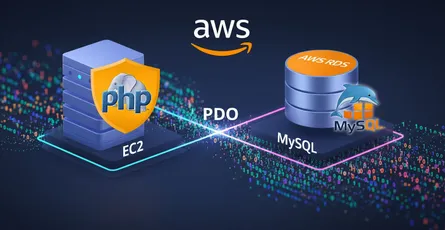
# Create PHP page
cat <<EOF3 > /var/www/html/index.php<?php\$servername = "localhost";\$username = "$DB_USER";\$password = "$DB_PASSWORD";\$dbname = "$DB_NAME";
// Create connectiontry { \$conn = new PDO("mysql:host=\$servername;dbname=\$dbname", \$username, \$password); // set the PDO error mode to exception \$conn->setAttribute(PDO::ATTR_ERRMODE, PDO::ERRMODE_EXCEPTION); echo "Connected successfully";} catch(PDOException \$e) { echo "Connection failed: " . \$e->getMessage();}?>EOF3
# Restart Apachesudo systemctl restart httpd
EOFThe user data script performs the following tasks:
- Updates the system.
- Installs the EFS utilities.
- Installs Apache HTTP Server.
- Installs PHP.
- Installs MariaDB.
- Secures MariaDB.
- Creates a database.
- Creates a user.
- Grants privileges to the user.
- Creates a PHP page.
- Restarts Apache HTTP Server.
# Create a user data scriptcat <<EOF > user-data2.sh#!/bin/bash
# VariablesROOT_DB_PASSWORD="121612"DB_NAME="DB"DB_USER="user"DB_PASSWORD="121612"
# update the systemsudo yum update -y
# install efs-utilssudo yum install git rpm-build make -y
# clone the efs-utils repositorygit clone https://github.com/aws/efs-utils
# change directory to efs-utilscd efs-utils
# build the efs-utilsmake rpm
# install the efs-utilssudo yum install build/amazon-efs-utils*rpm -y
# install httpdsudo yum install httpd -y
# start httpdsudo systemctl start httpd
# enable httpdsudo systemctl enable httpd
# At first, we will enable amazon-linux-extras so that we can specify the PHP version that we want to install.sudo amazon-linux-extras enable php7.4 -y
# Install PHPsudo yum install php php-{pear,cgi,common,curl,mbstring,gd,mysqlnd,gettext,bcmath,json,xml,fpm,intl,zip,imap} -y
# Install MariaDBsudo yum install mariadb-server -y
# Start MariaDBsudo systemctl start mariadb
# Enable MariaDBsudo systemctl enable mariadb
# Restart Apachesudo systemctl restart httpd
# We will now secure MariaDB.sudo mysql_secure_installation <<EOF2
y$ROOT_DB_PASSWORD$ROOT_DB_PASSWORDyyyyEOF2
EOFThe user data script performs the following tasks:
- Updates the system.
- Installs the EFS utilities.
- Installs Apache HTTP Server.
- Installs PHP.
- Installs MariaDB.
- Restarts Apache HTTP Server.
- Secures MariaDB.
Step 4: Create a Two EC2 Instances
To create two EC2 instances, run the following command:
# Create two EC2 instancesAWS_EC2_INSTANCE_1=$(aws ec2 run-instances \--image-id $AWS_AMI \--instance-type t2.micro \--key-name aws-key-pair \--monitoring "Enabled=false" \--security-group-ids $AWS_SECURITY_GROUP \--subnet-id $AWS_PUBLIC_SUBNET \--user-data file://user-data.sh \--query 'Instances[0].InstanceId' \--output text)
AWS_EC2_INSTANCE_2=$(aws ec2 run-instances \--image-id $AWS_AMI \--instance-type t2.micro \--key-name aws-key-pair \--monitoring "Enabled=false" \--security-group-ids $AWS_SECURITY_GROUP \--subnet-id $AWS_PUBLIC_SUBNET \--user-data file://user-data2.sh \--query 'Instances[0].InstanceId' \--output text)
# Add a tag to the instancesaws ec2 create-tags \--resources $AWS_EC2_INSTANCE_1 \--tags Key=Name,Value=ec2-instance-1
aws ec2 create-tags \--resources $AWS_EC2_INSTANCE_2 \--tags Key=Name,Value=ec2-instance-2Explanation:
AWS_EC2_INSTANCE_1andAWS_EC2_INSTANCE_2are variables that store the instance IDs of the two EC2 instances.- The
aws ec2 run-instancescommand creates two EC2 instances. - The
--image-idoption specifies the AMI ID. - The
--instance-typeoption specifies the instance type. - The
--key-nameoption specifies the key pair name. - The
--monitoringoption specifies whether detailed monitoring is enabled. - The
--security-group-idsoption specifies the security group ID. - The
--subnet-idoption specifies the subnet ID. - The
--user-dataoption specifies the user data script. - The
--queryoption specifies the query to retrieve the instance ID. - The
--outputoption specifies the output format. - The
aws ec2 create-tagscommand adds a tag to the instances.
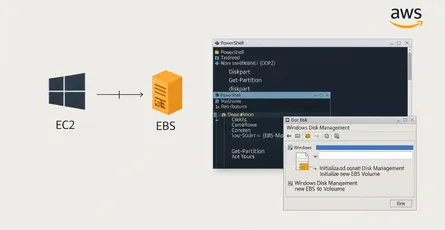
Create an EBS Volume
Step 1: Create an EBS Volume With Multiple
To create an EBS volume with all availability zones, run the following command:
AWS_AVAILABILITY_ZONE=$(aws ec2 describe-availability-zones \--query 'AvailabilityZones[*].ZoneName' \--output text)
# Create an EBS volume with all availability zonesAWS_EBS_VOLUME=$(aws ec2 create-volume \--availability-zone $AWS_AVAILABILITY_ZONE \--size 1 \--volume-type io1 \--iops 100 \--query 'VolumeId' \--output text)
# Add a tag to the EBS volumeaws ec2 create-tags \--resources $AWS_EBS_VOLUME \--tags Key=Name,Value=ebs-volumeExplanation:
AWS_AVAILABILITY_ZONEis a variable that stores the availability zone.- The
aws ec2 describe-availability-zonescommand retrieves the availability zone. - The
--queryoption specifies the query to retrieve the availability zone. - The
--outputoption specifies the output format. - The
aws ec2 create-volumecommand creates an EBS volume. - The
--availability-zoneoption specifies the availability zone. - The
--sizeoption specifies the size of the volume, in GiB. - The
--volume-typeoption specifies the volume type. - The
--iopsoption specifies the number of I/O operations per second (IOPS) that the volume supports. - The
--queryoption specifies the query to retrieve the volume ID. - The
--outputoption specifies the output format. - The
aws ec2 create-tagscommand adds a tag to the EBS volume.
Step 2: Attach the EBS Volume to the First EC2 Instance
To attach the EBS volume to the first EC2 instance, run the following command:
# Attach the EBS volume to the first EC2 instanceaws ec2 attach-volume \--device /dev/sdf \--instance-id $AWS_EC2_INSTANCE_1 \--volume-id $AWS_EBS_VOLUMEExplanation:
- The
aws ec2 attach-volumecommand attaches the EBS volume to the first EC2 instance. - The
--deviceoption specifies the device name. - The
--instance-idoption specifies the instance ID. - The
--volume-idoption specifies the volume ID.
Step 3: Create a File System and Mount the EBS Volume
To create a file system and mount the EBS volume, run the following command:
# connect to the first EC2 instancessh -i aws-key-pair.pem ec2-user@$AWS_EC2_INSTANCE_1_PUBLIC_IP
# create a file systemsudo mkfs -t ext4 /dev/xvdf
# create a directorysudo mkdir /data
# mount the EBS volumesudo mount /dev/xvdf /data
# add the EBS volume to the fstab filesudo echo "/dev/xvdf /data ext4 defaults 0 0" >> /etc/fstab
# exit the first EC2 instanceexitExplanation:
- The
sshcommand connects to the first EC2 instance. - The
sudo mkfs -t ext4 /dev/xvdfcommand creates a file system. - The
sudo mkdir /datacommand creates a directory. - The
sudo mount /dev/xvdf /datacommand mounts the EBS volume. - The
sudo echo "/dev/xvdf /data ext4 defaults 0 0" >> /etc/fstabcommand adds the EBS volume to the fstab file. - The
exitcommand exits the first EC2 instance.
Step 4: Attach the EBS Volume to the Second EC2 Instance
To attach the EBS volume to the second EC2 instance, run the following command:
# Attach the EBS volume to the second EC2 instanceaws ec2 attach-volume \--device /dev/sdf \--instance-id $AWS_EC2_INSTANCE_2 \--volume-id $AWS_EBS_VOLUMEExplanation:
- The
aws ec2 attach-volumecommand attaches the EBS volume to the second EC2 instance. - The
--deviceoption specifies the device name. - The
--instance-idoption specifies the instance ID. - The
--volume-idoption specifies the volume ID.
Step 5: Create a File System and Mount the EBS Volume
To create a file system and mount the EBS volume, run the following command:
# connect to the second EC2 instancessh -i aws-key-pair.pem ec2-user@$AWS_EC2_INSTANCE_2_PUBLIC_IP
# create a file systemsudo mkfs -t ext4 /dev/xvdf
# create a directorysudo mkdir /data
# mount the EBS volumesudo mount /dev/xvdf /data
# add the EBS volume to the fstab filesudo echo "/dev/xvdf /data ext4 defaults 0 0" >> /etc/fstab
# exit the second EC2 instanceexitExplanation:
- The
sshcommand connects to the second EC2 instance. - The
sudo mkfs -t ext4 /dev/xvdfcommand creates a file system. - The
sudo mkdir /datacommand creates a directory. - The
sudo mount /dev/xvdf /datacommand mounts the EBS volume. - The
sudo echo "/dev/xvdf /data ext4 defaults 0 0" >> /etc/fstabcommand adds the EBS volume to the fstab file. - The
exitcommand exits the second EC2 instance.
Create an EFS File System
Step 1: Create an EFS File System
To create an EFS file system, run the following command:
# Create an EFS file systemAWS_EFS_FILE_SYSTEM=$(aws efs create-file-system \--performance-mode generalPurpose \--throughput-mode bursting \--query 'FileSystemId' \--output text)
# Add a tag to the EFS file systemaws efs create-tags \--file-system-id $AWS_EFS_FILE_SYSTEM \--tags Key=Name,Value=efs-file-systemExplanation:
- The
aws efs create-file-systemcommand creates an EFS file system. - The
--performance-modeoption specifies the performance mode. - The
--throughput-modeoption specifies the throughput mode. - The
--queryoption specifies the query to retrieve the file system ID. - The
--outputoption specifies the output format. - The
aws efs create-tagscommand adds a tag to the EFS file system.
Step 2: Create an EFS Mount Target
To create an EFS mount target, run the following command:
# Create an EFS mount targetAWS_EFS_MOUNT_TARGET=$(aws efs create-mount-target \--file-system-id $AWS_EFS_FILE_SYSTEM \--subnet-id $AWS_PUBLIC_SUBNET \--security-groups $AWS_SECURITY_GROUP \--query 'MountTargetId' \--output text)Explanation:
- The
aws efs create-mount-targetcommand creates an EFS mount target. - The
--file-system-idoption specifies the file system ID. - The
--subnet-idoption specifies the subnet ID. - The
--security-groupsoption specifies the security group ID. - The
--queryoption specifies the query to retrieve the mount target ID. - The
--outputoption specifies the output format.
Step 3: Mount the EFS File System to Two EC2 Instances
To mount the EFS file system to two EC2 instances, run the following command:
# connect to the first EC2 instancessh -i aws-key-pair.pem ec2-user@$AWS_EC2_INSTANCE_1_PUBLIC_IP
# mount the EFS file systemsudo mount -t nfs4 -o nfsvers=4.1,rsize=1048576,wsize=1048576,hard,timeo=600,retrans=2 $AWS_EFS_FILE_SYSTEM.efs.$AVAILABILITY_ZONE.amazonaws.com:/ /var/www/html
# add the EFS file system to the fstab filesudo echo "$AWS_EFS_FILE_SYSTEM.efs.$AVAILABILITY_ZONE.amazonaws.com:/ /var/www/html nfs4 nfsvers=4.1,rsize=1048576,wsize=1048576,hard,timeo=600,retrans=2 0 0" >> /etc/fstab
# exit the first EC2 instanceexit
# connect to the second EC2 instancessh -i aws-key-pair.pem ec2-user@$AWS_EC2_INSTANCE_2_PUBLIC_IP
# mount the EFS file systemsudo mount -t nfs4 -o nfsvers=4.1,rsize=1048576,wsize=1048576,hard,timeo=600,retrans=2 $AWS_EFS_FILE_SYSTEM.efs.$AVAILABILITY_ZONE.amazonaws.com:/ /var/www/html
# add the EFS file system to the fstab filesudo echo "$AWS_EFS_FILE_SYSTEM.efs.$AVAILABILITY_ZONE.amazonaws.com:/ /var/www/html nfs4 nfsvers=4.1,rsize=1048576,wsize=1048576,hard,timeo=600,retrans=2 0 0" >> /etc/fstab
# exit the second EC2 instanceexitExplanation:
- The
sshcommand connects to the first EC2 instance. - The
sudo mount -t nfs4 -o nfsvers=4.1,rsize=1048576,wsize=1048576,hard,timeo=600,retrans=2 $AWS_EFS_FILE_SYSTEM.efs.$AVAILABILITY_ZONE.amazonaws.com:/ /var/www/htmlcommand mounts the EFS file system. - The
sudo echo "$AWS_EFS_FILE_SYSTEM.efs.$AVAILABILITY_ZONE.amazonaws.com:/ /var/www/html nfs4 nfsvers=4.1,rsize=1048576,wsize=1048576,hard,timeo=600,retrans=2 0 0" >> /etc/fstabcommand adds the EFS file system to the fstab file. - The
exitcommand exits the first EC2 instance. - The
sshcommand connects to the second EC2 instance. - The
sudo mount -t nfs4 -o nfsvers=4.1,rsize=1048576,wsize=1048576,hard,timeo=600,retrans=2 $AWS_EFS_FILE_SYSTEM.efs.$AVAILABILITY_ZONE.amazonaws.com:/ /var/www/htmlcommand mounts the EFS file system. - The
sudo echo "$AWS_EFS_FILE_SYSTEM.efs.$AVAILABILITY_ZONE.amazonaws.com:/ /var/www/html nfs4 nfsvers=4.1,rsize=1048576,wsize=1048576,hard,timeo=600,retrans=2 0 0" >> /etc/fstabcommand adds the EFS file system to the fstab file. - The
exitcommand exits the second EC2 instance.
Create a Database Replication on EBS
Step 1: Create a Database Replication on EBS
To create a database replication on EBS, run the following command:
- Connect to the first EC2 instance.
# Connect to the first EC2 instancessh -i aws-key-pair.pem ec2-user@$AWS_EC2_INSTANCE_1_PUBLIC_IP- Create a database Replication
# VariablesROOT_DB_PASSWORD="121612"
# Create a database Replicationsudo mysql -u root -p$ROOT_DB_PASSWORD -e "CREATE USER 'replication'@'%' IDENTIFIED BY '121612';"sudo mysql -u root -p$ROOT_DB_PASSWORD -e "GRANT REPLICATION SLAVE ON *.* TO 'replication'@'%';"sudo mysql -u root -p$ROOT_DB_PASSWORD -e "FLUSH PRIVILEGES;"sudo mysql -u root -p$ROOT_DB_PASSWORD -e "SHOW MASTER STATUS;"Explanation:
-
The
sudo mysql -u root -p$ROOT_DB_PASSWORD -e "CREATE USER 'replication'@'%' IDENTIFIED BY '121612';"command creates a database replication. -
The
sudo mysql -u root -p$ROOT_DB_PASSWORD -e "GRANT REPLICATION SLAVE ON *.* TO 'replication'@'%';"command grants replication slave on all databases to the replication user. -
The
sudo mysql -u root -p$ROOT_DB_PASSWORD -e "FLUSH PRIVILEGES;"command flushes the privileges. -
The
sudo mysql -u root -p$ROOT_DB_PASSWORD -e "SHOW MASTER STATUS;"command shows the master status. -
Connect to the second EC2 instance.
# Connect to the second EC2 instancessh -i aws-key-pair.pem ec2-user@$AWS_EC2_INSTANCE_2_PUBLIC_IP- Create a database Replication
# VariablesROOT_DB_PASSWORD="121612"AWS_EC2_INSTANCE_1_PRIVATE_IP=''
# Create a database Replicationsudo mysql -u root -p$ROOT_DB_PASSWORD -e "CHANGE MASTER TO MASTER_HOST='$AWS_EC2_INSTANCE_1_PRIVATE_IP', MASTER_USER='replication', MASTER_PASSWORD='password', MASTER_LOG_FILE='mysql-bin.000001', MASTER_LOG_POS=0;"sudo mysql -u root -p$ROOT_DB_PASSWORD -e "START SLAVE;"sudo mysql -u root -p$ROOT_DB_PASSWORD -e "SHOW SLAVE STATUS\G;"Explanation:
- The
sudo mysql -u root -p$ROOT_DB_PASSWORD -e "CHANGE MASTER TO MASTER_HOST='$AWS_EC2_INSTANCE_1_PRIVATE_IP', MASTER_USER='replication', MASTER_PASSWORD='password', MASTER_LOG_FILE='mysql-bin.000001', MASTER_LOG_POS=0;"command changes the master to the first EC2 instance. - The
sudo mysql -u root -p$ROOT_DB_PASSWORD -e "START SLAVE;"command starts the slave. - The
sudo mysql -u root -p$ROOT_DB_PASSWORD -e "SHOW SLAVE STATUS\G;"command shows the slave status.
Test the Replication
Step 1: Test the Replication
To test the replication, run the following command:
- Connect to the first EC2 instance.
# Connect to the first EC2 instancessh -i aws-key-pair.pem ec2-user@$AWS_EC2_INSTANCE_1_PUBLIC_IP
# VariablesROOT_DB_PASSWORD="121612"
# Create a database MK LLCsudo mysql -u root -p$ROOT_DB_PASSWORD -e "CREATE DATABASE MKLLC;"
# Create a table userssudo mysql -u root -p$ROOT_DB_PASSWORD -e "USE MKLLC; CREATE TABLE users (id INT NOT NULL AUTO_INCREMENT, FIRST_NAME VARCHAR(255) NOT NULL, LAST_NAME VARCHAR(255) NOT NULL, PRIMARY KEY (id));"
# Insert a record to the table userssudo mysql -u root -p$ROOT_DB_PASSWORD -e "USE MKLLC; INSERT INTO users (FIRST_NAME, LAST_NAME) VALUES ('John', 'Doe');"sudo mysql -u root -p$ROOT_DB_PASSWORD -e "USE MKLLC; INSERT INTO users (FIRST_NAME, LAST_NAME) VALUES ('Jane', 'Doe');"sudo mysql -u root -p$ROOT_DB_PASSWORD -e "USE MKLLC; INSERT INTO users (FIRST_NAME, LAST_NAME) VALUES ('Jack', 'Doe');"sudo mysql -u root -p$ROOT_DB_PASSWORD -e "USE MKLLC; INSERT INTO users (FIRST_NAME, LAST_NAME) VALUES ('Jill', 'Doe');"sudo mysql -u root -p$ROOT_DB_PASSWORD -e "USE MKLLC; INSERT INTO users (FIRST_NAME, LAST_NAME) VALUES ('Joe', 'Doe');"
# Select all records from the table userssudo mysql -u root -p$ROOT_DB_PASSWORD -e "USE MKLLC; SELECT * FROM users;"Explanation:
-
The
sudo mysql -u root -p$ROOT_DB_PASSWORD -e "CREATE DATABASE MKLLC;"command creates a database MK LLC. -
The
sudo mysql -u root -p$ROOT_DB_PASSWORD -e "USE MKLLC; CREATE TABLE users (id INT NOT NULL AUTO_INCREMENT, FIRST_NAME VARCHAR(255) NOT NULL, LAST_NAME VARCHAR(255) NOT NULL, PRIMARY KEY (id));"command creates a table users. -
The
sudo mysql -u root -p$ROOT_DB_PASSWORD -e "USE MKLLC; INSERT INTO users (FIRST_NAME, LAST_NAME) VALUES ('FIRST_NAME', 'FIRST_NAME');"command inserts a record to the table users. -
The
sudo mysql -u root -p$ROOT_DB_PASSWORD -e "USE MKLLC; SELECT * FROM users;"command selects all records from the table users. -
Connect to the second EC2 instance.
# Connect to the second EC2 instancessh -i aws-key-pair.pem ec2-user@$AWS_EC2_INSTANCE_2_PUBLIC_IP
# VariablesROOT_DB_PASSWORD="121612"
# Select all records from the table userssudo mysql -u root -p$ROOT_DB_PASSWORD -e "USE MKLLC; SELECT * FROM users;"If the replication is successful, the command returns the following output:
+----+------------+-----------+| id | FIRST_NAME | LAST_NAME |+----+------------+-----------+| 1 | John | Doe || 2 | Jane | Doe || 3 | Jack | Doe || 4 | Jill | Doe || 5 | Joe | Doe |+----+------------+-----------+The command tests the replication.
Why is the Replication Important?
The replication is important because it provides the following benefits:
- It provides high availability.
- It provides disaster recovery.
- It provides data redundancy.
- It provides data security.
The replication is important.
Conclusion
In this article, you learned how to create a database replication on EBS and EFS. You also learned why the replication is important.
Resources
- Amazon EC2 User Guide for Linux Instances
- Amazon EBS User Guide
- Amazon EFS User Guide
- Amazon VPC User Guide
- AWS Command Line Interface (CLI) User Guide
- AWS CLI Command Reference - ec2
- AWS CLI Command Reference - efs
- AWS Identity and Access Management (IAM) User Guide
- MySQL Replication Documentation
- Mounting EFS file systems
- Attaching an Amazon EBS volume to an instance
- User data and shell scripts for EC2 instances
- Security groups for your VPC
- Tutorial: Installing a LAMP Web Server on Amazon Linux 2 (Relevant for setting up MariaDB/PHP)