Introduction
We will learn how to create an AWS EC2 instance using AWS CLI in this tutorial. We will also discover how to set up an AWS EC2 instance so that it functions with the Apache web server. We will also discover how to set up an AWS EC2 instance so that it functions with WordPress.
Prerequisites
To follow along with this tutorial, you will need:
- An AWS account.
- An AWS IAM user with the following permissions:
- AmazonEC2FullAccess
- AmazonVPCFullAccess
- An AWS CLI installed on your computer.
- An SSH client installed on your computer.
Create an AWS VPC
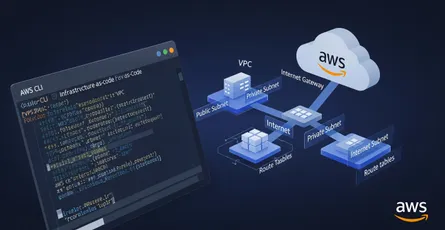
Before we create an AWS EC2 instance using AWS CLI, we need to create a VPC. We will also create a public and private subnet, an internet gateway, and a route table.
Create an VPC
To create a VPC, run the following command:
# Create a VPCAWS_VPC=$(aws ec2 create-vpc \--cidr-block 10.0.0.0/16 \--query 'Vpc.{VpcId:VpcId}' \--output text)
# Add a name tag to the VPCaws ec2 create-tags \--resources $AWS_VPC \--tags Key=Name,Value=DevOpsVPCModify your custom VPC and enable DNS hostname support, and DNS support
To modify your custom VPC and enable DNS hostname support, and DNS support, run the following command:
# Enable DNS hostnamesaws ec2 modify-vpc-attribute \--vpc-id $AWS_VPC \--enable-dns-hostnames "{\"Value\":true}"
# Enable DNS supportaws ec2 modify-vpc-attribute \--vpc-id $AWS_VPC \--enable-dns-support "{\"Value\":true}"Create a Public Subnet
To create a public subnet, run the following command:
# Create a public subnetAWS_PUBLIC_SUBNET=$(aws ec2 create-subnet \--vpc-id $AWS_VPC \--cidr-block 10.0.1.0/24 \--availability-zone us-east-1a \--query 'Subnet.{SubnetId:SubnetId}' \--output text)
# Add a name tag to the public subnetaws ec2 create-tags \--resources $AWS_PUBLIC_SUBNET \--tags Key=Name,Value=DevOpsPublicSubnetCreate a Private Subnet
To create a private subnet, run the following command:
# create a private subnetAWS_PRIVATE_SUBNET=$(aws ec2 create-subnet \--vpc-id $AWS_VPC \--cidr-block 10.0.2.0/24 \--availability-zone us-east-1a \--query 'Subnet.{SubnetId:SubnetId}' \--output text)
# Add a name tag to the private subnetaws ec2 create-tags \--resources $AWS_PRIVATE_SUBNET \--tags Key=Name,Value=DevOpsPrivateSubnetEnable Auto-assign Public IP on the subnet
To enable auto-assign public IP on the subnet, run the following command:
# Enable auto-assign public IP on the public subnetaws ec2 modify-subnet-attribute \--subnet-id $AWS_PUBLIC_SUBNET \--map-public-ip-on-launchCreate an Internet Gateway
To create an internet gateway, run the following command:
AWS_INTERNET_GATEWAY=$(aws ec2 create-internet-gateway \--query 'InternetGateway.{InternetGatewayId:InternetGatewayId}' \--output text)
# Add a name tag to the Internet Gatewayaws ec2 create-tags \--resources $AWS_INTERNET_GATEWAY \--tags Key=Name,Value=DevOpsInternetGatewayCreate an NAT gateway
To create an NAT gateway, run the following command:
# Get Elastic IPAWS_ELASTIC_IP=$(aws ec2 allocate-address \--domain vpc \--query 'AllocationId' \--output text)
# Create a NAT gatewayAWS_NAT_GATEWAY=$(aws ec2 create-nat-gateway \--subnet-id $AWS_PUBLIC_SUBNET \--allocation-id $AWS_EIP_ALLOCATION \--query 'NatGateway.{NatGatewayId:NatGatewayId}' \--output text)
# Add a name tag to the NAT gatewayaws ec2 create-tags \--resources $AWS_NAT_GATEWAY \--tags Key=Name,Value=DevOpsNATGatewayAttach the Internet gateway to your VPC
To attach the Internet gateway to your VPC, run the following command:
# Attach the Internet gateway to your VPCaws ec2 attach-internet-gateway \--vpc-id $AWS_VPC \--internet-gateway-id $AWS_INTERNET_GATEWAY \--query 'InternetGateway.{InternetGatewayId:InternetGatewayId}' \--output textCreate a custom route table
To create a route table, run the following command:
# Create a custom route tableAWS_ROUTE_TABLE=$(aws ec2 create-route-table \--vpc-id $AWS_VPC \--query 'RouteTable.{RouteTableId:RouteTableId}' \--output text)
# Add a name tag to the route tableaws ec2 create-tags \--resources $AWS_ROUTE_TABLE \--tags Key=Name,Value=DevOpsRouteTableCreate a custom route table association
To create a custom route table association, run the following command:
# Create a custom route table associationaws ec2 associate-route-table \--route-table-id $AWS_ROUTE_TABLE \--subnet-id $AWS_PUBLIC_SUBNET \--output textAssociate the subnet with route table, making it a public subnet
To associate the subnet with route table, making it a public subnet, run the following command:
# Associate the subnet with route table, making it a public subnetaws ec2 create-route \--route-table-id $AWS_ROUTE_TABLE \--destination-cidr-block 0.0.0.0/0 \--gateway-id $AWS_INTERNET_GATEWAY \--output textAssociate the NAT gateway with the route table, making it a private subnet
To associate the NAT gateway with the route table, making it a private subnet, run the following command:
# Associate the NAT gateway with the route table, making it a private subnetaws ec2 create-route \--route-table-id $AWS_ROUTE_TABLE \--destination-cidr-block 10.2.0.0/24 \--nat-gateway-id $AWS_NAT_GATEWAY \--output textCreate a security group
To create a security group, run the following command:
# Create a security groupAWS_SECURITY_GROUP=$(aws ec2 create-security-group \--group-name DevOpsSG \--description "DevOps Security Group" \--vpc-id $AWS_VPC \--query 'GroupId' \--output text)
# Add a name tag to the security groupaws ec2 create-tags \--resources $AWS_SECURITY_GROUP \--tags Key=Name,Value=DevOpsSGAdd a rule to the security group
To add a rule to the security group, run the following command:
# Add a rule to the security group
# Add SSH ruleaws ec2 authorize-security-group-ingress \--group-id $AWS_SECURITY_GROUP \--protocol tcp \--port 22 \--cidr 0.0.0.0/0 \--output text
# Add HTTP ruleaws ec2 authorize-security-group-ingress \--group-id $AWS_SECURITY_GROUP \--protocol tcp \--port 80 \--cidr 0.0.0.0/0 \--output textCreate an AWS EC2 instance
Get the latest AMI ID
To get the latest AMI ID, run the following command:
# Get the latest AMI IDAWS_AMI=$(aws ec2 describe-images \ --owners 'amazon' \ --filters 'Name=name,Values=amzn2-ami-hvm-2.0.*' \ 'Name=state,Values=available' \ --query 'sort_by(Images, &CreationDate)[-1].[ImageId]' \ --output 'text')Create a key pair
To create a key pair, run the following command:
# Create a key pairaws ec2 create-key-pair \--key-name DevOpsKeyPair \--query 'KeyMaterial' \--output text > DevOpsKeyPair.pem
# Change the permission of the key pairchmod 400 DevOpsKeyPair.pemCreate an EC2 instance
Before creating an EC2 instance, you need to create a user data script. That script will be automation previous three blog posts:
- How to Install Apache Web Server on Amazon Linux 2
- How to Install PHP and MariaDB on Amazon Linux 2
- How To Create An AWS EC2 Instance Using AWS CLI
You can find the user data script in the GitHub repository
# Create a bash script to update packages, install git and clone the repo, and run the scriptcat <<EOF > install.sh#!/bin/bash
# Update packagessudo yum update -y
# Install gitsudo yum install git -y
# Clone the repogit clone https://github.com/MKAbuMattar/install-and-setup-wordpress-on-amazon-linux-2.git
# Run the scriptbash install-and-setup-wordpress-on-amazon-linux-2/script.sh mkabumattar 121612 121612 wordpressdb wordpressuser passwordEOFTo create an EC2 instance, run the following command:
# Create an EC2 instanceAWS_EC2_INSTANCE=$(aws ec2 run-instances \--image-id $AWS_AMI \--instance-type t2.micro \--key-name DevOpsKeyPair \--monitoring "Enabled=false" \--security-group-ids $AWS_SECURITY_GROUP \--subnet-id $AWS_PUBLIC_SUBNET \--user-data file://install.sh \--private-ip-address 10.0.1.10 \--query 'Instances[0].InstanceId' \--output text)
# Add a name tag to the EC2 instanceaws ec2 create-tags \--resources $AWS_EC2_INSTANCE \--tags "Key=Name,Value=DevOpsInstance"Check the status of the EC2 instance
To check the status of the EC2 instance, run the following command:
# Check the status of the EC2 instanceaws ec2 describe-instances \--instance-ids $AWS_EC2_INSTANCE \--query 'Reservations[*].Instances[*].[InstanceId,State.Name,PublicIpAddress]' \--output textGet the public ip address of your instance
To get the public ip address of your instance, run the following command:
# Get the public ip address of your instanceAWS_PUBLIC_IP=$(aws ec2 describe-instances \--instance-ids $AWS_EC2_INSTANCE \--query 'Reservations[*].Instances[*].[PublicIpAddress]' \--output text)
echo $AWS_EC2_INSTANCE_PUBLIC_IPSSH into the EC2 instance
To SSH into the EC2 instance, run the following command:
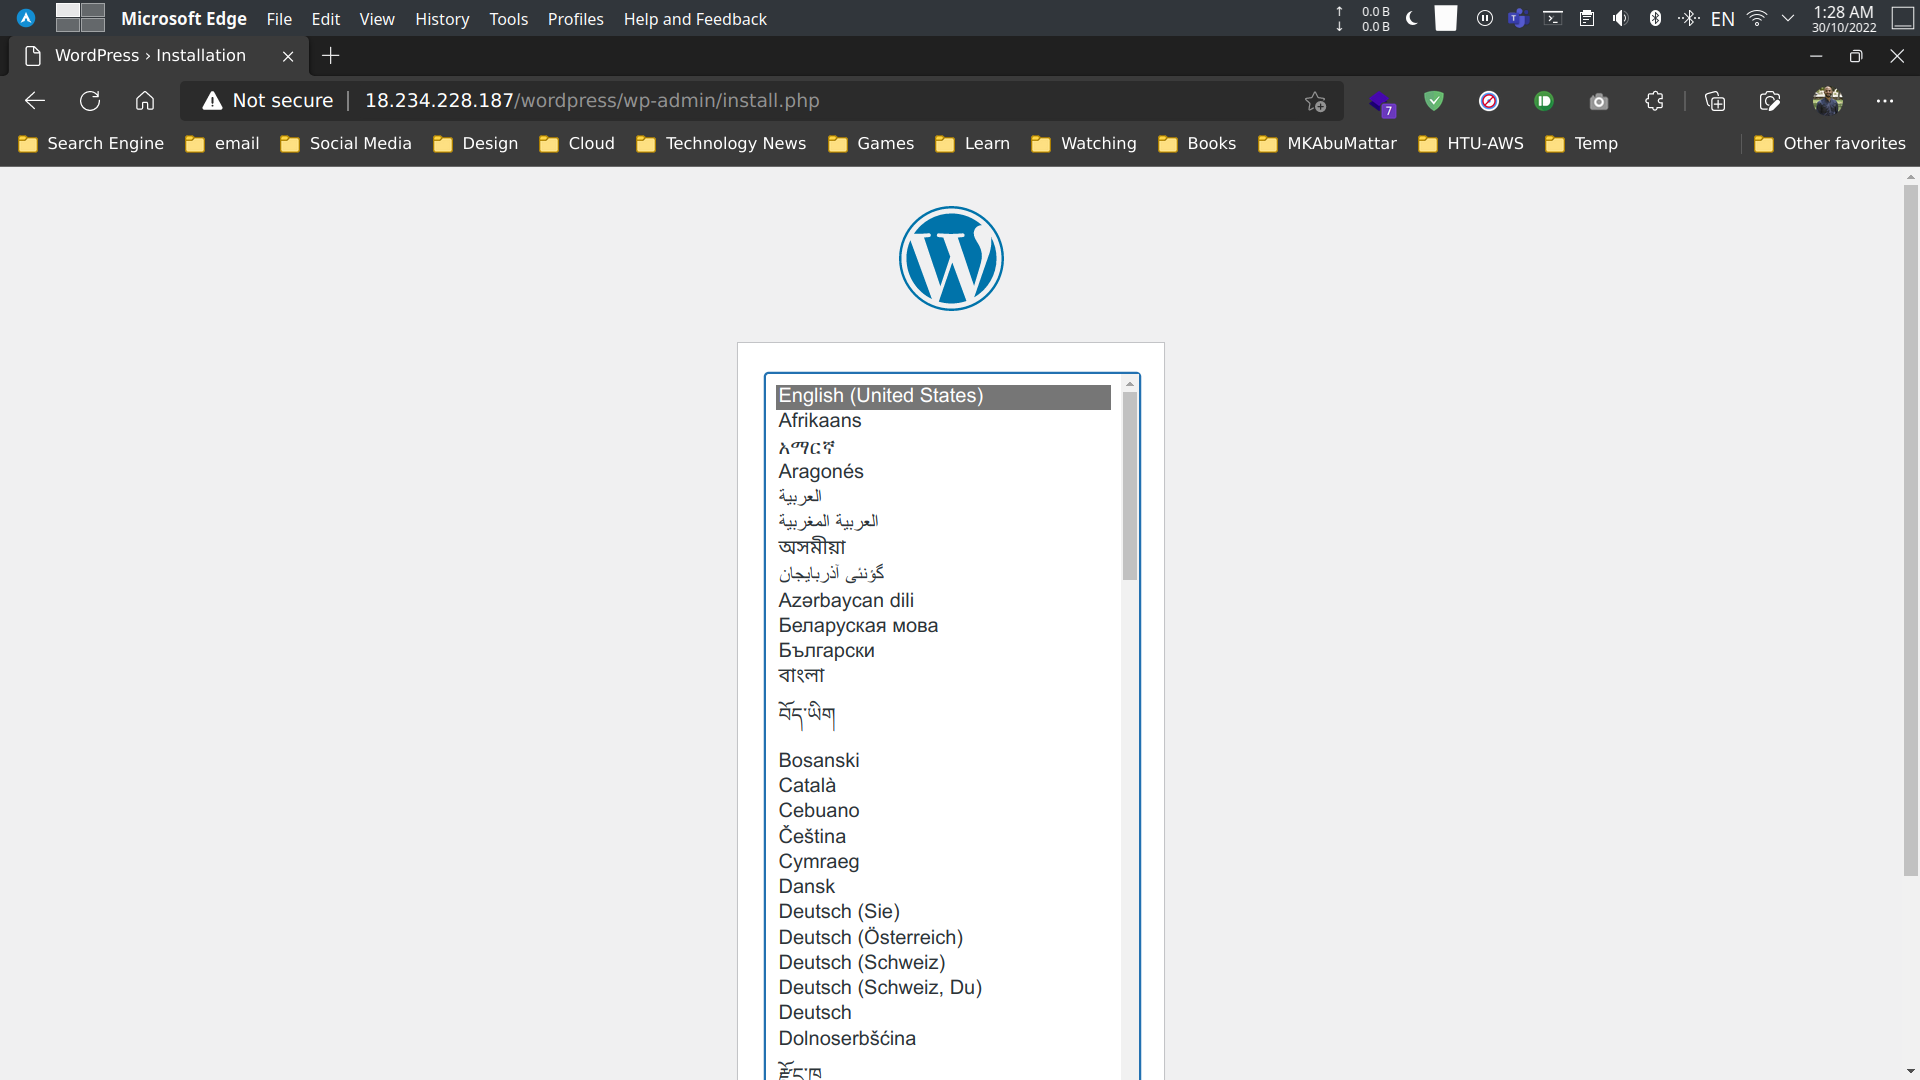
# SSH into the EC2 instancessh -i DevOpsKeyPair.pem ec2-user@$AWS_PUBLIC_IPShow the WordPress website
Conclusion
In this blog post, you learned how to create a VPC, a public subnet, a private subnet, a NAT gateway, a route table, a security group, and an EC2 instance. You also learned how to SSH into the EC2 instance.
References
- AWS CLI Command Reference - EC2
- AWS CLI Command Reference -
ec2 create-vpc - AWS CLI Command Reference -
ec2 create-subnet - AWS CLI Command Reference -
ec2 create-internet-gateway - AWS CLI Command Reference -
ec2 create-nat-gateway - AWS CLI Command Reference -
ec2 create-route-table - AWS CLI Command Reference -
ec2 create-security-group - AWS CLI Command Reference -
ec2 run-instances - AWS CLI Command Reference -
ec2 create-key-pair - Amazon EC2 User Guide for Linux Instances - User Data
- Amazon VPC User Guide
- WordPress Official Website
- Tutorial: Installing a LAMP Web Server on Amazon Linux 2
- GitHub Repository for User Data Script
- AWS Identity and Access Management (IAM) User Guide