Introduction
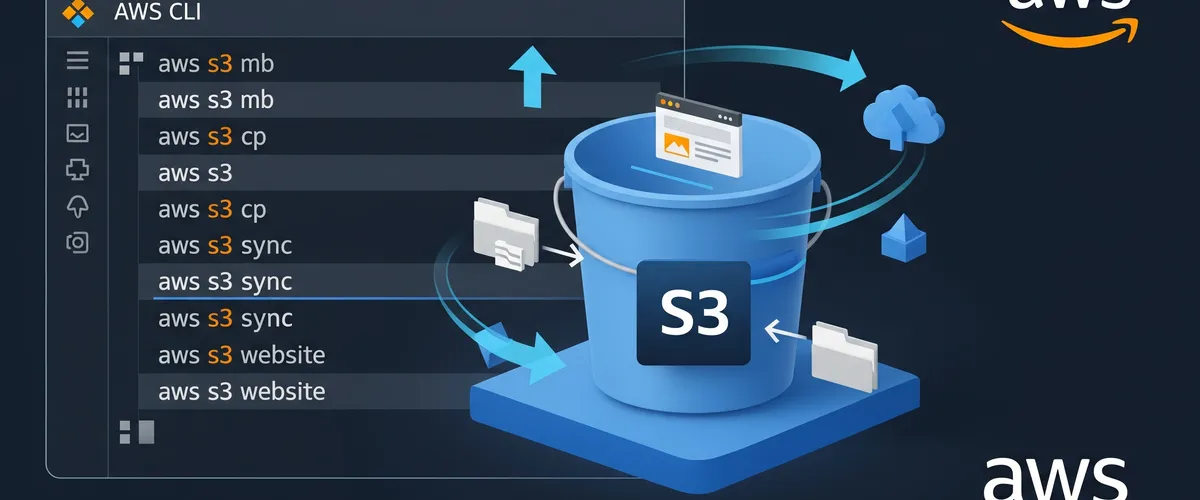
In this post, I will show you how to create a AWS S3 bucket using AWS CLI.
Prerequisites
You need to have:
- AWS CLI installed and configured
- AWS S3 bucket name
AWS S3 Bucket
Step 1: Create AWS S3 Bucket
To create a AWS S3 bucket, run the following command:
aws s3 mb s3://<BUCKET_NAME>Explanation:
aws s3 mb- Create a buckets3://<BUCKET_NAME>- Bucket name
Note
- The bucket name must be unique across all existing bucket names in Amazon S3.
- You can use the
--regionoption to specify the region where the bucket will be created. - You can use the
--acloption to specify the access control list (ACL) for the bucket. - You can use the
--create-bucket-configurationoption to specify the bucket configuration. - You can use the
--grantsoption to specify the grantee and permission for each grantee.
Step 2: List AWS S3 Buckets
To list all AWS S3 buckets, run the following command:
aws s3 lsExplanation:
aws s3 ls- List all buckets
Step 3: Upload File to AWS S3 Bucket
To upload a file to AWS S3 bucket, run the following command:
aws s3 cp <FILE_PATH> s3://<BUCKET_NAME>Explanation:
aws s3 cp- Copy an object<FILE_PATH>- File path in your local machines3://<BUCKET_NAME>- Bucket name where the file will be uploaded
Step 4: Download File from AWS S3 Bucket
To download a file from AWS S3 bucket, run the following command:
aws s3 cp s3://<BUCKET_NAME>/<FILE_NAME> <FILE_PATH>Explanation:
aws s3 cp- Copy an objects3://<BUCKET_NAME>/<FILE_NAME>- Bucket name and file name where the file will be downloaded from<FILE_PATH>- File path in your local machine
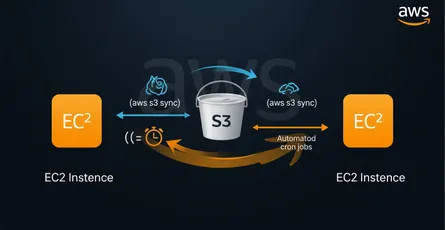
Step 5: Sync Local Directory with AWS S3 Bucket
To sync a local directory with AWS S3 bucket, run the following command:
aws s3 sync <LOCAL_DIRECTORY_PATH> s3://<BUCKET_NAME>Explanation:
aws s3 sync- Sync a local directory with a S3 bucket<LOCAL_DIRECTORY_PATH>- Local directory path in your local machines3://<BUCKET_NAME>- Bucket name where the local directory will be synced with
Step 6: Sync AWS S3 Bucket with Local Directory
To sync a AWS S3 bucket with local directory, run the following command:
aws s3 sync s3://<BUCKET_NAME> <LOCAL_DIRECTORY_PATH>Explanation:
aws s3 sync- Sync a S3 bucket with a local directorys3://<BUCKET_NAME>- Bucket name where the local directory will be synced with<LOCAL_DIRECTORY_PATH>- Local directory path in your local machine
Step 7: List Files in AWS S3 Bucket
To list all files in a AWS S3 bucket, run the following command:
aws s3 ls s3://<BUCKET_NAME>Explanation:
aws s3 ls- List all objects in a buckets3://<BUCKET_NAME>- Bucket name
Step 8: Move File in AWS S3 Bucket
To move a file in a AWS S3 bucket, run the following command:
aws s3 mv s3://<BUCKET_NAME>/<FILE_NAME> s3://<BUCKET_NAME>/<NEW_FILE_NAME>Explanation:
aws s3 mv- Move an objects3://<BUCKET_NAME>/<FILE_NAME>- Bucket name and file name where the file will be moved froms3://<BUCKET_NAME>/<NEW_FILE_NAME>- Bucket name and new file name where the file will be moved to
Step 9: Presign URL for AWS S3 Bucket
To presign a URL for a AWS S3 bucket, run the following command:
aws s3 presign s3://<BUCKET_NAME>/<FILE_NAME>Explanation:
aws s3 presign- Generate a presigned URL for an Amazon S3 object or a buckets3://<BUCKET_NAME>/<FILE_NAME>- Bucket name and file name where the file will be presigned
Note
- You can use the
--expires-inoption to specify the number of seconds before the presigned URL expires. - You can use the
--regionoption to specify the region where the bucket is located. - You can use the
--signature-versionoption to specify the signature version to use when signing the URL. - You can use the
--version-idoption to specify the version ID of the object that the presigned URL will be used to access.
Step 10: Delete File from AWS S3 Bucket
To delete a file from a AWS S3 bucket, run the following command:
aws s3 rm s3://<BUCKET_NAME>/<FILE_NAME>Explanation:
aws s3 rm- Remove an objects3://<BUCKET_NAME>/<FILE_NAME>- Bucket name and file name where the file will be deleted from
Step 11: Delete AWS S3 Bucket
To delete a AWS S3 bucket, run the following command:
aws s3 rb s3://<BUCKET_NAME>Explanation:
aws s3 rb- Remove a buckets3://<BUCKET_NAME>- Bucket name
Note
- You can use the
--forceoption to delete a non-empty bucket. - You can use the
--regionoption to specify the region where the bucket is located. - You can use the
--versioningoption to delete all objects (including all object versions and delete markers) in the bucket.
Step 12: Static Website Hosting
To host a static website on AWS S3 bucket, run the following command:
aws s3 website s3://<BUCKET_NAME> --index-document <INDEX_DOCUMENT> --error-document <ERROR_DOCUMENT>Explanation:
aws s3 website- Set the configuration of a bucket for website hostings3://<BUCKET_NAME>- Bucket name--index-document- The name of the index document (for example, index.html)--error-document- The name of the error document (for example, error.html)
Note
- You can use the
--regionoption to specify the region where the bucket is located. - You can use the
--website-configurationoption to specify the website configuration. - You can use the
--removeoption to remove the website configuration.
Conclusion
In this tutorial, you learned how to use the AWS CLI to manage AWS S3 buckets. You also learned how to upload, download, sync, list, move, presign, and delete files in AWS S3 buckets.
References
- Amazon S3 User Guide
- AWS CLI Command Reference - s3
- AWS CLI Command Reference - s3api (for more granular S3 operations)
- Working with Amazon S3 Buckets
- Uploading Objects to Amazon S3
- Downloading an Object from Amazon S3
- Syncing Folders with Amazon S3
- Listing Keys in an Amazon S3 Bucket
- Generating a Presigned URL for an S3 Object
- Deleting Objects from Amazon S3
- Deleting an S3 Bucket
- Hosting a Static Website on Amazon S3
- AWS CLI User Guide
- Bucket Naming Rules - Amazon S3