Introduction
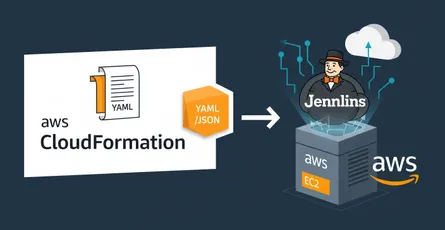
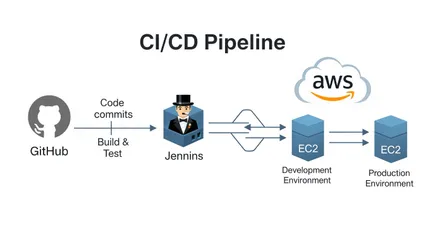
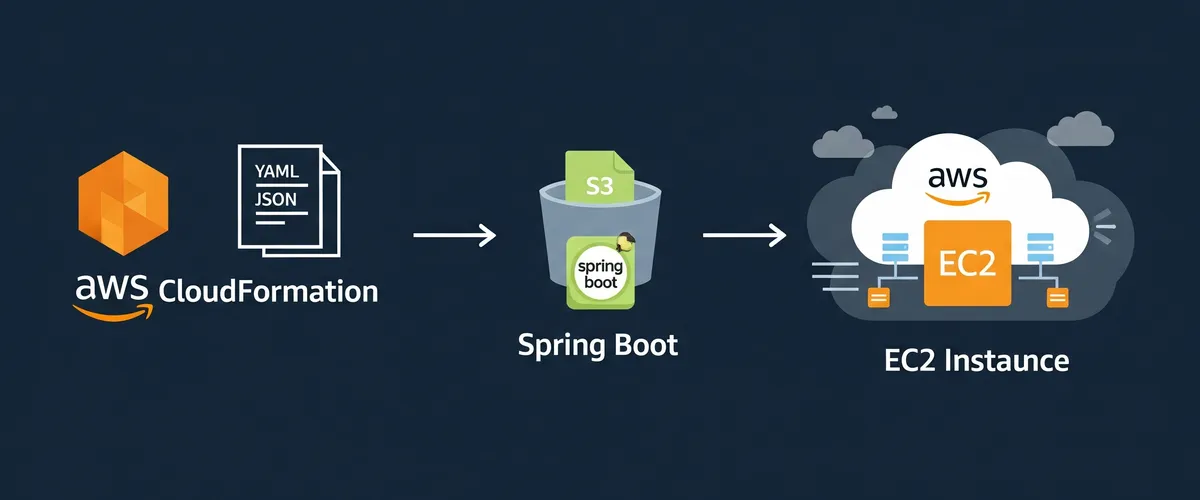
Deploying a Spring Boot application to the cloud can provide many benefits such as scalability and easy management. AWS CloudFormation is a service that allows for the creation and management of infrastructure as code, making it easy to provision and update resources. In this article, we will go over the steps to deploy a Spring Boot application to AWS CloudFormation. We will cover how to create a CloudFormation template, package the application into a deployable artifact, update the stack with the new version of the application, and set up continuous deployment to automatically update the application when new code is pushed to a version control repository. By the end of this guide, you will have a solid understanding of how to deploy a Spring Boot application to AWS CloudFormation.
Prerequisites
A few requirements must be satisfied before beginning to deploy a Spring Boot application to AWS CloudFormation.
- An AWS account is required to use AWS CloudFormation.
- The Spring Boot application should be already built and ready for deployment.
- Familiarity with AWS CloudFormation and the AWS Management Console is recommended.
- AWS CLI and AWS SDK should be installed in the local machine.
- AWS IAM user with permissions to create and update CloudFormation stacks.
- Familiarity with the Spring Boot application’s dependencies and configuration.
Before starting the deployment process, make sure you have met all the requirements.
Creating a CloudFormation template
What is a CloudFormation template?
AWS CloudFormation is a tool that enables you to model and provide all the resources required for your applications across all of your AWS accounts and locations in an automated and secure way using a single YAML or JSON file. Known as a CloudFormation template, this file.
All the AWS resources you wish to generate and configure for your application, together with their interdependencies, are listed in a CloudFormation template. The template is a text file with JSON or YAML formatting. You may use this straightforward, reusable, and simple-to-read framework to represent your infrastructure. To create, edit, and delete stacks using CloudFormation templates, utilize the AWS Management Console, AWS Command Line Interface (CLI), or SDKs.
A potent tool that enables you to design your infrastructure as code is the CloudFormation template. This implies that you may test your templates in various settings, version control them, and undo changes as needed. You may automate the construction and administration of your resources with CloudFormation, which can save you time and lower the possibility of human mistake.
Creating the template
You may create a CloudFormation template in one of three ways:
- From Scratch
- Using one of the sample templates provided by AWS CloudFormation
- Using the AWS CloudFormation Designer
From Scratch
You can create a template by hand using a text editor. You can use either JSON or YAML to write the template, however, YAML is more human-readable and less verbose.
Using one of the sample templates provided by AWS CloudFormation
AWS CloudFormation provides a number of sample templates that cover different scenarios and use cases. You can use these templates as a starting point and customize them to suit your needs.
Using the AWS CloudFormation Designer
The AWS CloudFormation Designer is a visual editor that allows you to create a CloudFormation template by dragging and dropping resources. You can use the AWS CloudFormation Designer to create a template for a simple application, but it is not recommended for more complex applications.
Template structure
Six primary parts make up a CloudFormation template:
- “AWSTemplateFormatVersion”: This field is required and specifies the format version of the CloudFormation template. The current version is “2010-09-09”
- “Description”: This field is optional and provides a brief description of the stack and its resources.
- “Metadata”: This field is optional and provides additional information about the template and its resources.
- “Parameters”: This field is optional and allows you to pass input values to the template at runtime. This allows you to customize the stack’s resources.
- “Resources”: This field is required and defines the stack’s resources and their properties.
- “Outputs”: This field is optional and allows you to output values from the stack’s resources. This can be useful for displaying information about the stack’s resources after it is created.
Understanding a CloudFormation template’s structure and the many elements it consists of is crucial since doing so will make it easier for you to develop and alter your templates.
Creating a CloudFormation template for a Spring Boot application
We’ll build a CloudFormation template for a Spring Boot application in this part. Although we will start from scratch, you are free to apply any of the techniques mentioned in the previous section. The template will deploy the Spring Boot application, set up Java, and establish an EC2 instance. To increase the application’s scalability and fault tolerance, you may utilize advanced AWS services like a load balancer, auto-scaling groups, and others.
Template structure
The template will consist of the following sections:
- AWSTemplateFormatVersion
- Description
- Parameters
- Metadata
- Resources
- Outputs
AWSTemplateFormatVersion
The first section of the template is the AWSTemplateFormatVersion section. This section is required and specifies the format version of the CloudFormation template. The current version is “2010-09-09”.
AWSTemplateFormatVersion: 2010-09-09Description
The next section is the Description section. This section is optional and provides a brief description of the stack and its resources.
Description: >- This template deploys a Spring Boot application to AWS CloudFormation.Parameters
The next section is the Parameters section. This section is optional and allows you to pass input values to the template at runtime. This allows you to customize the stack’s resources.
Parameters: KeyName: Description: Name of an existing EC2 KeyPair to enable SSH access to the instance Type: AWS::EC2::KeyPair::KeyName ConstraintDescription: must be the name of an existing EC2 KeyPair. InstanceType: Description: WebServer EC2 instance type Type: String Default: t2.micro AllowedValues: - t2.nano - t2.micro - t2.small - t2.medium - t2.large - t2.xlarge - t2.2xlarge - t3.nano - t3.micro - t3.small - t3.medium - t3.large - t3.xlarge - t3.2xlarge - m1.small - m1.medium - m1.large - m1.xlarge - m2.xlarge - m2.2xlarge - m2.4xlarge - m3.medium - m3.large - m3.xlarge - m3.2xlarge - m4.large - m4.xlarge - m4.2xlarge - m4.4xlarge - m4.10xlarge - m4.16xlarge - m5.large - m5.xlarge - m5.2xlarge - m5.4xlarge - m5.12xlarge - m5.24xlarge - m5d.large - m5d.xlarge - m5d.2xlarge - m5d.4xlarge - m5d.12xlarge - m5d.24xlarge - c1.medium - c1.xlarge - c3.large - c3.xlarge - c3.2xlarge - c3.4xlarge - c3.8xlarge - c4.large - c4.xlarge - c4.2xlarge - c4.4xlarge - c4.8xlarge - c5.large - c5.xlarge - c5.2xlarge - c5.4xlarge - c5.9xlarge ConstraintDescription: must be a valid EC2 instance type. AMI: Description: >- The ID of the Amazon Machine Image (AMI) that you want to use to launch the instances. Type: AWS::SSM::Parameter::Value<AWS::EC2::Image::Id> Default: /aws/service/ami-amazon-linux-latest/amzn2-ami-hvm-x86_64-gp2The template contains three parameters:
- KeyName: This parameter specifies the name of an existing EC2 KeyPair to enable SSH access to the instance.
- InstanceType: This parameter specifies the EC2 instance type.
- AMI: This parameter specifies the ID of the Amazon Machine Image (AMI) that you want to use to launch the instances.
Metadata
The next section is the Metadata section. This section is optional and provides additional information about the template and its resources.
Metadata: AWS::CloudFormation::Interface: ParameterGroups: - Label: default: EC2 Instance Configuration Parameters: - KeyName - InstanceType - AMI ParameterLabels: KeyName: default: EC2 Key Pair InstanceType: default: EC2 Instance Type AMI: default: Amazon Machine Image (AMI)Resources
The next section is the Resources section. This section is required and defines the stack’s resources and their properties.
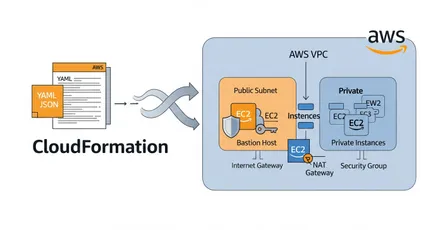
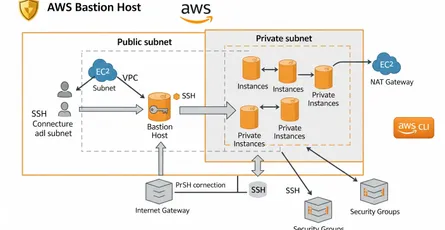
Resources: VPC: Type: AWS::EC2::VPC Properties: CidrBlock: 15.0.0.0/16 EnableDnsSupport: true EnableDnsHostnames: true Tags: - Key: Name Value: !Sub ${AWS::StackName}-VPC
PublicSubnet: Type: AWS::EC2::Subnet DependsOn: - VPC Properties: VpcId: !Ref VPC CidrBlock: 15.0.0.0/24 AvailabilityZone: !Select [0, !GetAZs ''] MapPublicIpOnLaunch: true Tags: - Key: Name Value: !Sub ${AWS::StackName}-PublicSubnet
IGW: Type: AWS::EC2::InternetGateway Properties: Tags: - Key: Name Value: !Sub ${AWS::StackName}-IGW VPCGatewayAttachment: Type: AWS::EC2::VPCGatewayAttachment DependsOn: - VPC - IGW Properties: VpcId: !Ref VPC InternetGatewayId: !Ref IGW
PublicRouteTable: Type: AWS::EC2::RouteTable DependsOn: - VPC Properties: VpcId: !Ref VPC Tags: - Key: Name Value: !Sub ${AWS::StackName}-PublicRouteTable
PublicRoute: Type: AWS::EC2::Route Properties: RouteTableId: !Ref PublicRouteTable DestinationCidrBlock: 0.0.0.0/0 GatewayId: !Ref IGW
PublicSubnetRouteTableAssociation: Type: AWS::EC2::SubnetRouteTableAssociation DependsOn: - PublicRouteTable - PublicSubnet Properties: SubnetId: !Ref PublicSubnet RouteTableId: !Ref PublicRouteTable
SpringBootSG: Type: AWS::EC2::SecurityGroup DependsOn: - VPC Properties: GroupDescription: Security group for Spring Boot application VpcId: !Ref VPC SecurityGroupIngress: - IpProtocol: tcp FromPort: 22 ToPort: 22 CidrIp: 0.0.0.0/0 - IpProtocol: tcp FromPort: 8080 ToPort: 8080 CidrIp: 0.0.0.0/0 Tags: - Key: Name Value: !Sub ${AWS::StackName}-SpringBootSG
S3CodeBucket: Type: AWS::S3::Bucket Properties: BucketName: !Join - '-' - - code-bucket - !Ref AWS::Region - !Select - 0 - !Split - '-' - !Select - 2 - !Split - '/' - !Ref 'AWS::StackId' AccessControl: Private Tags: - Key: Name Value: !Sub ${AWS::StackName}-S3CodeBucket
SprerBootEC2: Type: AWS::EC2::Instance DependsOn: - SpringBootSG - PublicSubnet Properties: ImageId: !Ref AMI InstanceType: !Ref InstanceType KeyName: !Ref KeyName NetworkInterfaces: - AssociatePublicIpAddress: true DeviceIndex: 0 GroupSet: - !Ref SpringBootSG SubnetId: !Ref PublicSubnet UserData: Fn::Base64: !Sub - | #!/bin/bash sudo yum update -y sudo amazon-linux-extras enable java-openjdk11 -y sudo amazon-linux-extras install java-openjdk11 -y sudo yum install -y java-11-openjdk-devel - {} Tags: - Key: Name Value: !Sub ${AWS::StackName}-SpringBootEC2The template contains the following resources:
- VPC: This resource creates a VPC with a CIDR block of
15.0.0.0/16. - PublicSubnet: This resource creates a public subnet with a CIDR block of
15.0.0.0/24. - IGW: This resource creates an Internet Gateway.
- VPCGatewayAttachment: This resource attaches the Internet Gateway to the VPC.
- PublicRouteTable: This resource creates a public route table.
- PublicRoute: This resource creates a public route.
- PublicSubnetRouteTableAssociation: This resource associates the public route table with the public subnet.
- SpringBootSG: This resource creates a security group for the Spring Boot application.
- S3CodeBucket: This resource creates an S3 bucket to store the Spring Boot application code.
- SprerBootEC2: This resource creates an EC2 instance to host the Spring Boot application.
Outputs
The next section is the Outputs section. This section is optional and provides information about the stack’s resources.
Outputs: S3CodeBucket: Description: S3 bucket to store the Spring Boot application code Value: !Ref S3CodeBucket SpringBootEC2: Description: Spring Boot EC2 instance Value: !Ref SprerBootEC2 SpringBootEC2PublicIP: Description: Spring Boot EC2 instance public IP Value: !GetAtt SprerBootEC2.PublicIp SpringBootEC2PublicDNS: Description: Spring Boot EC2 instance public DNS Value: !GetAtt SprerBootEC2.PublicDnsNameThe template contains the following outputs:
- S3CodeBucket: This output provides the S3 bucket name to store the Spring Boot application code.
- SpringBootEC2IP: This output provides the IP address of the Spring Boot EC2 instance.
To get the full template, see spring-boot-cloudformation-template-cfn.yaml.
Create the Stack
To create a stack using a CloudFormation template, you can use the AWS Management Console, AWS CLI, or SDKs. Here’s an example of how to create a stack using the AWS CLI:
aws cloudformation create-stack \ --stack-name spring-boot-cloudformation \ --template-body file://spring-boot-cloudformation-template-cfn.yaml \ --parameters ParameterKey=KeyName,ParameterValue=aws-key-pair \ --capabilities CAPABILITY_NAMED_IAMThe command creates a stack:
--stack-name: The name of the stack, which isspring-boot-cloudformation.--template-body: The path to the template file, which isspring-boot-cloudformation-template-cfn.yaml.--parameters: The parameters to pass to the template, which is the key pair nameaws-key-pair.--capabilities: The capabilities to pass to the template, which isCAPABILITY_NAMED_IAM.
Upload the Spring Boot Application .jar File to the S3 Bucket
First, you need to create a .jar file of the Spring Boot application. To do that, you can use the following command:
mvn clean installmvn clean packageThe command creates a .jar file of the Spring Boot application in the target directory.
Next, you need to upload the .jar file to the S3 bucket. To do that, you can use the following command:
AWS_S3_BUCKET_NAME=$(aws cloudformation describe-stacks \ --stack-name spring-boot-cloudformation \ --query 'Stacks[0].Outputs[?OutputKey==`S3CodeBucket`].OutputValue' \ --output text)
aws s3 cp target/spring-boot-web-0.0.1-SNAPSHOT.jar s3://$AWS_S3_BUCKET_NAMEThe command uploads the .jar file to the S3 bucket:
AWS_S3_BUCKET_NAME: The name of the S3 bucket, which is the output of theS3CodeBucketoutput.target/spring-boot-web-0.0.1-SNAPSHOT.jar: The path to the.jarfile, which is the.jarfile of the Spring Boot application.
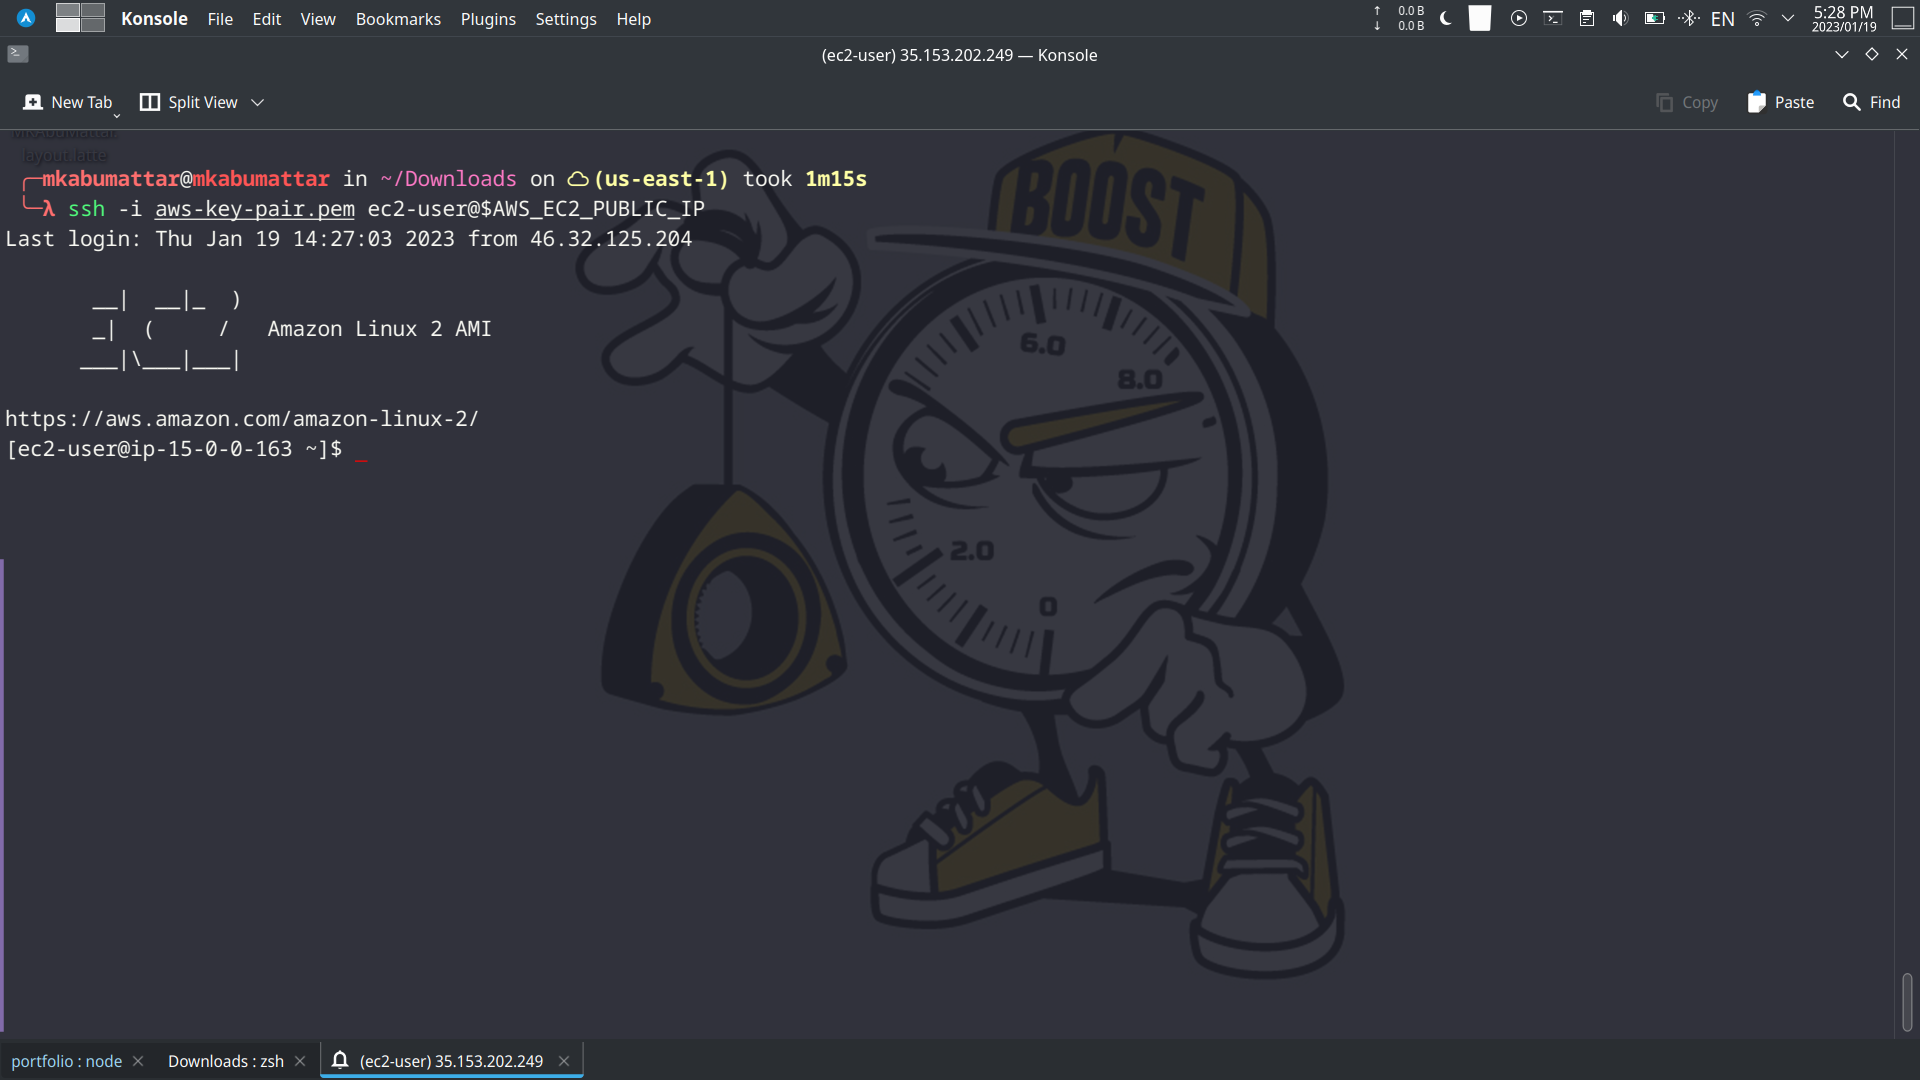
Connect to the EC2 Instance
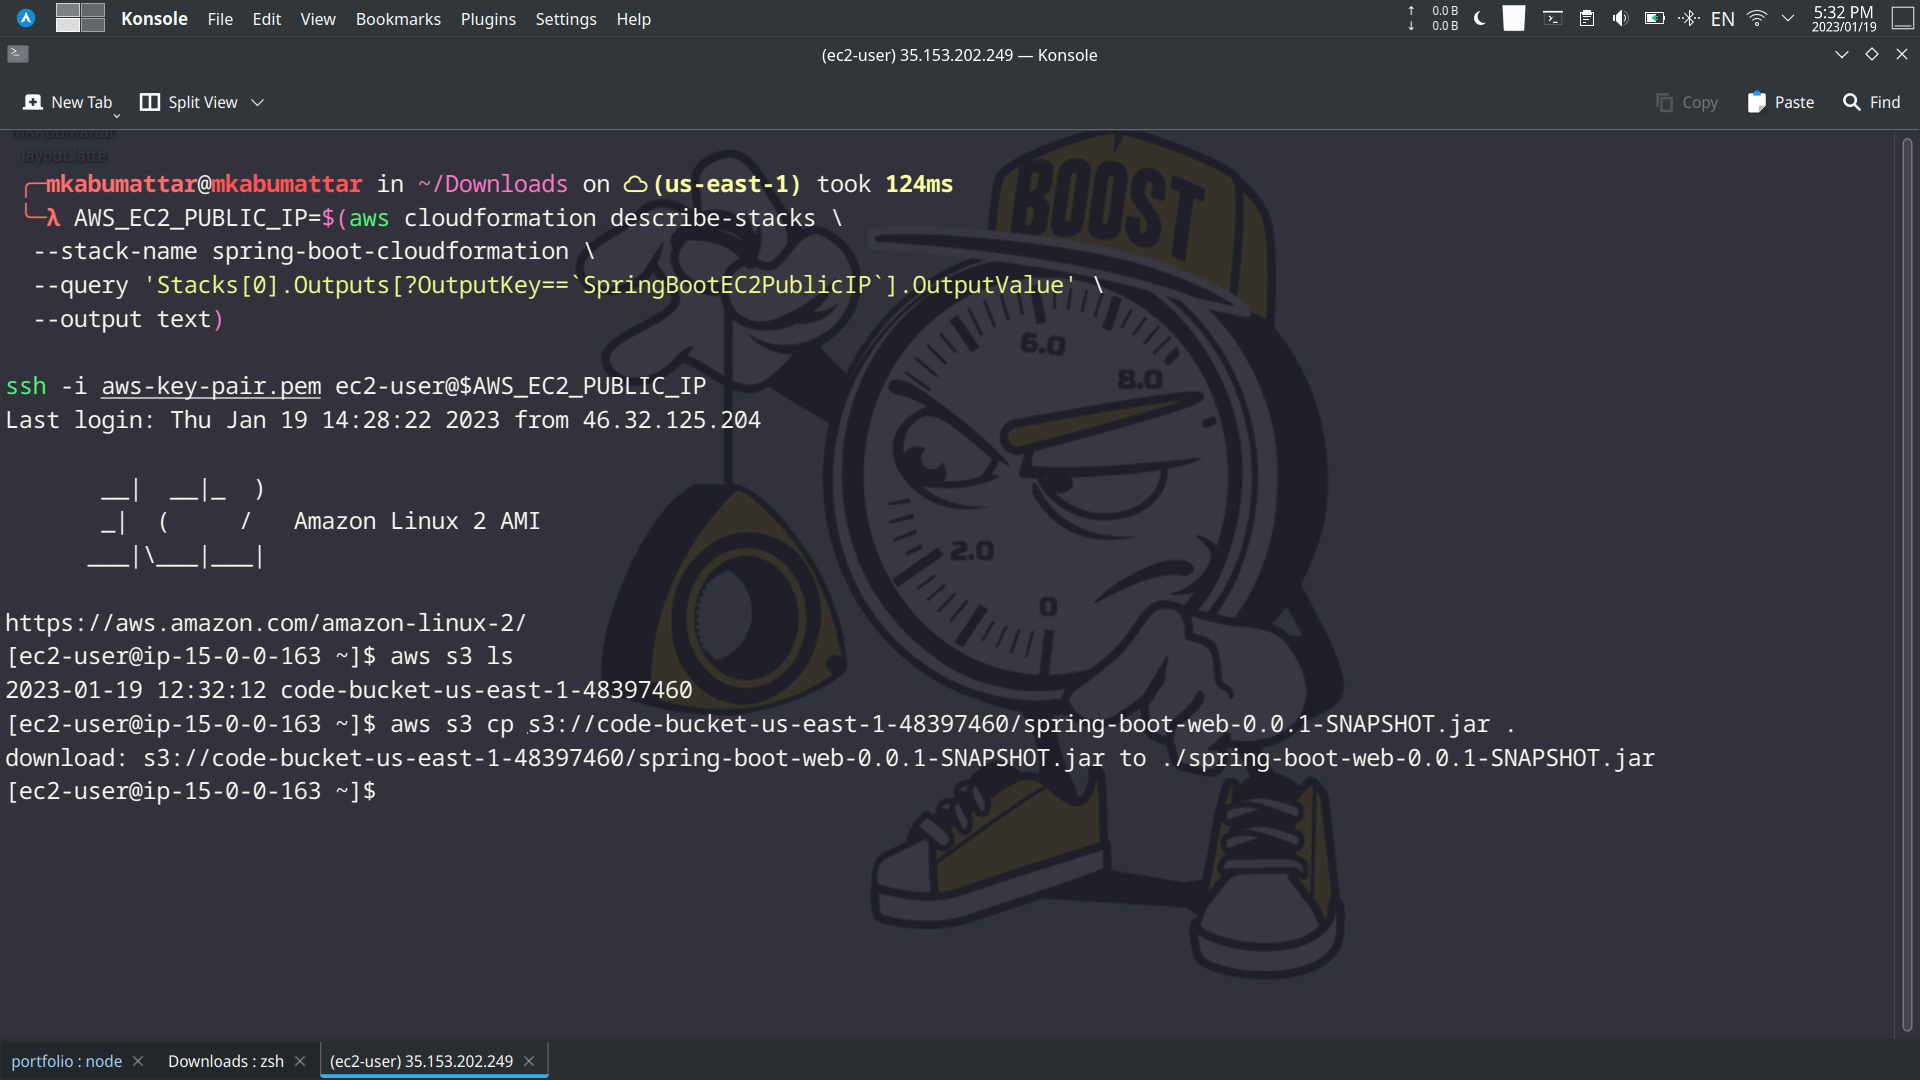
To connect to the EC2 instance, you need to get the public IP address of the EC2 instance. To do that, you can use the following command:
AWS_EC2_PUBLIC_IP=$(aws cloudformation describe-stacks \ --stack-name spring-boot-cloudformation \ --query 'Stacks[0].Outputs[?OutputKey==`SpringBootEC2PublicIP`].OutputValue' \ --output text)
ssh -i ~/.ssh/aws-key-pair.pem ec2-user@$AWS_EC2_PUBLIC_IPThe command connects to the EC2 instance:
AWS_EC2_PUBLIC_IP: The public IP address of the EC2 instance, which is the output of theSpringBootEC2PublicIPoutput.~/.ssh/aws-key-pair.pem: The path to the key pair file.
Run the Spring Boot Application
Get the .jar file from the S3 bucket:
aws s3 ls
# copy the bucket name from the outputaws s3 cp s3://<bucket-name>/spring-boot-web-0.0.1-SNAPSHOT.jar .The command gets the .jar file from the S3 bucket.
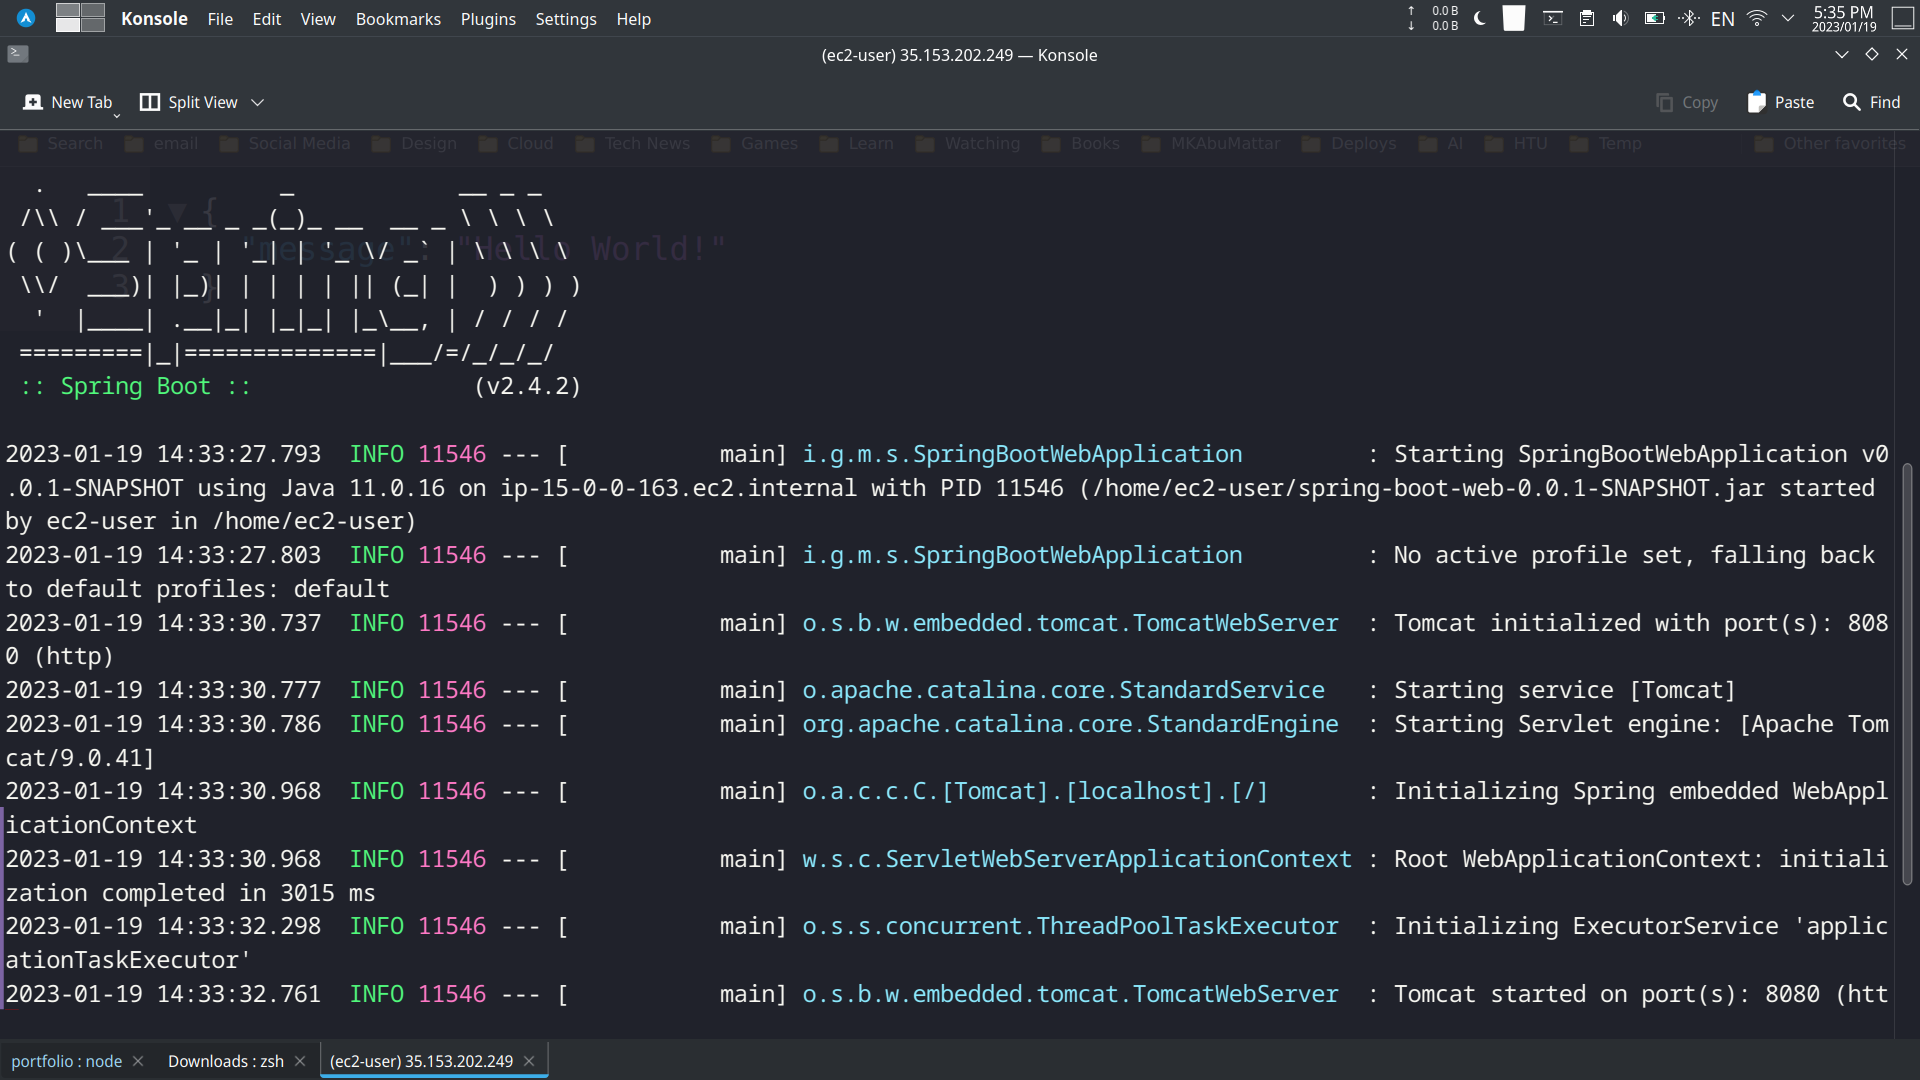
Run the Spring Boot application:
java -jar spring-boot-web-0.0.1-SNAPSHOT.jarThe command runs the Spring Boot application.
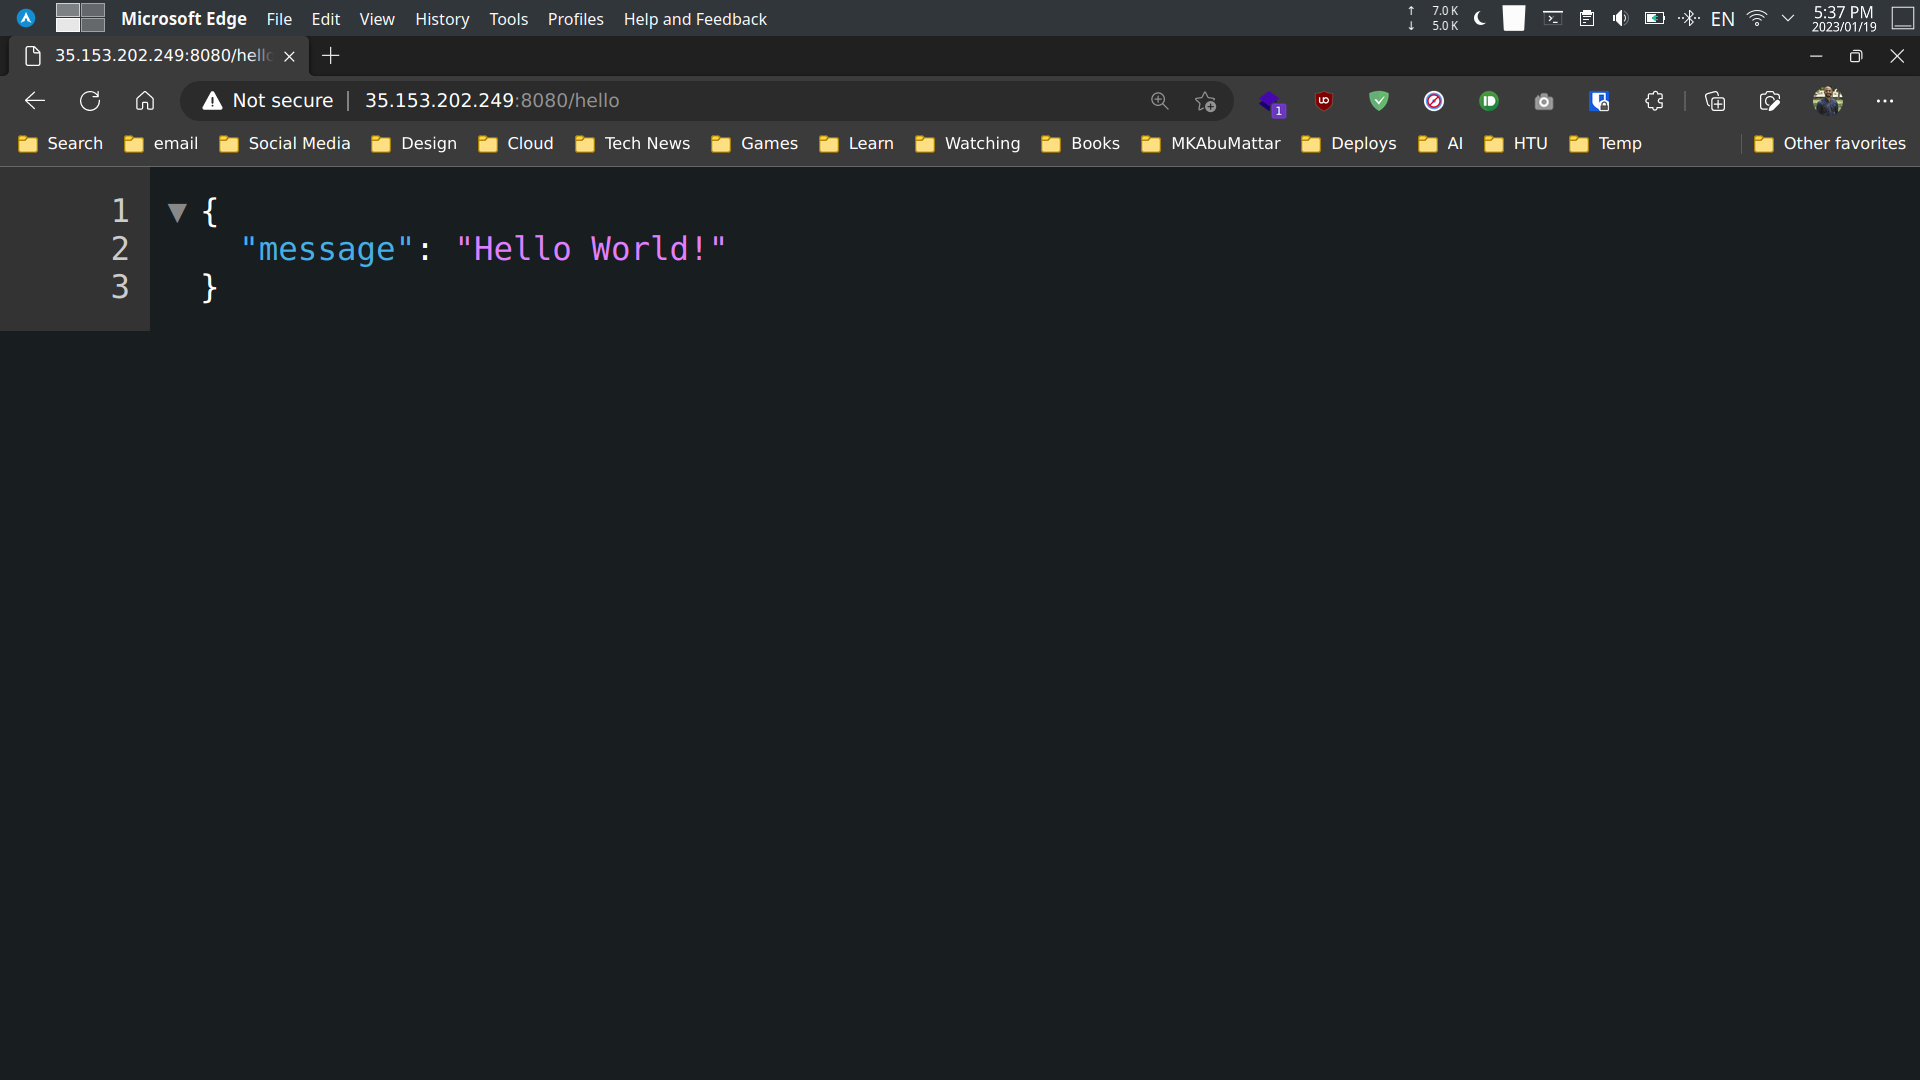
Access the Spring Boot Application
To access the Spring Boot application, you need to get the public DNS of the EC2 instance. To do that, you can use the following command:
AWS_EC2_PUBLIC_DNS=$(aws cloudformation describe-stacks \ --stack-name spring-boot-cloudformation \ --query 'Stacks[0].Outputs[?OutputKey==`SpringBootEC2PublicDNS`].OutputValue' \ --output text)The command gets the public DNS of the EC2 instance.
Open the public DNS in the browser:
open http://$AWS_EC2_PUBLIC_DNS:8080/helloThe command opens the public DNS in the browser.
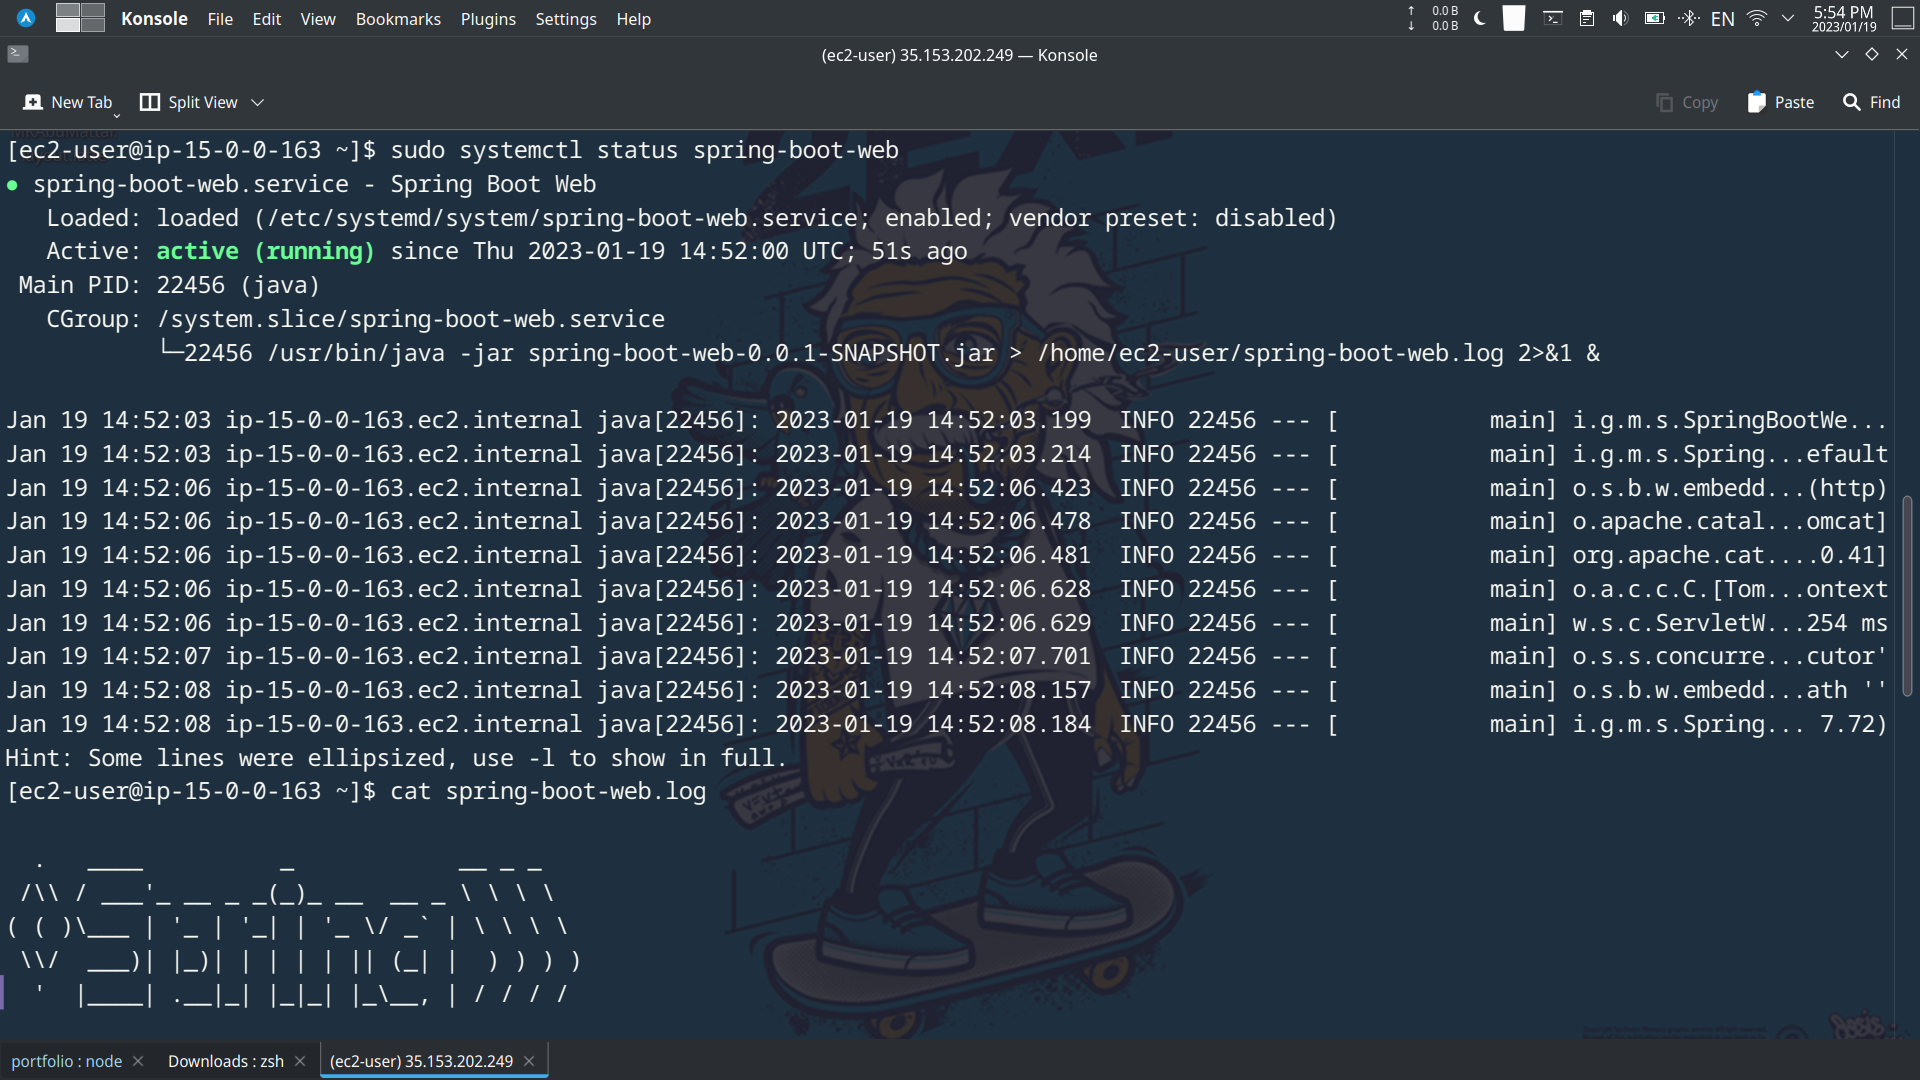
Run the Spring Boot Application as a Service
To run the Spring Boot application as a service, you need to create a service file. To do that, you can use the following command:
sudo vi /etc/systemd/system/spring-boot-web.service[Unit]Description=Spring Boot WebAfter=network.target
[Service]User=ec2-userWorkingDirectory=/home/ec2-userExecStart=/usr/bin/java -jar spring-boot-web-0.0.1-SNAPSHOT.jar > /home/ec2-user/spring-boot-web.log 2>&1 &SuccessExitStatus=143
[Install]WantedBy=multi-user.targetThe command creates a service file.
Reload the daemon:
sudo systemctl daemon-reloadThe command reloads the daemon.
Start the service:
sudo systemctl start spring-boot-webThe command starts the service.
Enable the service:
sudo systemctl enable spring-boot-webThe command enables the service.
Check the status of the service:
sudo systemctl status spring-boot-webThe command checks the status of the service.
Delete the Stack
To delete the stack, you can use the following command:
aws cloudformation delete-stack --stack-name spring-boot-cloudformationThe command deletes the stack.
Conclusion
In conclusion, deploying a Spring Boot application to AWS CloudFormation can provide many benefits such as scalability and easy management. By following the steps outlined in this article, you should now have a solid understanding of how to deploy a Spring Boot application to AWS CloudFormation. From creating a CloudFormation template, to packaging the application into a deployable artifact, updating the stack with the new version of the application and setting up continuous deployment, the guide covers all the necessary steps for a successful deployment. Keep in mind that this guide assumes that you have met all the prerequisites and are familiar with the Spring Boot application’s dependencies and configuration. With this knowledge, you should be able to deploy your Spring Boot application to AWS CloudFormation with confidence.
References
Here are some references that you can use to learn more about the topics covered in this article:
- Spring Boot Official Website
- AWS CloudFormation User Guide
- AWS CloudFormation Template Reference
- AWS Command Line Interface (CLI) User Guide
- Amazon EC2 User Guide for Linux Instances
- Amazon S3 User Guide
- AWS Identity and Access Management (IAM) User Guide
- Deploying Spring Boot Applications - Spring Documentation
- AWS CloudFormation Best Practices
- Creating a Spring Boot Project with Maven
- Working with AWS CloudFormation Stacks
- AWS SDK for Java
- Running Spring Boot Applications as a Service (systemd)
- AWS Well-Architected Framework