Introduction
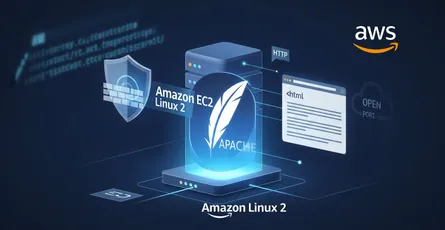
In this post, we will learn how to run an Apache web server using Docker on an AWS EC2 instance. We will use the following tools:
Prerequisites
To follow this tutorial, you will need:
- An AWS account
- An AWS EC2 instance
Note
You can follow this tutorial to create an AWS EC2 instance Using AWS CLI wthout using user data, or you can create an AWS EC2 instance using the AWS console.
Setup and Configure Docker to Run an Apache Web Server on an AWS EC2 Instance
Step 1: Install Docker on the AWS EC2 Instance
Before we can install Docker on the AWS EC2 instance, we need to update the package list.
sudo yum update -yThen, we need to install Docker on the AWS EC2 instance.
sudo amazon-linux-extras install docker -yStep 2: Start the Docker Service
After installing Docker on the AWS EC2 instance, we need to start the Docker service.
sudo service docker startStep 3: Add the ec2-user to the Docker Group
Try to run the following command to check if the Docker service is running.
docker infoExplination:
docker info- This command will show the information about the Docker service.
If you get the following error:
Client: Context: default Debug Mode: false
Server: ERROR: Cannot connect to the Docker daemon at unix:///var/run/docker.sock. Is the docker daemon running?errors pretty printing infoThen, you need to add the ec2-user to the Docker group.
sudo usermod -a -G docker ec2-userExit the SSH session and reconnect to the AWS EC2 instance.
After reconnecting to the AWS EC2 instance, try to run the following command again.
docker infoIf you get the following output:
Client: Context: default Debug Mode: false
Server: Containers: 0 Running: 0 Paused: 0 Stopped: 0 Images: 0 Server Version: 20.10.17 Storage Driver: overlay2 Backing Filesystem: xfs Supports d_type: true Native Overlay Diff: true userxattr: false Logging Driver: json-file Cgroup Driver: cgroupfs Cgroup Version: 1 Plugins: Volume: local Network: bridge host ipvlan macvlan null overlay Log: awslogs fluentd gcplogs gelf journald json-file local logentries splunk syslog Swarm: inactive Runtimes: io.containerd.runc.v2 io.containerd.runtime.v1.linux runc Default Runtime: runc Init Binary: docker-init containerd version: 10c12954828e7c7c9b6e0ea9b0c02b01407d3ae1 runc version: 1e7bb5b773162b57333d57f612fd72e3f8612d94 init version: de40ad0 Security Options: seccomp Profile: default Kernel Version: 5.10.144-127.601.amzn2.x86_64 Operating System: Amazon Linux 2 OSType: linux Architecture: x86_64 CPUs: 1 Total Memory: 964.8MiB Name: ip-172-31-95-171.ec2.internal ID: VWQG:27RB:ARKI:V77B:34E2:BRGC:6DDJ:EKSF:VUQP:TX5G:UXVF:Q444 Docker Root Dir: /var/lib/docker Debug Mode: false Registry: https://index.docker.io/v1/ Labels: Experimental: false Insecure Registries: 127.0.0.0/8 Live Restore Enabled: falseThen, you have successfully installed Docker on the AWS EC2 instance.
Step 4: Run the Apache Web Server Using Docker
First, we need to pull the Apache image from Docker Hub.
docker pull httpdExplination:
docker pull- Pull an image or a repository from a registry like Docker Hub, or from a private registry like AWS ECR.
Then, we need to run the Apache web server using Docker.
docker run -dit --name apache -p 80:80 httpdExplination:
docker run- Run a command in a new container.-dit- Run container in background and print container ID.--name- Assign a name to the container.-p- Publish a container’s port(s) to the host.httpd- The image name.
Step 5: Test the Apache Web Server
To test the Apache web server, we need to get the public IP address of the AWS EC2 instance.
curl http://PUBLIC_IP_ADDRESSOr, we can use the the private IP address of the AWS EC2 instance.
curl http://PRIVATE_IP_ADDRESSIf you get the following output:
<html><body><h1>It works!</h1></body></html>Then, the Apache web server is running successfully.
Step 6: Edit The Web Page on Docker Container
To edit the web page, we need to open the index.html file, in the /usr/local/apache2/htdocs directory.
Before we can edit the index.html file, we need to get the container ID of the Apache container.
docker psExplination:
docker ps- List containers.
Then, we need to open the Docker container.
docker exec -it CONTAINER_ID /bin/bashExplination:
docker exec- Run a command in a running container.-it- Keep STDIN open even if not attached.CONTAINER_ID- The container ID./bin/bash- The command to run.
Then, we need to open the index.html file, in the /usr/local/apache2/htdocs directory.
vi /usr/local/apache2/htdocs/index.htmlIf you get the following output:
bash: vi: command not foundThen, you need to install the vi editor.
# update the package listapt-get update -y
# upgrade the packagesapt-get upgrade -y
# install the vi editorapt-get install -y vimThen, we need to open the index.html file, in the /usr/local/apache2/htdocs directory.
vi /usr/local/apache2/htdocs/index.htmlThen, we need to add the following content to the index.html file.
<html> <body> <h1>Hello World!</h1> </body></html>Then, we need to save the index.html file.
:wqThen, we need to exit the Docker container.
exitThen, we need to refresh the web page.
curl http://PUBLIC_IP_ADDRESSIf you get the following output:
<html> <body> <h1>Hello World!</h1> </body></html>Then, the web page has been updated successfully.
Step 7: Stop the Docker Container
To stop the Docker container, we need to get the container ID of the Apache container.
# To get the Docker container IDdocker ps
# To stop the Apache web serverdocker stop CONTAINER_ID
# Or, you can use the container namedocker stop apacheOr, you can stop all the Docker containers using the following command.
docker stop $(docker ps -a -q)Explination:
docker ps- List containers.docker stop- Stop one or more running containers.
Step 8: Restart the Docker Container
To restart the Docker container by using the container name, we need to run the following command.
docker start apacheExplination:
docker start- Start one or more stopped containers.
Step 9: Remove the Docker Container
To remove the Docker container, we need to get the container ID of the Apache container.
# To get the Docker container IDdocker ps -a
# To remove the Apache web serverdocker rm CONTAINER_ID
# Or, you can use the container namedocker rm apacheOr, you can remove all the Docker containers using the following command.
docker rm $(docker ps -a -q)Explination:
docker ps- List containers.docker rm- Remove one or more containers.
Step 10: Remove the Docker Image
To remove the Docker image, we need to get the image ID of the Apache image.
# To get the Docker image IDdocker images
# To remove the Apache web serverdocker rmi IMAGE_ID
# Or, you can use the image namedocker rmi httpdOr, you can remove all the Docker images using the following command.
docker rmi $(docker images -q)Explination:
docker images- List images.docker rmi- Remove one or more images.
Conclusion
In this post, we learned how to run an Apache web server using Docker on an AWS EC2 instance. We also learned how to update and install packages on Docker containers.
Note
If you have any questions, please leave a comment below..
References
- Docker Official Website
- Docker Hub - httpd (Apache HTTP Server)
- Amazon EC2 User Guide for Linux Instances
- Install Docker Engine on Amazon Linux 2 (Though the post uses
amazon-linux-extras) - Amazon Linux Extras library
- Apache HTTP Server Project
- Docker CLI
runcommand reference - Docker CLI
pullcommand reference - Docker CLI
pscommand reference - Docker CLI
execcommand reference - Docker CLI
stopcommand reference - Docker CLI
rmcommand reference - Docker CLI
imagescommand reference - Docker CLI
rmicommand reference - Post-installation steps for Linux - Manage Docker as a non-root user