Introduction
Docker has revolutionized the way we run and manage applications by making it easy to package, deploy, and run applications in containers. Containers allow applications to run in a consistent environment, independent of the host system, making it easier to manage and deploy applications.
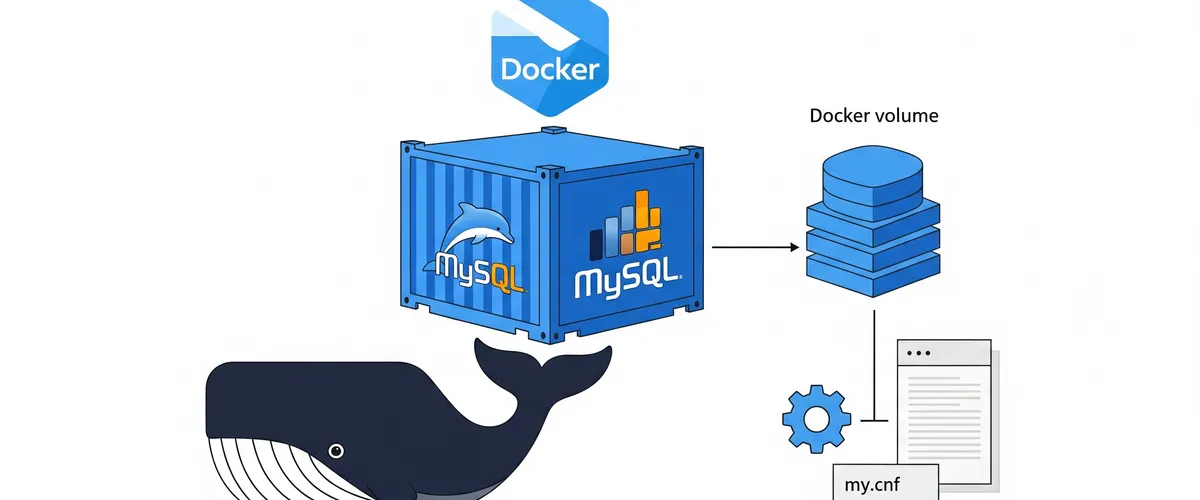
MySQL is one of the most widely used databases in the world, and it can be easily run in a Docker container. Running MySQL in a Docker container provides several benefits, including increased portability, easier management, and the ability to run multiple instances of the database on the same host.
In this article, we’ll cover the basics of running a MySQL database in a Docker container, including how to start a container, connect to it, customize the configuration, and persist data using Docker volumes. We’ll also provide tips for optimizing and customizing your MySQL container setup. Whether you’re a developer, system administrator, or database administrator, this guide will help you get started with using Docker to run and manage your MySQL database.
Prerequisites
Before you can run a MySQL database in a Docker container, you’ll need to have a few things set up on your machine:
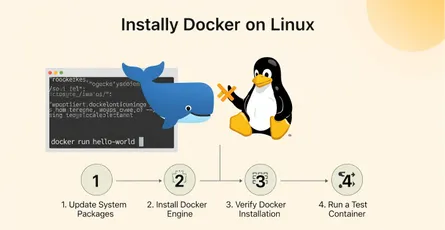
- Docker: Make sure you have Docker installed on your machine. If you don’t have Docker installed, you can follow the instructions for your operating system from the Docker website How To Run MySQL in a Docker Container: A Step-by-Step Guide with Customization Tips.
- Docker CLI: You’ll also need the Docker CLI installed on your machine. This is included in the Docker installation package for most operating systems.
- Basic knowledge of Docker: To follow this guide, you should have a basic understanding of how Docker works and how to use the Docker CLI.
Once you have these prerequisites in place, you’re ready to start running a MySQL database in a Docker container.
Running and Setup MySQL Database in a Docker Container
Step 1: Running a MySQL Container with the Docker Run Command
To run a MySQL container, you can use the Docker run command. The run command is used to start a new container from an image. You can use the official MySQL image from the Docker Hub to start a new container.
The basic syntax of the Docker run command is as follows:
docker run [OPTIONS] IMAGE [COMMAND] [ARG...]To run a MySQL container, you can use the following command:
docker run --name [CONTAINER_NAME] -e MYSQL_ROOT_PASSWORD=[ROOT_PASSWORD] -d mysqlHere, we are using the following options:
--name: This option is used to specify a name for the container. You can replace[CONTAINER_NAME]with the name you want to give to the container.-e: This option is used to set an environment variable. In this case, we’re setting theMYSQL_ROOT_PASSWORDenvironment variable to the root password for the MySQL database. You can replace[ROOT_PASSWORD]with the password you want to use.-d: This option is used to run the container in the background.
This command will download the official MySQL image from the Docker Hub, start a new container with the specified name, set the root password, and run the container in the background.
Once the container is running, you can use the Docker ps command to view a list of running containers and verify that your MySQL container is running.
Example
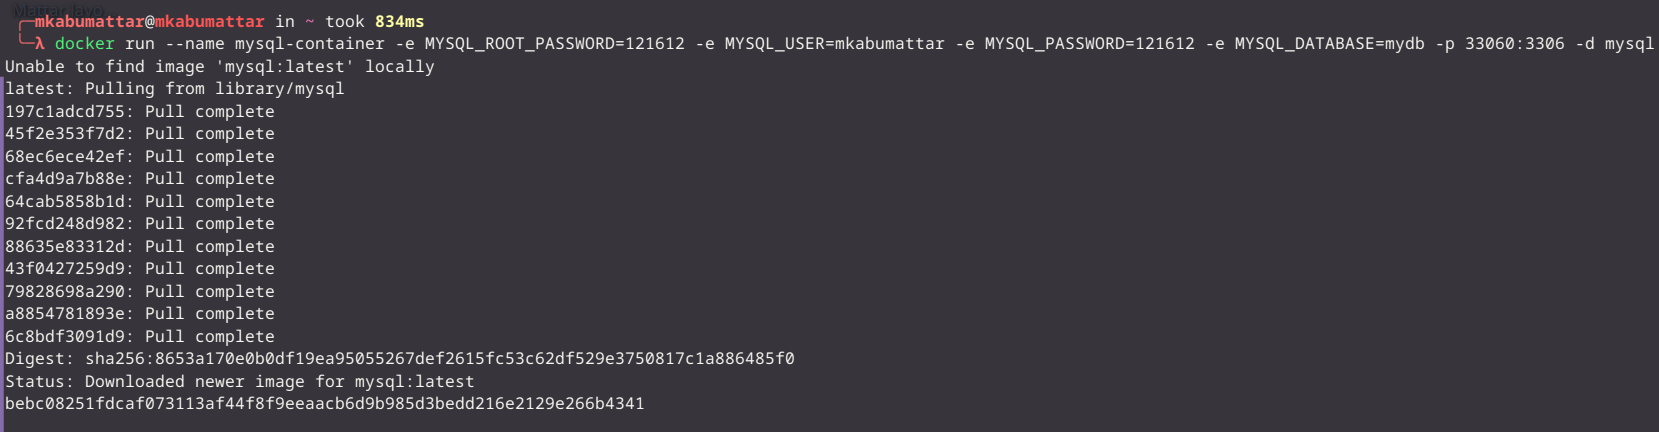
Here’s an example command that runs a MySQL container with the username mkabumattar and password 121612:
# Run a MySQL containerdocker run --name mysql-container -e MYSQL_ROOT_PASSWORD=121612 -e MYSQL_USER=mkabumattar -e MYSQL_PASSWORD=121612 -e MYSQL_DATABASE=mydb -p 33060:3306 -d mysqlHere, we’re using the following options:
-
--name: This option is used to specify the name of the container. We’re using the name mysql-container in this example. -
-e: This option is used to set environment variables for the container. We’re setting the following environment variables in this example:MYSQL_ROOT_PASSWORD: This sets the password for the root user. We’re setting this to121612.MYSQL_USER: This sets the username for a new user. We’re setting this tomkabumattar.MYSQL_PASSWORD: This sets the password for the new user. We’re setting this to121612.MYSQL_DATABASE: This creates a new database with the specified name. We’re creating a database namedmydb.
-
-p: This option is used to map a port from the host to the container. We’re mapping port 33060 on the host to port 3306 on the container. This allows us to connect to the MySQL container from the host machine. -
-d: This option is used to run the container in the background.
When you run this command, Docker will download the MySQL image if it’s not already present on your system and run the container. You can then connect to the MySQL container using the mysql client as described in Step 2.
Step 2: Connecting to the MySQL Container
Once your MySQL container is running, you can connect to it using the MySQL client. The MySQL client is a command-line tool that allows you to interact with the MySQL database.
To connect to the MySQL container, you’ll need to know the hostname and port of the container. The hostname is the name of the container, and the default port for MySQL is 3306.
The basic syntax for connecting to a MySQL container using the MySQL client is as follows:
mysql -u [USERNAME] -p -h [HOSTNAME] -P [PORT]Here, we’re using the following options:
-u: This option is used to specify the username to use when connecting to the database. By default, the MySQL container uses the root user.-p: This option is used to prompt for a password. You’ll need to enter the root password you set when running the container.-h: This option is used to specify the hostname of the container. You can replace[HOSTNAME]with the name of your container.-P: This option is used to specify the port to use when connecting to the container. By default, the MySQL container uses port 3306.
When you run this command, you’ll be prompted for the root password. Once you enter the correct password, you’ll be connected to the MySQL container and can start interacting with the database.
You can then run SQL commands to create databases, tables, and perform other tasks within the MySQL container.
Example
Here’s an example command that connects to the MySQL container using the username mkabumattar and password 121612:
mysql -h 127.0.0.1 -P 33060 -u mkabumattar -pHere, we’re using the following options:
-h: This option is used to specify the hostname. We’re using the hostname127.0.0.1, which is the IP address for localhost.-P: This option is used to specify the port. We’re using port33060, which is the default port for MySQL.-u: This option is used to specify the username. We’re using the usernamemkabumattarin this example.-p: This option is used to prompt for a password.
When you run this command, you’ll be prompted to enter the password for the user. Enter the password 121612 and hit Enter. You should then be connected to the MySQL container and be able to run SQL commands.

Step 3: Customizing the MySQL Container Configuration
By default, the MySQL container uses a set of default configuration options that may not suit your needs. You can customize the configuration by creating a custom my.cnf file and mounting it into the container.
To do this, you’ll need to create a new directory on your host system that will be used to store the custom configuration file. Next, create a my.cnf file in that directory with the desired configuration options.
Here’s an example directory structure for a custom configuration:
/path/to/config |- my.cnfIn this example, the my.cnf file might contain the following configuration options:
[mysqld]character-set-server=utf8mb4max_allowed_packet=64Minnodb_log_file_size=256Minnodb_buffer_pool_size=1GNext, when you run the docker run command, use the -v option to mount the custom configuration directory into the container. For example:
docker run --name mysql -e MYSQL_ROOT_PASSWORD=121612 -v /path/to/config:/etc/mysql/conf.d -p 33060:3306 -d mysqlIn this example, we’re mounting the /path/to/config directory into the /etc/mysql/conf.d directory in the container. This means that the custom my.cnf file will be used instead of the default configuration file.
After running the container with the custom configuration, you can verify that the new options are in effect by connecting to the container and running the SHOW VARIABLES command. This command will show all of the current MySQL configuration options, and you should see your custom options listed.
Step 4: Persisting Data with Docker Volumes
By default, the data stored in a Docker container is ephemeral, which means that it is not persisted across container restarts. This can be a problem if you need to keep your data intact even if the container is stopped or recreated.
To persist the data, you can use Docker volumes to store the data outside of the container. Docker volumes are mappings from a directory on the host system to a directory in the container, and the data stored in the volume is not deleted when the container is deleted.
To create a Docker volume, use the -v option in the docker run command and specify the mapping between the host directory and the container directory. For example:
docker run --name mysql -e MYSQL_ROOT_PASSWORD=121612 -v /path/to/data:/var/lib/mysql -p 3306:3306 -d mysqlIn this example, the /path/to/data directory on the host system is mapped to the /var/lib/mysql directory in the container. This means that any data stored in the /var/lib/mysql directory in the container will be persisted in the /path/to/data directory on the host system.
Once the volume is created, you can use the docker inspect command to verify that the volume has been created and that the data is being stored in the specified location on the host system.
By using volumes to persist data, you can ensure that your data is safe even if the container is deleted or recreated. Additionally, if you need to upgrade the MySQL image or change the configuration, you can simply stop the container, delete it, and recreate it with the new image or configuration, while keeping your data intact.
Step 5: Stopping and Starting the MySQL Container
To stop the MySQL container, use the docker stop command. For example:
docker stop mysqlTo start the MySQL container, use the docker start command. For example:
docker start mysqlSetting up the compose.yml File
If you want to run multiple containers, you can use the compose.yml file to define and run your application. The compose.yml file is a YAML file that defines the services that make up your application. Each service is defined using a set of configuration options that tell Docker how to run the container.
Here’s an example compose.yml file that defines a MySQL container:
version: '3.1'
x-common-variables: &common-variables MYSQL_ROOT_PASSWORD: 121612 MYSQL_DATABASE: mydb MYSQL_USER: mkabumattar MYSQL_PASSWORD: 121612
services: mysql: image: mysql:latest container_name: mysql ports: - 33060:3306 volumes: - /path/to/data:/var/lib/mysql environment: <<: *common-variables MYSQL_ROOT_PASSWORD: MYSQL_ROOT_PASSWORD MYSQL_HOST: localhost
adminer: image: adminer container_name: adminer ports: - 8888:8080 environment: <<: *common-variables ADMINER_DEFAULT_SERVER: mysqlIn this example, we’re defining two services: mysql and adminer. The mysql service defines a MySQL container, and the adminer service defines an Adminer container. Adminer is a web-based database management tool that can be used to manage MySQL databases.
The mysql service defines the following configuration options:
image: The image to use to create the container. In this case, we’re using themysql:latestimage.container_name: The name of the container. In this case, we’re using the namemysql.ports: The port mappings between the host system and the container. In this case, we’re mapping the port 33060 on the host system to the port 3306 in the container.volumes: The volume mappings between the host system and the container. In this case, we’re mapping the/path/to/datadirectory on the host system to the/var/lib/mysqldirectory in the container.environment: The environment variables to set in the container. In this case, we’re setting theMYSQL_ROOT_PASSWORDenvironment variable to121612.
The adminer service defines the following configuration options:
image: The image to use to create the container. In this case, we’re using theadminerimage.container_name: The name of the container. In this case, we’re using the nameadminer.ports: The port mappings between the host system and the container. In this case, we’re mapping the port 8080 on the host system to the port 8080 in the container.environment: The environment variables to set in the container. In this case, we’re setting theMYSQL_ROOT_PASSWORDenvironment variable to121612, and theADMINER_DEFAULT_SERVERenvironment variable tomysql.
To run the application defined in the compose.yml file, use the docker-compose up command. For example:
docker-compose up -dThe -d option tells Docker to run the containers in the background. If you don’t use the -d option, Docker will run the containers in the foreground and will not return control to the terminal until you stop the containers.
To stop the containers, use the docker-compose down command. For example:
docker-compose downConclusion
Docker is a powerful tool that makes it easy to run and manage applications in containers. Running MySQL in a Docker container is a convenient way to isolate the database from the host system and other containers, while still having the ability to access it from other applications.
In this article, we have shown you how to run a MySQL container using the docker run command, connect to the container, customize the configuration, and persist the data using Docker volumes. By following these steps, you can easily run a MySQL database in a Docker container, and customize it to meet your needs.
Whether you are a developer, a DevOps engineer, or a database administrator, using Docker to run MySQL can simplify your workflow and help you manage your database infrastructure more efficiently. So, why not give it a try and see for yourself?
References
- Docker Official Website - Get Started
- MySQL Official Docker Image - Docker Hub
- MySQL Documentation
- Docker Run Command Reference
- Docker Compose Overview
- Manage data in Docker - Docker Volumes
- MySQL Client Commands
- MySQL Server Configuration Defaults (for
my.cnf) - Adminer Official Docker Image - Docker Hub
- “How To Install Docker On Linux In 4 Easy Steps!” (Your previous article) - /blog/how-to-install-docker-on-linux-in-4-easy-steps
- “Persisting Data in Docker: A Deep Dive into Volumes” - (Example: Search for articles on Docker data persistence.), [Link to a relevant article]
- “Customizing MySQL Configuration in Docker” - (Example: Search for tutorials on this topic.), [Link to a relevant tutorial]
- “Docker Networking Basics” - (Example: Article from Docker’s documentation or a reputable blog.), [Link to a relevant article]