Why multi-stage builds matter
Image size is really about what is inside
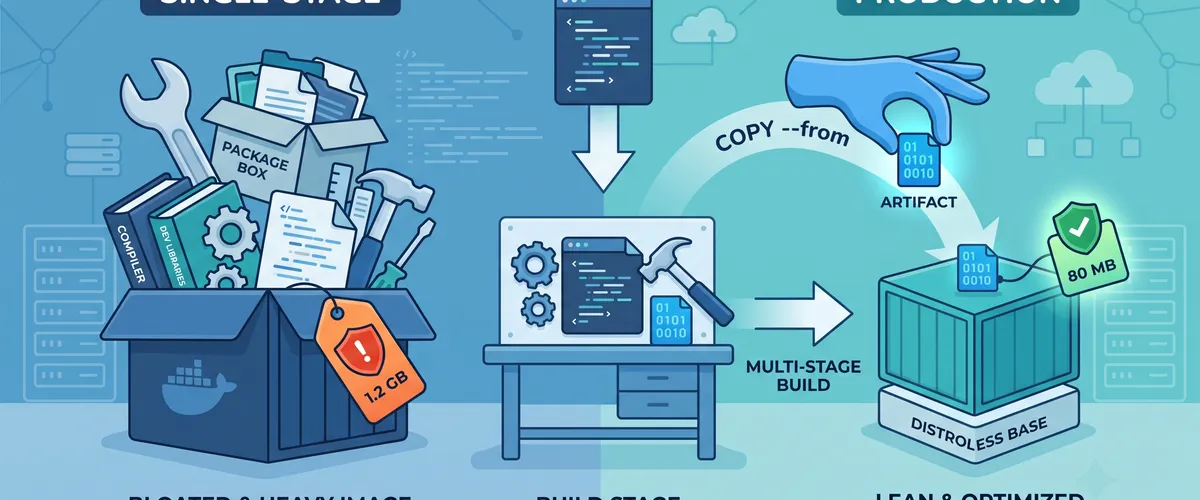
Hey, want to stop shipping a toolshed to production? If your Dockerfile builds and runs the app in one stage, your final image is carrying everything you used to build it: the compiler, the package manager caches, the dev dependencies, all of it. None of that runs in production, but all of it ships anyway. That means slower pulls, slower cold starts, and a lot more code that a scanner has to worry about. Multi-stage builds let you build with all your tools, then throw the tools away and keep only the finished app.
Build tools and runtime are different jobs
Building your app and running it need completely different things. The build needs compilers, headers, and dev packages. The runtime just needs your binary or bundled code and maybe a couple of shared libraries. Mixing the two into one image is the root of most bloated, insecure containers. Separating them is the whole idea here.
The problem with single-stage Dockerfiles
What’s the issue?
A single-stage Dockerfile does everything in one place. You start from a full base image like node:20 or golang:1.22, install dependencies, compile or bundle, and that same fat image becomes what you deploy. So your production container includes gcc, npm, git, and every dev dependency you only needed for a few seconds during the build. You are shipping a build machine and calling it a runtime.
Real-world consequences
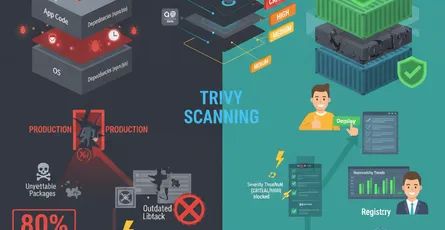
The costs pile up quietly. Images balloon to a gigabyte or more, which slows every deploy and every autoscale event. Worse, every extra package is another thing that can have a CVE. When your scanner flags fifty vulnerabilities, most of them are usually in build tools your app never even calls at runtime. You end up patching things that should not have been in the image in the first place.
The multi-stage fix
Here’s how to fix it
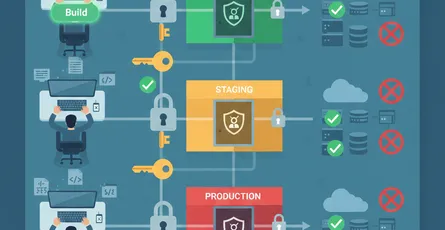
A multi-stage build splits your Dockerfile into named stages using FROM ... AS. You do all the heavy work in a build stage, then start a fresh, minimal final stage and pull across only the artifact you need with COPY --from. Everything left behind in the build stage, the compilers and dev dependencies, never makes it into the image you ship.
Implementing it
Here is a Go example. The first stage compiles the binary, and the second stage starts from a tiny base and copies just that binary.
# Build stage: has the full Go toolchainFROM golang:1.22 AS buildWORKDIR /srcCOPY . .RUN CGO_ENABLED=0 go build -o /app ./cmd/server
# Production stage: minimal, no compilerFROM gcr.io/distroless/staticCOPY --from=build /app /appENTRYPOINT ["/app"]The final image has no Go toolchain, no shell, and no package manager. It is just your binary on a distroless base. The same pattern works for Node: build and bundle in a node:20 stage, then copy the dist folder and production node_modules into a slim runtime stage.
Tools and platforms
BuildKit is the modern Docker builder and it runs independent stages in parallel and caches them well, so multi-stage builds stay fast. For final bases, reach for distroless images from Google or an alpine variant when you need a shell. Pair the build with a scanner like Trivy or Grype so you can see the vulnerability count drop after you strip the build tools out.
Quick implementation steps
Quick takeaways to slim down your images:
- Split your Dockerfile into a build stage and a final stage with
FROM ... AS. - Do all compiling and bundling in the build stage.
- Start the final stage from a minimal base like distroless or alpine.
- Copy only the finished artifact across with
COPY --from. - Enable BuildKit so stages build in parallel and cache well.
- Scan the final image and compare the size and CVE count before and after.
Copy only what runs
The trick is being strict about what crosses the COPY --from line. Bring over the compiled binary, the bundled assets, and production dependencies only. Leave source files, test files, and dev dependencies in the build stage where they belong. If you are not sure something is needed at runtime, it probably is not.
Measure the before and after
Run docker images to see the size difference, and run your scanner on both versions. It is not unusual to go from over a gigabyte down to under a hundred megabytes, with the vulnerability count dropping right along with it. That comparison is the easiest way to convince a team the change is worth it.
Benefits of multi-stage builds
Why it helps
You get a production image that only contains what it needs to run. That means faster pulls, faster cold starts, and a much smaller attack surface. With no compilers, package managers, or dev dependencies inside, there is simply less for an attacker to use and less for a scanner to flag.
Faster and safer deploys
Smaller images move faster through your whole pipeline. Registries store less, nodes pull quicker, and autoscaling responds sooner because there is less to download before a pod starts. On the security side, a distroless final stage with no shell makes a compromised container far harder to pivot from, since there is barely anything in there to run.
What’s your approach?
Community discussion
What’s your take? Multi-stage builds are one of those changes that feel small but pay off every single deploy. If you have converted an old single-stage Dockerfile, how much smaller did the image get, and did your scan results improve?
Share your experience
If you are running multi-stage builds in production, I would love to hear which final base you settled on. Distroless, alpine, or something custom, and how you handle the cases where you still need a shell for debugging.