Why cluster isolation matters
The multi-tenant reality
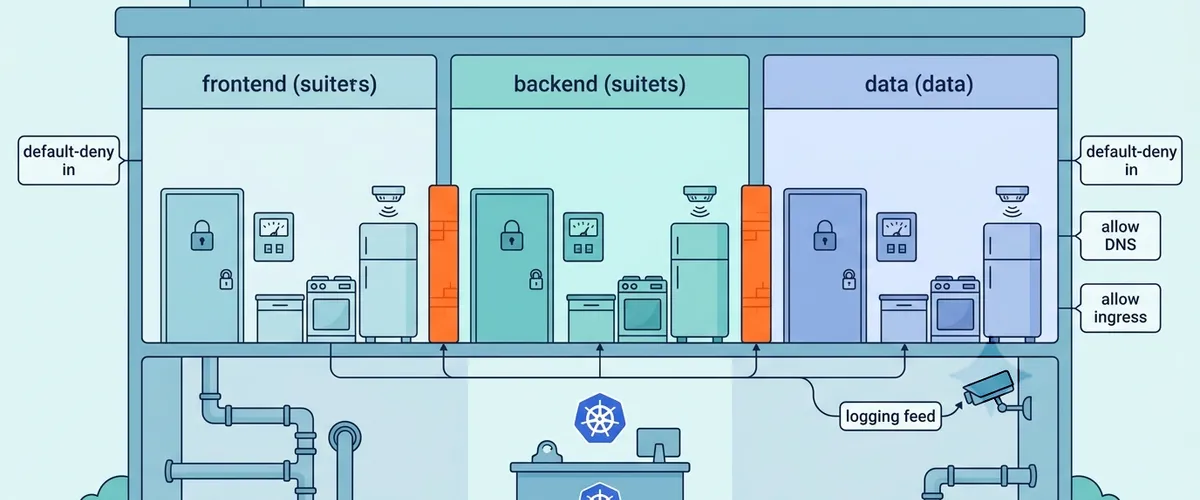
If you’re running a separate cluster for every environment and every dev team, you have already seen the bill and the amount of upgrade work that comes with it. Sharing a single cluster is a lot like staying in a hotel. Everyone gets their own secure, private room in the same building. You share the plumbing and foundation, but your space is entirely yours. You pack more workloads onto the same nodes, logging and monitoring live in one place, and there is one control plane to upgrade instead of thirty.
To get started with logical separation, you can declare a namespace with a few clear labels to keep things organized:
# A simple, labeled namespace to partition our clusterapiVersion: v1kind: Namespacemetadata: name: team-frontend labels: team: frontend environment: production managed-by: platform-teamSoft vs. hard multi-tenancy
Decide which model you are building before you write any manifests. Soft multi-tenancy is enough for trusted internal teams in the same company, where you only need logical boundaries. Hard multi-tenancy is what you need for untrusted external users or regulated workloads, and it costs more: dedicated node pools with taints and tolerations, and sometimes a sandboxed runtime like gVisor or Kata Containers so a host kernel exploit stays inside the sandbox.
The problem with default-allow clusters
The illusion of isolation
Most teams think that simply creating different namespaces for different teams keeps things isolated. It doesn’t. Out of the box, Kubernetes is designed as an open, single-tenant system, and a namespace is really just a logical boundary for the API. Resource names can overlap across namespaces, which is handy for keeping things organized, but the scheduling and network layers stay wide open by default.
Real-world collateral damage
Without controls, one runaway batch job in a staging namespace can take all the memory on a shared node. That triggers the Out-of-Memory (OOM) killer, and the kernel does not care that the pod it picks belongs to production next door. Because pods allow all traffic by default, a compromised container in your frontend namespace can port-scan and query a database in your backend namespace. The worst of the three is a single tenant flooding the API server with thousands of Secrets or ConfigMaps until etcd runs out of storage and the control plane stops answering for everyone.
Careful here
Three real failure modes from a default-allow cluster: an OOM kill that takes down a neighbor’s production pods, a compromised frontend pod that pivots straight to a backend database, and one tenant exhausting etcd by creating thousands of Secrets. All preventable with the controls below.
Layered namespace isolation
Stacking the controls
No single setting protects a shared cluster. Isolation is something you build one control at a time, and it takes all five: namespaces, ResourceQuotas, LimitRanges, RBAC, and NetworkPolicies.
The table below shows how these controls work together for real defense-in-depth:
| Control Type | Scope | Core Enforcement Mechanism | Mitigated Risk | Failure Mode if Omitted |
|---|---|---|---|---|
| Namespace | Logical / API | API Server name scoping | Naming collisions and basic management sprawl | Inability to separate administrative concerns |
| ResourceQuota | Namespace total | Admission controller validation | Cluster-wide resource starvation and etcd storage exhaustion | A single runaway tenant exhausts whole cluster capacity |
| LimitRange | Individual pod/container | Admission controller injection | Single container monopolizing namespace resources | Pods without resource declarations are rejected or run unbounded |
| NetworkPolicy | Pod network | Container Network Interface (CNI) | Lateral movement and cross-namespace port scanning | Full network reachability; compromised pods attack any internal target |
| RBAC Roles | Identity / Access | API authorization engine | Unauthorized credential exploit and cross-tenant tampering | Attackers exploit cluster-wide credentials to compromise all workloads |
Resource control
To stop “noisy neighbors” from taking over your cluster, apply a ResourceQuota to every namespace. That sets a hard limit on the total CPU, memory, and object counts a team can use. There is a catch. Once a quota exists, the API server rejects any pod that doesn’t explicitly state its own resource requests and limits, which breaks deploys for every team that hasn’t retrofitted its manifests. A LimitRange fixes that by injecting default values at admission time when a developer forgets to set them.
Tip
A ResourceQuota on its own will reject any pod that doesn’t declare its own requests/limits, which silently breaks deploys for any team that hasn’t retrofitted their manifests. Pair every Quota with a LimitRange so missing values get sane defaults injected automatically.
Here’s how to set up a ResourceQuota to keep resource usage in check:
# Caps the total resources used by all pods in this namespaceapiVersion: v1kind: ResourceQuotametadata: name: compute-quota namespace: team-frontendspec: hard: requests.cpu: '4' requests.memory: 8Gi limits.cpu: '8' limits.memory: 16GiPair that quota with a container-level LimitRange in the same namespace to establish default fallback values:
# Automatically injects resource defaults for containers that don't declare themapiVersion: v1kind: LimitRangemetadata: name: container-limits namespace: team-frontendspec: limits: - type: Container default: cpu: 500m memory: 256Mi defaultRequest: cpu: 100m memory: 128MiNetwork and access paths
To block lateral movement, change the network default from “allow-all” to “deny-all”. A default-deny NetworkPolicy that matches every pod shuts down unauthorized traffic immediately. Then you open only the paths you trust. Allow DNS resolution and traffic from your ingress controller explicitly, or your apps cannot resolve internal services and nothing reaches them from outside.
Here’s your baseline default-deny policy to secure a namespace:
# Shuts down all incoming and outgoing network traffic by defaultapiVersion: networking.k8s.io/v1kind: NetworkPolicymetadata: name: default-deny-all namespace: team-frontendspec: podSelector: {} # An empty selector matches every pod in the namespace policyTypes: - Ingress - EgressCareful here
Once a default-deny Egress policy is active, pods can no longer reach CoreDNS, and every service lookup starts failing in confusing ways. Always pair the deny with an allow-DNS policy in the same change.
Once everything is blocked, add a policy to allow DNS resolution so your pods can find other services:
# Selectively allows outbound DNS queries to CoreDNSapiVersion: networking.k8s.io/v1kind: NetworkPolicymetadata: name: allow-dns namespace: team-frontendspec: podSelector: {} policyTypes: - Egress egress: - to: - namespaceSelector: {} # Matches any namespace hosting the DNS pods ports: - protocol: UDP port: 53For control plane access, keep roles scoped to namespaces with Role and RoleBinding rather than cluster-wide bindings. A team that can only see its own namespace cannot delete someone else’s Deployment by pasting the wrong context.
Tools and platforms
You can automate this whole setup with Terraform and declare namespaces, quotas, and network policies alongside the rest of your infrastructure. If you need Layer 7 filtering or traffic you can actually watch flowing, a CNI like Cilium gives you both. For high-security workloads, gVisor or Kata Containers put a user-space kernel between the container and the host, so a breakout lands in the sandbox.
Quick implementation steps
Step-by-step hardening
Here’s the checklist for hardening a shared environment:
- Deploy a default-deny NetworkPolicy in all non-system namespaces to shut down unauthorized lateral traffic.
- Set up a global LimitRange to automatically assign safe CPU and memory fallback defaults.
- Enforce a ResourceQuota to cap total namespace consumption and keep your etcd storage from getting exhausted.
- Keep developer access strictly within their designated namespace boundaries using group-based RBAC bindings.
- Use minimal base images like Alpine or container sandboxes to shrink your host-level attack surface.
Namespaces in Terraform
Manage namespaces as code so every one of them ends up with the same controls. Here’s a Terraform block that provisions a namespace and attaches its resource quota in the same apply:
# Provisions a team namespace and immediately pairs it with a resource quota
resource "kubernetes_namespace" "team_backend" { metadata { name = "team-backend" labels = { team = "backend" environment = "production" managed-by = "terraform" } }}
resource "kubernetes_resource_quota" "backend_quota" { metadata { name = "backend-quota" namespace = kubernetes_namespace.team_backend.metadata.name } spec { hard = { "requests.cpu" = "4" "requests.memory" = "8Gi" "limits.cpu" = "8" "limits.memory" = "16Gi" } }}Automating default policies
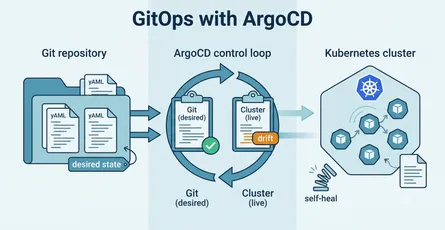
Use Kustomize or a GitOps pipeline to roll out the default-deny policy and the quota with every new namespace. Otherwise the namespace somebody created by hand six months ago is still sitting there wide open.
Benefits of layered isolation
Predictable performance and security
Getting namespace isolation right pays off in two places. The bill goes down, because workloads consolidate onto fewer nodes and you no longer need a control plane per team. And your ops team monitors one cluster instead of thirty, which is the difference between an upgrade being a Tuesday and an upgrade being a quarter. The third benefit shows up later: once the defaults are codified, developers can create their own isolated staging namespace without waiting on an approval, because the guardrails come with it.
A smaller blast radius
A layered setup shrinks your blast radius if things go sideways. Even if a container gets compromised, the attacker is stuck inside a locked room. They can’t access other tenants’ data, query neighboring services, or starve the rest of the cluster of resources.
What’s your approach?
Community discussion
The trade-off never fully goes away. Every control here makes the cluster safer and makes somebody’s first deploy fail in a way they did not expect. Where have you landed on that?
Share your experience
Do you like managing your namespaces and quotas through Terraform, or do you rely on dynamic operators to do the heavy lifting? Have you ever run into a case where a default-deny network policy accidentally blocked something critical?
References
- Kubernetes multi-tenancy: A 2026 guide to secure shared infrastructure - Northflank
- How to Implement Multi-Tenancy with Namespace Isolation and Resource Quotas - OneUptime
- Multi-tenancy - Kubernetes docs
- Best practices for enterprise multi-tenancy - Google Kubernetes Engine
- Kubernetes Multi-Tenancy: Namespace Isolation, RBAC, and Network Policies Explained - DEV Community
- How to Set Up Kubernetes Namespace Resource Quotas and LimitRanges - OneUptime
- How to Implement Default Deny Network Policies in Kubernetes - OneUptime
- Resource Quotas - Kubernetes docs
- Limit Ranges - Kubernetes docs
- Enable a default deny policy for Kubernetes pods - Calico Documentation
- kubernetes-network-policy-recipes: deny-all-non-whitelisted-traffic - GitHub
- How to Create Kubernetes Namespaces with Terraform - OneUptime
- Orchestrating Kubernetes with Terraform: A Step-by-Step Guide - Control Plane